
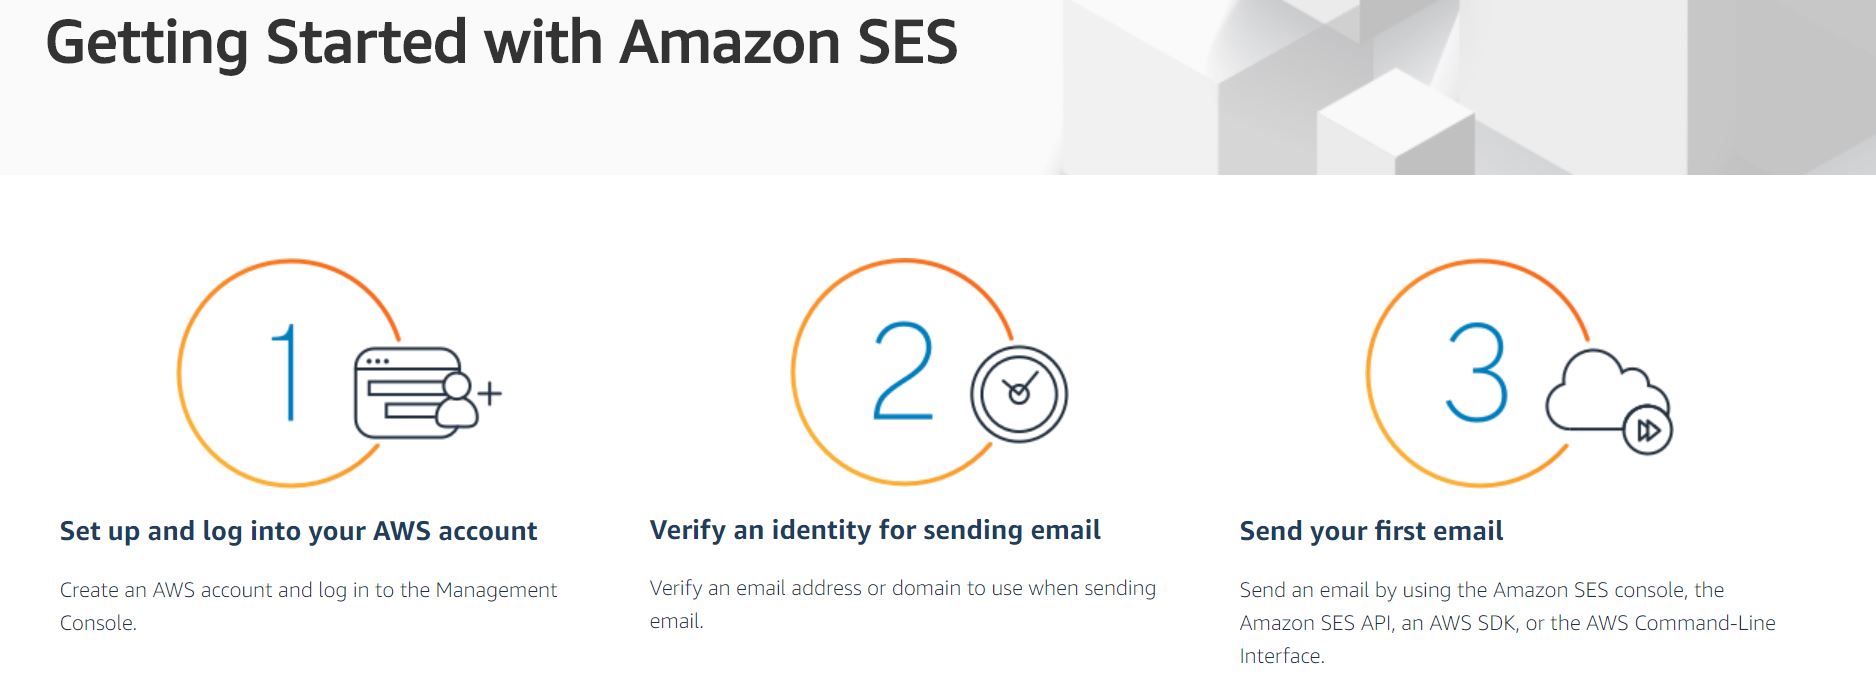
Part 1: How to send emails with Gmail using Amazon Simple Email Service
How the email settings were like with Bluehost
When I moved my blog over from Bluehost to Amazon Lightsail, my biggest challenge was setting an email account which was linked to Amazon. My previous arrangement with Bluehost was straightforward. All I was required to do was to set up my email account details on Bluehost, and enter the SMTP server, username and password. To receive email, I keyed in the stipulated username, password and POP server via Gmail. However, such an approach differs for Amazon Simple Email Service, as it does not rely on a POP server.
The steps to send emails via Gmail were straightforward. Receiving emails was much more challenging, Through my research, I learnt that I had to create a Amazon S3 bucket (to store emails), and a Amazon Lambda function (for emails to be forwarded to my Gmail account. After several futile tries over two weeks, I decided to enlist the help of AWS Support and was eventually successful – phew! More to come in a next post. For now, here is Part 1: How to send emails with Gmail using Amazon Simple Email Service:
Part 1: How to send emails with Gmail using Amazon Simple Email Service
1. Verify the Domain you wish to send and receive email from
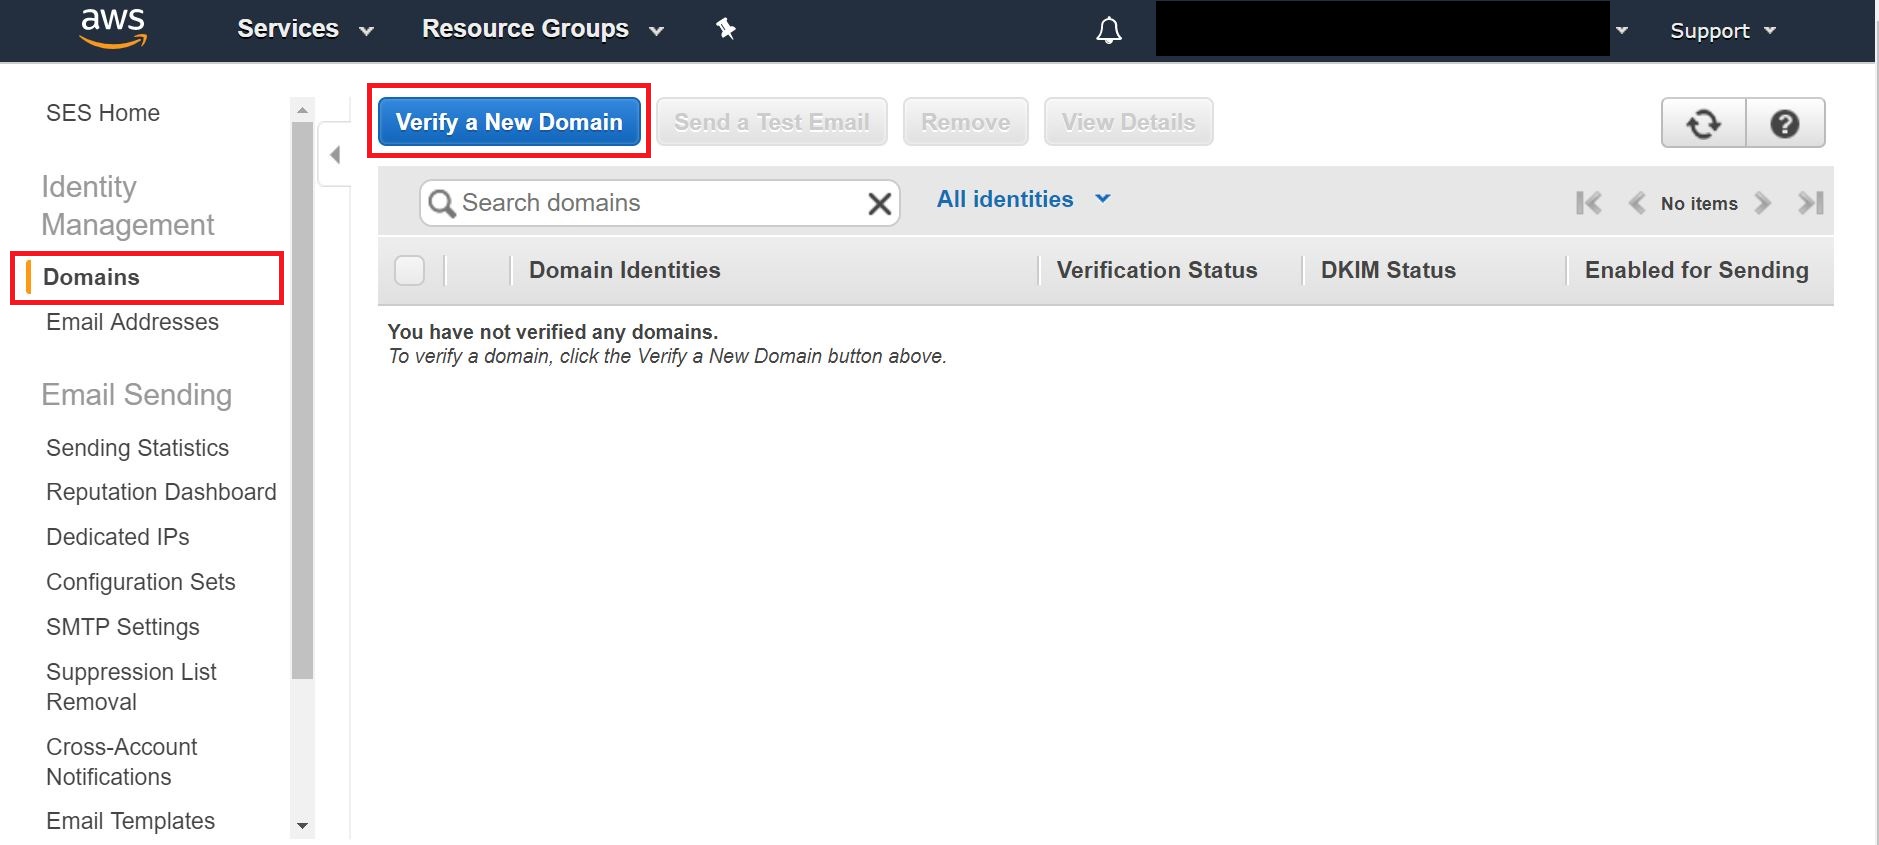
Go to Amazon Simple Email Service and sign in with your AWS account (it’s the same one you used for Amazon Lightsail). In my case, as I wished to send and receive emails using phebe@thetravellingsquid.com, the domain I verified was “thetravellingsquid.com”. As indicated in the screenshot above, click on the ‘Domains’ tab on the SES panel on the left hand side.
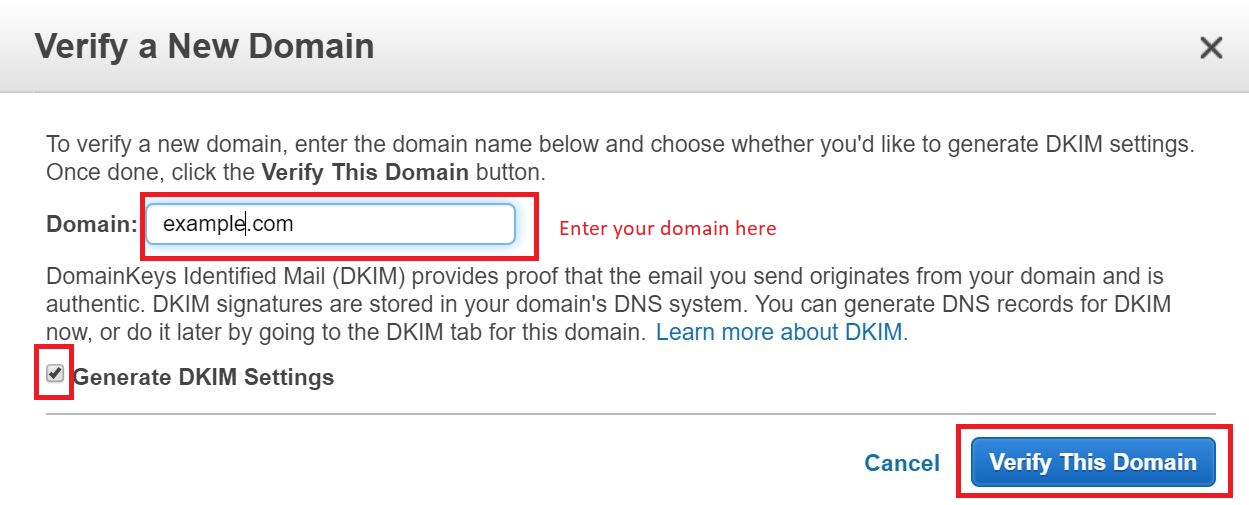
Tick the box which says generate DKIM settings, and click the blue button which says, “Verify this domain”. The window below will pop out.
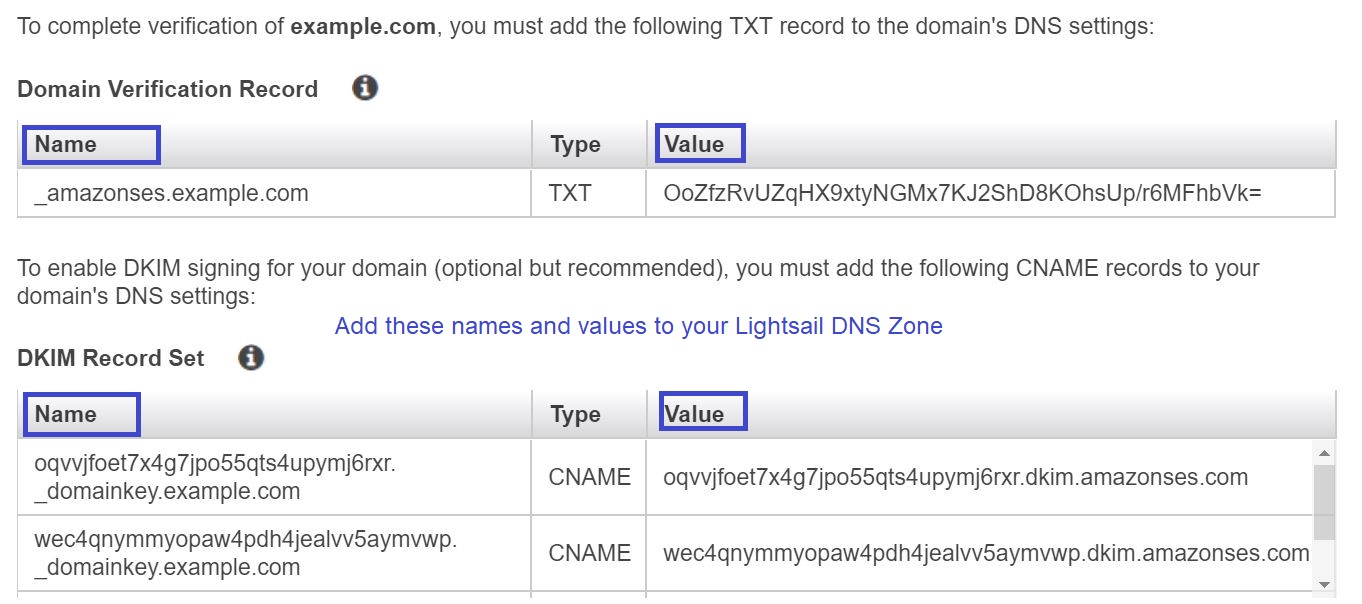
A list of CNAME, TXT and MX records will be generated. Add them to the DNS zone under the ‘Networking’ tab of your Lightsail account. When your domain has been successfully verified, you should see the following message:

2. Verify the email address which you wish to view/ send emails from
Verify the email address you would like to view emails or send emails from. For example, I use my Gmail account most often, and do check my emails from phebe@thetravellingsquid.com using that Gmail account. Therefore, under the option to verify email addresses under the SES panel (it’s right under the Domain tab), I keyed in my Gmail account.
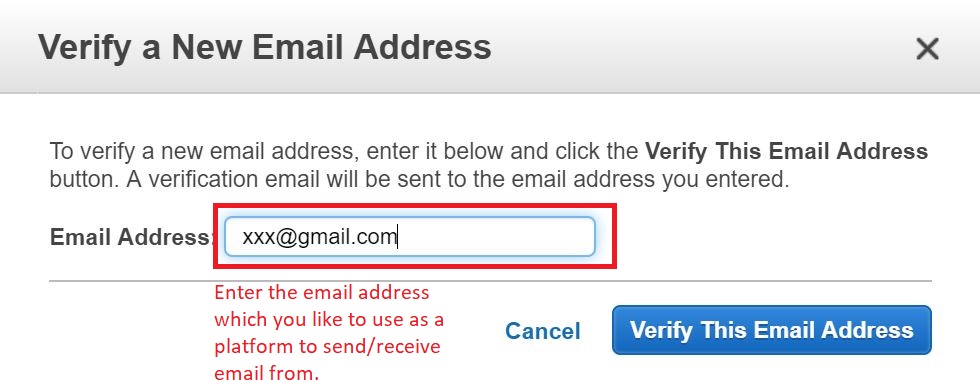
After you click the option ‘Verify this email address’, Amazon will send an email to your Gmail account. Click on the URL provided by Amazon to verify that you can use this email address. Similar to domain verification, you should see the status as verified if successful.
3. Next, create SMTP settings to connect with your Gmail account
Under Email Sending of the SES left hand side panel (screenshot below), click on SMTP settings. You are creating a ‘user’ for this email service.
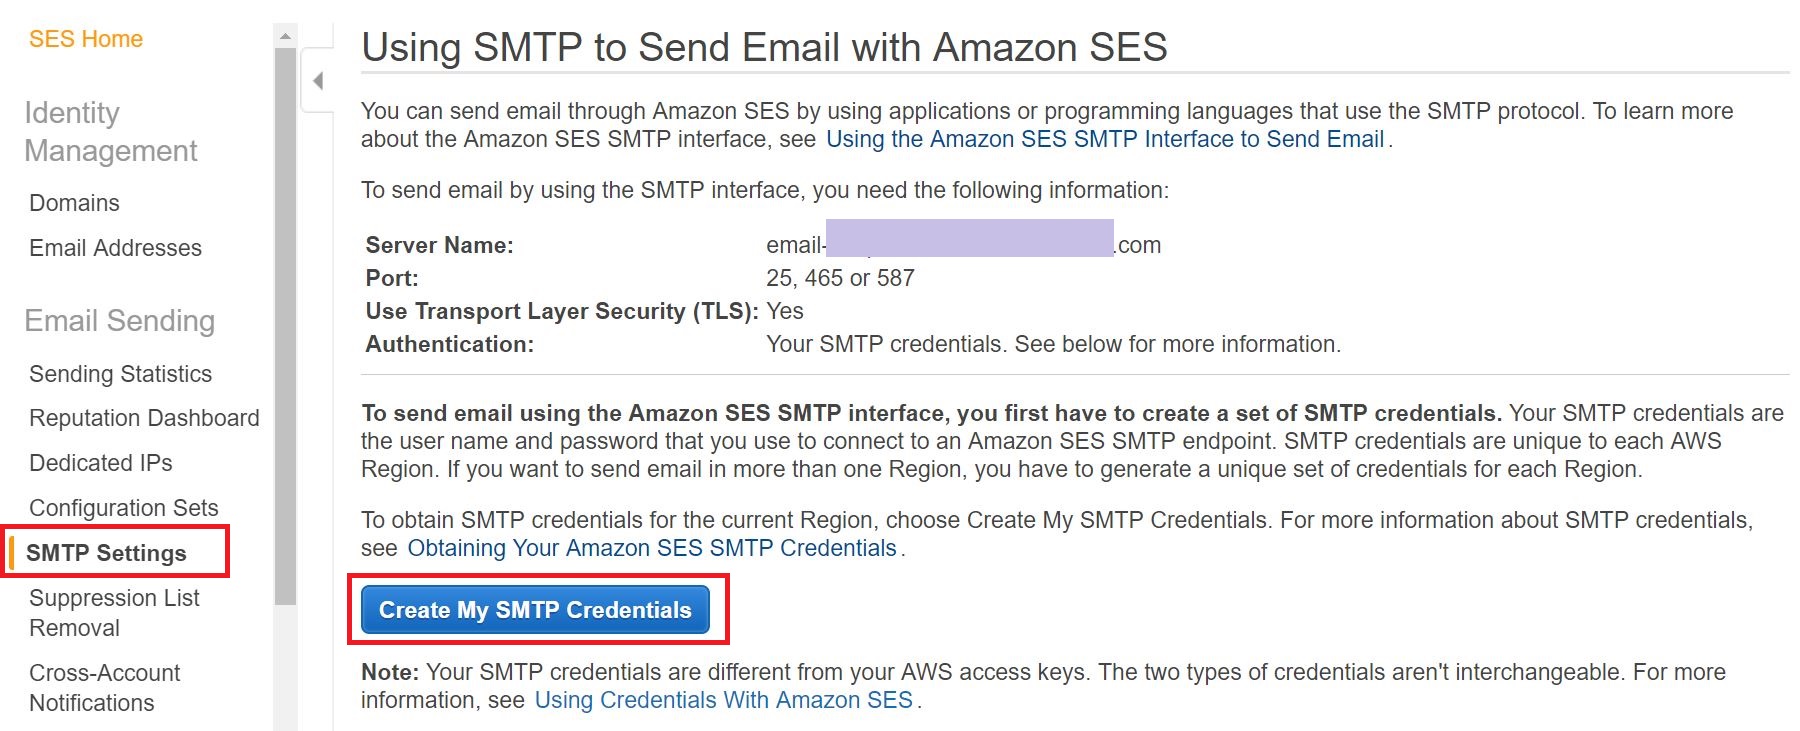
After this, click ‘Create’ and then ‘Show SMTP security credentials’. You will also see a SMTP username and password. Take note of them as you will need to key them into your Gmail settings later.
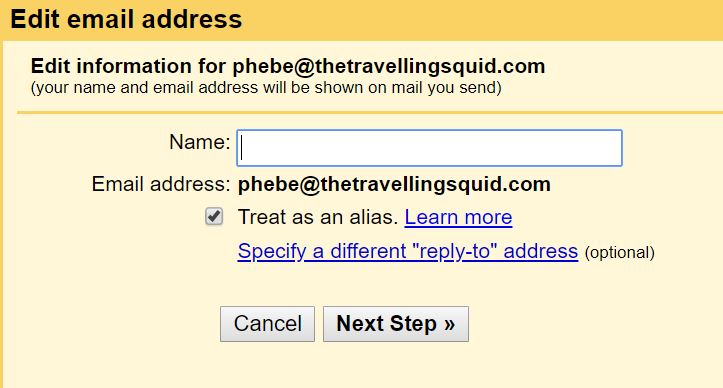
4. Copy your SMTP settings to Gmail
In a separate tab of your browser, got to the Gmail settings option. It’s on the top right hand corner of your Gmail interface, depicted by a ‘gear’ icon. Under the settings section of Gmail, click on the ‘Accounts and Imports’ tab. Under the ‘Send mail as’ category, click ‘Add another email address’. Enter your name and the email address which you wish to send emails from. In my case, it’s phebe@thetravellingsquid.com.
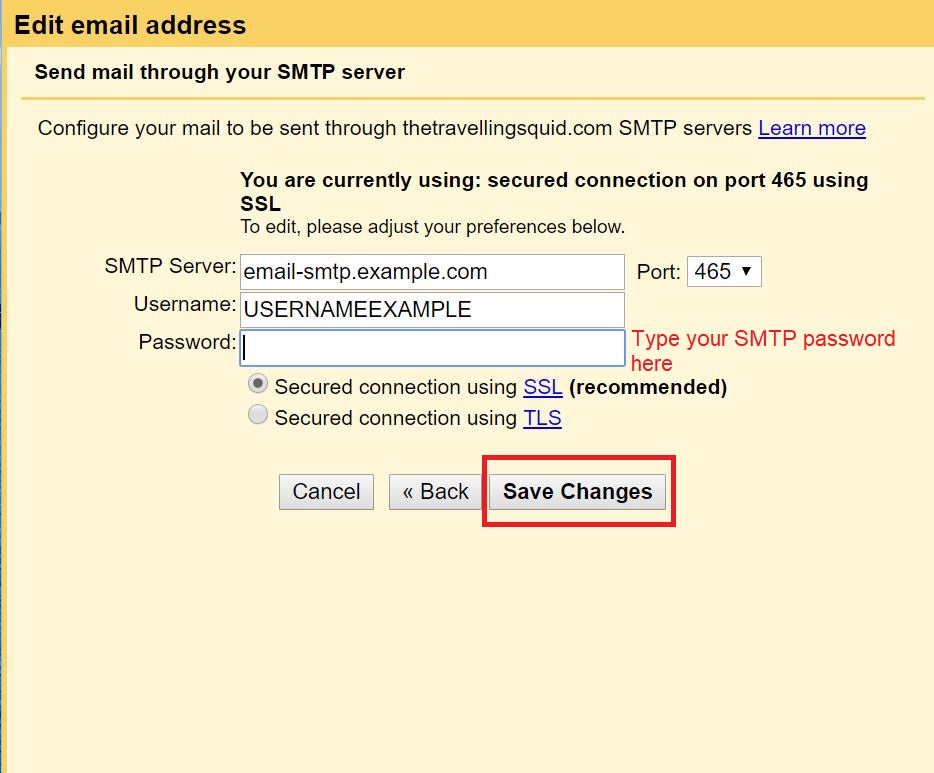
You should be able to send emails with your domain specific email address. That said, Amazon SES has restrictions in place for new SES accounts, so you will need to proceed with Step 5 before you can start emailing your clients and customers.
5. Move your Amazon SES account out of the sandbox
According to Amazon, new Amazon SES accounts are placed in a sandbox, to prevent fraud and abuse. While in the sandbox, all features can be used, however, you can only send email to verified email addresses and domains. To circumvent this, you will need to login to your AWS management console page, then click on the Support Center tab. Click on ‘Create case’, and then ‘Service limit increase’ followed by ‘SES limits’. Key in the relevant information – it’s quite intuitive but if you need a guide, refer to the same article by Amazon. After I raised the case, the request was granted in about 24 hours and I received an email notification. It’s pretty straightforward.
The Travelling Squid’s Take – It’s easy to send emails with Gmail using Amazon Simple Email Service
Do a test to see if you can send emails to other email addresses using your domain-specific email address. I’d encourage that you set up the SES settings to receive email with your Gmail account concurrently too while at Step 4. (The settings are more challenging and might take a while.) That way you will not miss out on any emails as it is hard to retrieve emails in between then. More on this to come in the next post – Part 2: Receive emails on Gmail with Amazon Simple Email Service. It’s quite a challenge, but very worth it when you succeed.
[Note: We have been alerted that our email address phebe@thetravellingsquid.com has been spoofed, i.e., a person or program has been masquerading us by sending spam emails tagged to our email address. We wish to clarify that the emails have not been sent by us. Please ignore suspicious emails especially those on erectile dysfunction, bitcoins, etc and DO NOT click on any of the links in the email or open any attachments. Delete them immediately. Thank you.]
Leave a Reply