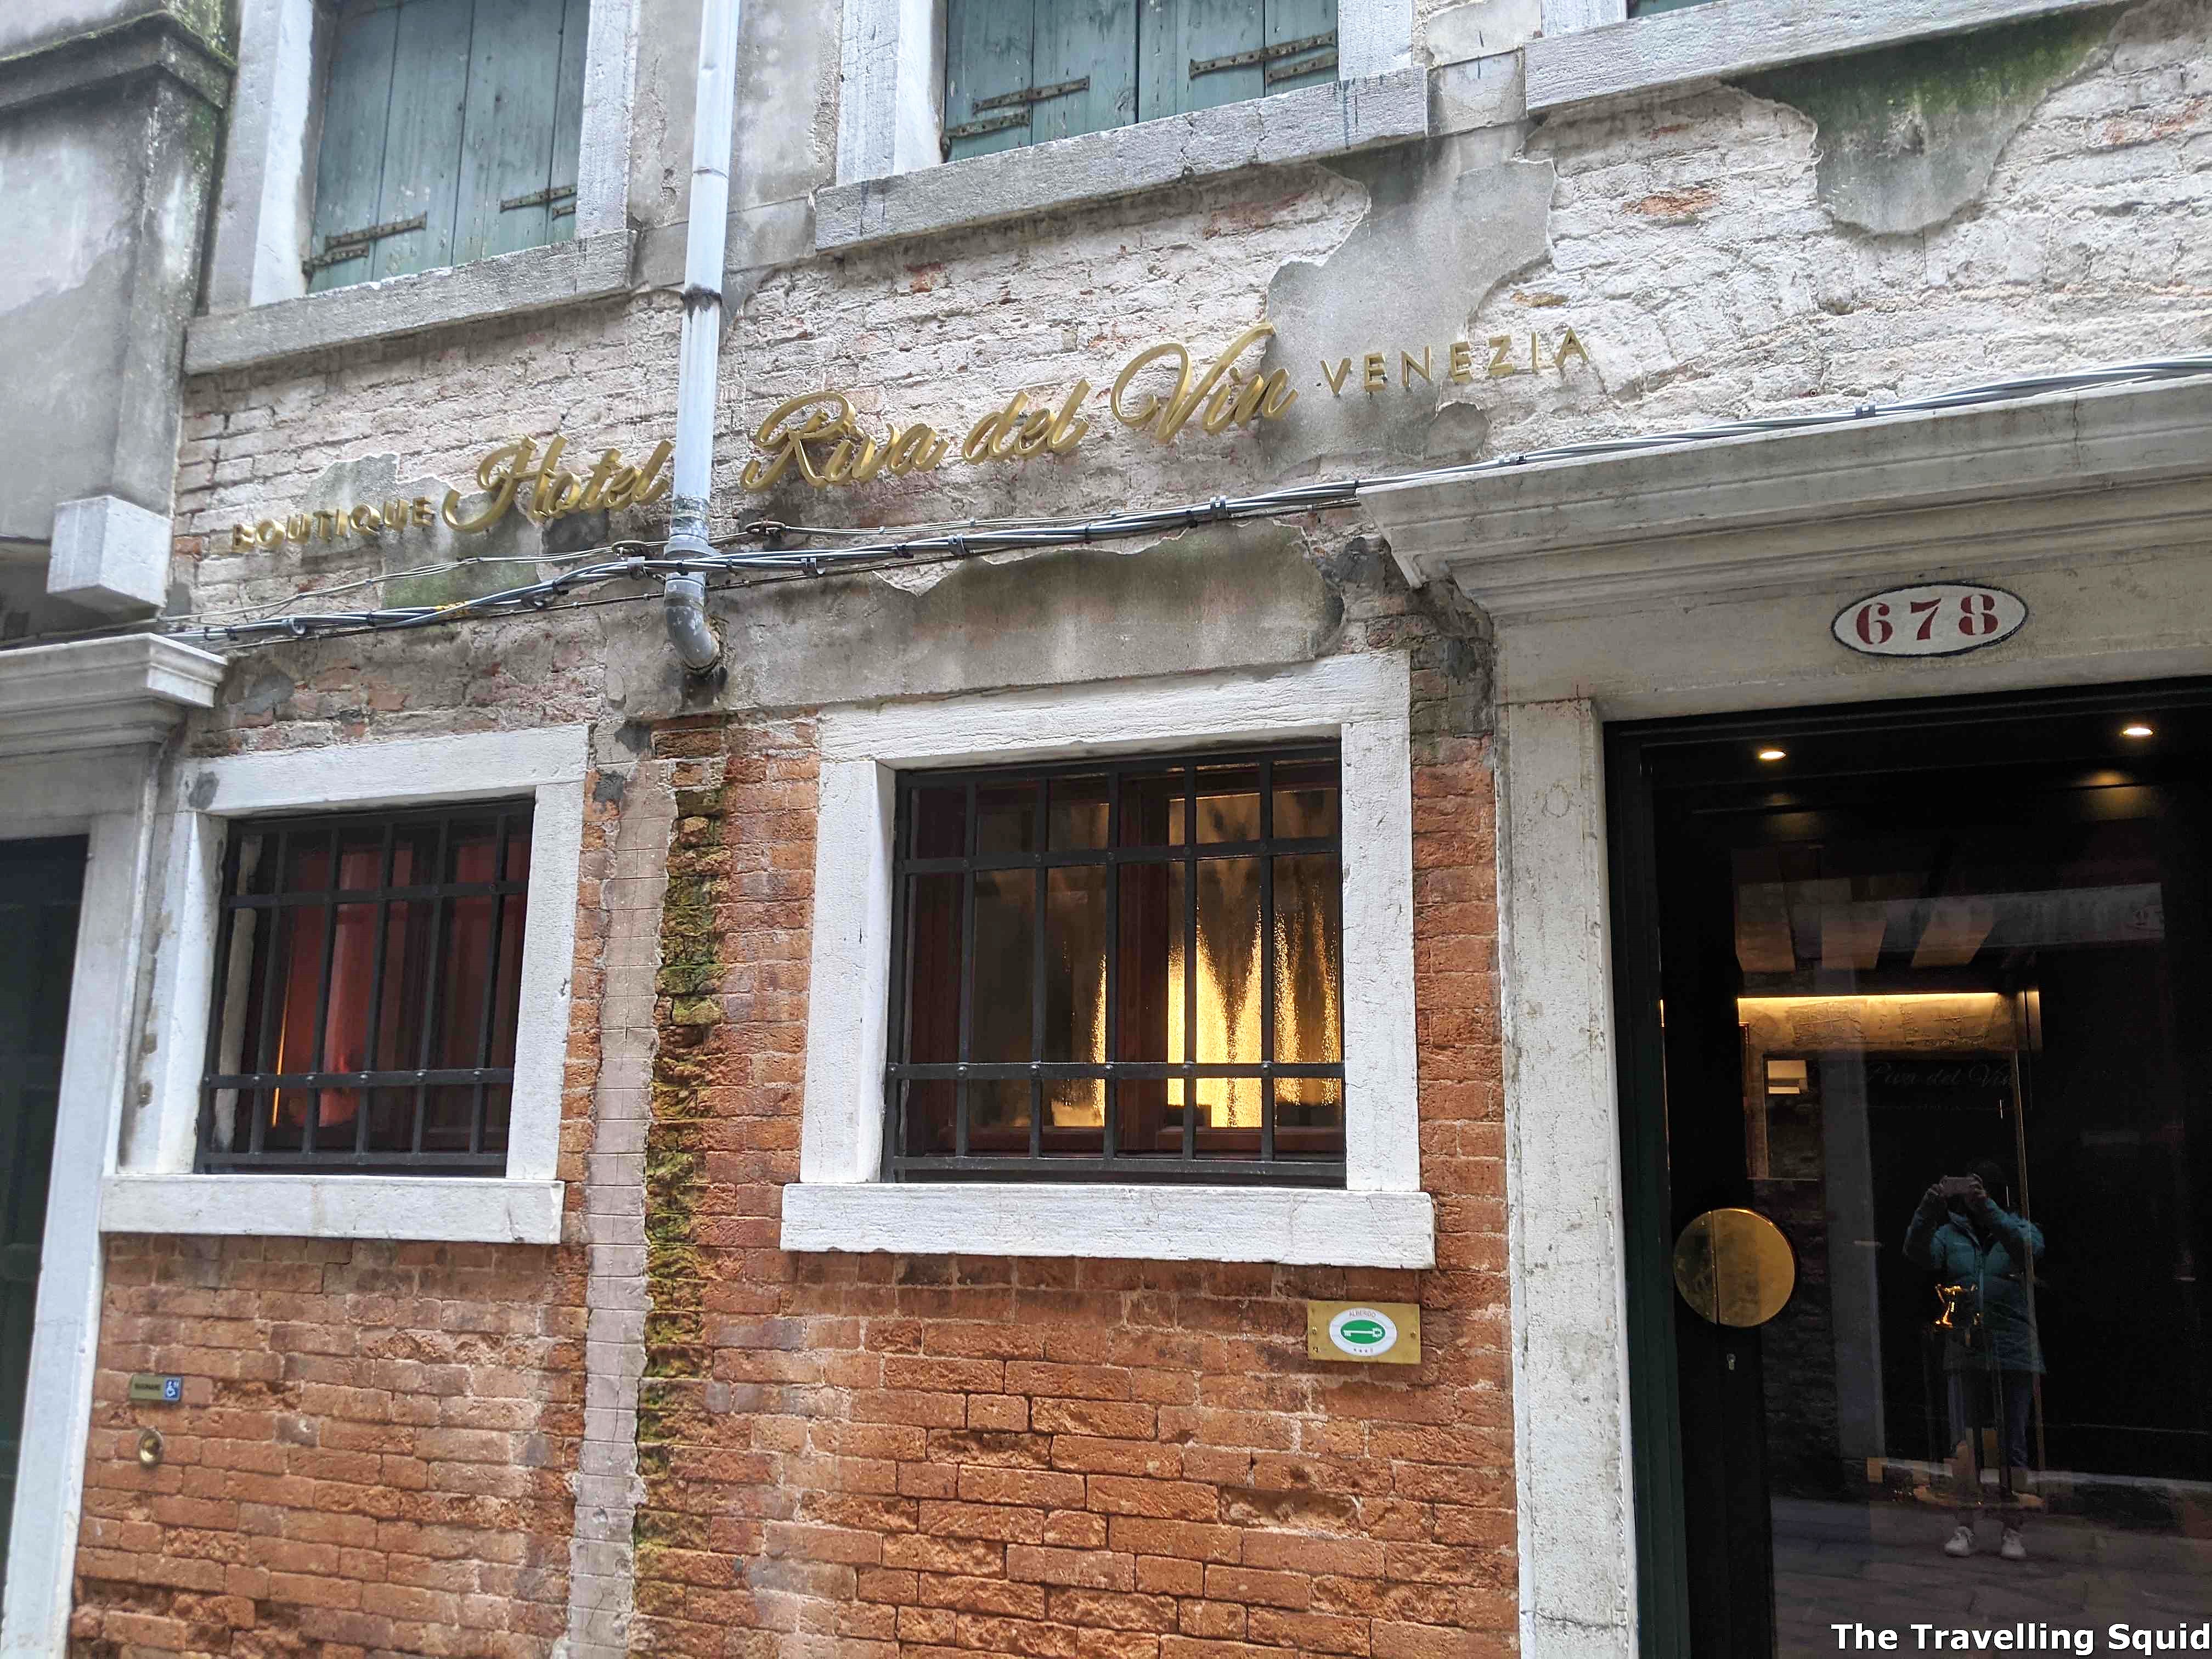
If you’re looking for a place to stay in Venice, location is most important. This is because dragging your suitcases through the cobblestone streets and up bridges can be a rather tiring exercise. We stayed at Boutique Hotel Riva Del Vin for two nights and found it to be in a very convenient location, right across the Rialto river taxi station. It is also located away from the hustle and bustle of the main Rialto bridge in a little cobblestone alleyway, which made it a convenient yet quiet place to stay at. Here is more on our stay at Hotel Riva Del Vin in Venice.
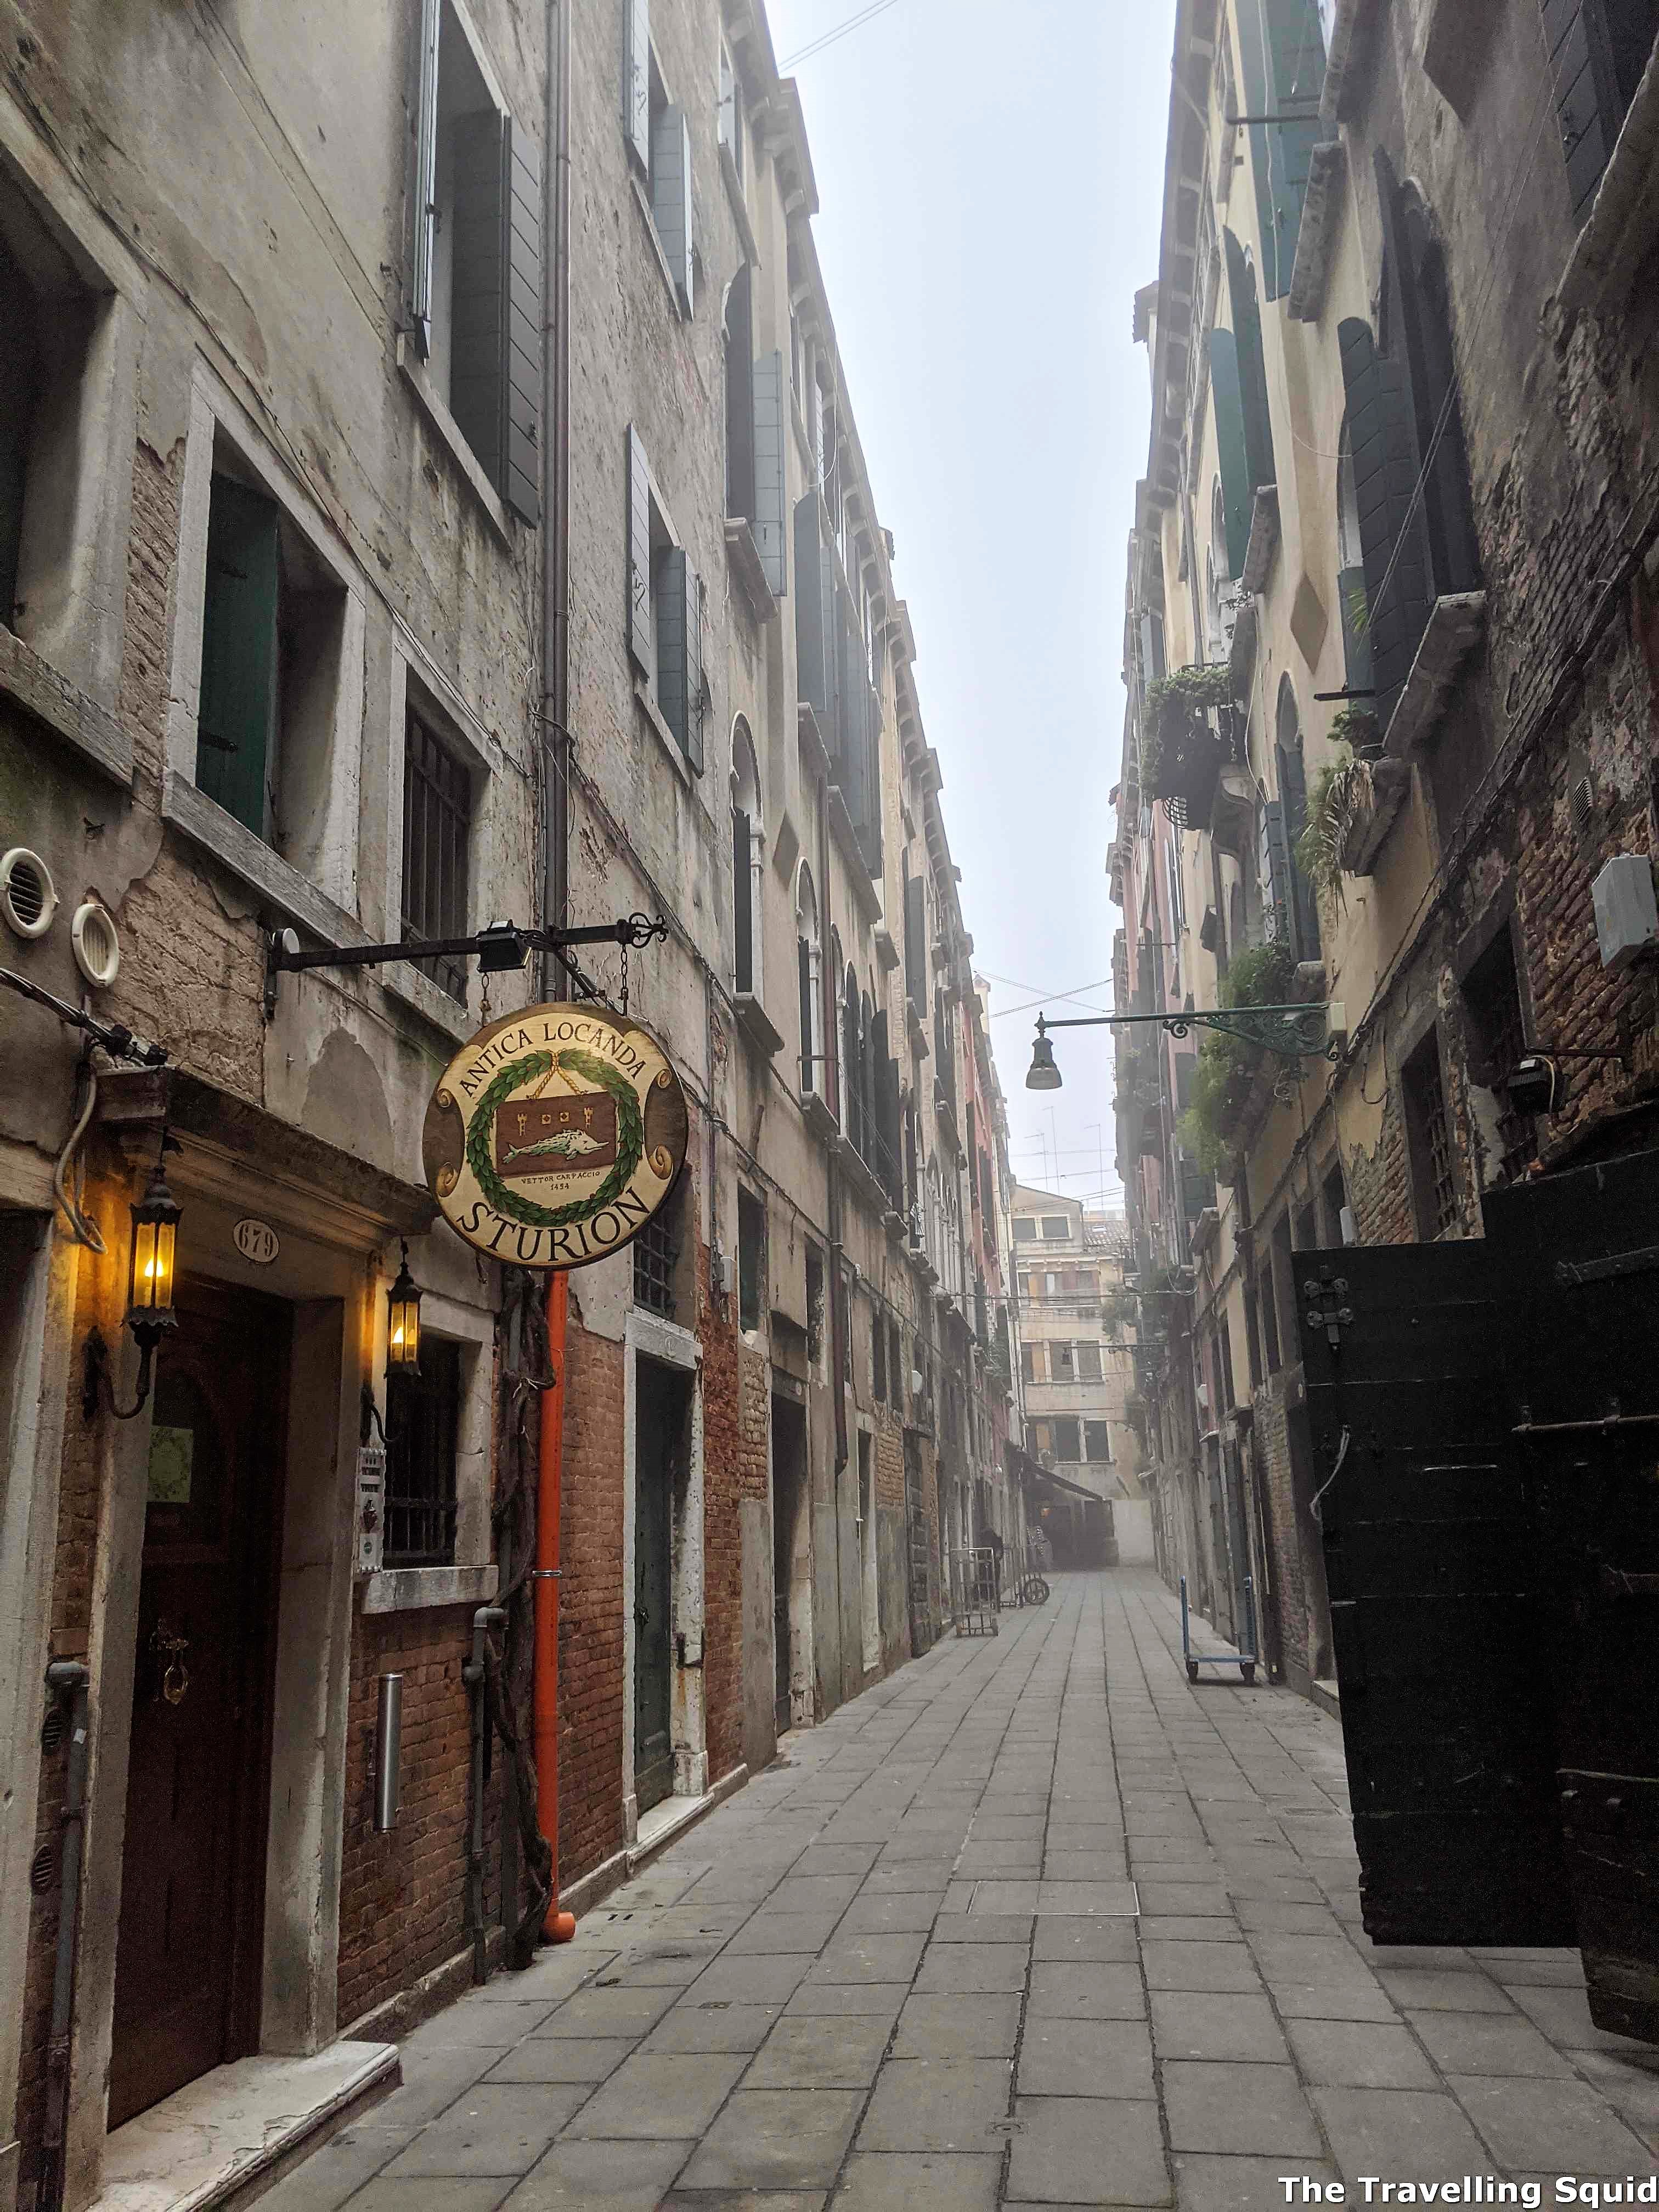
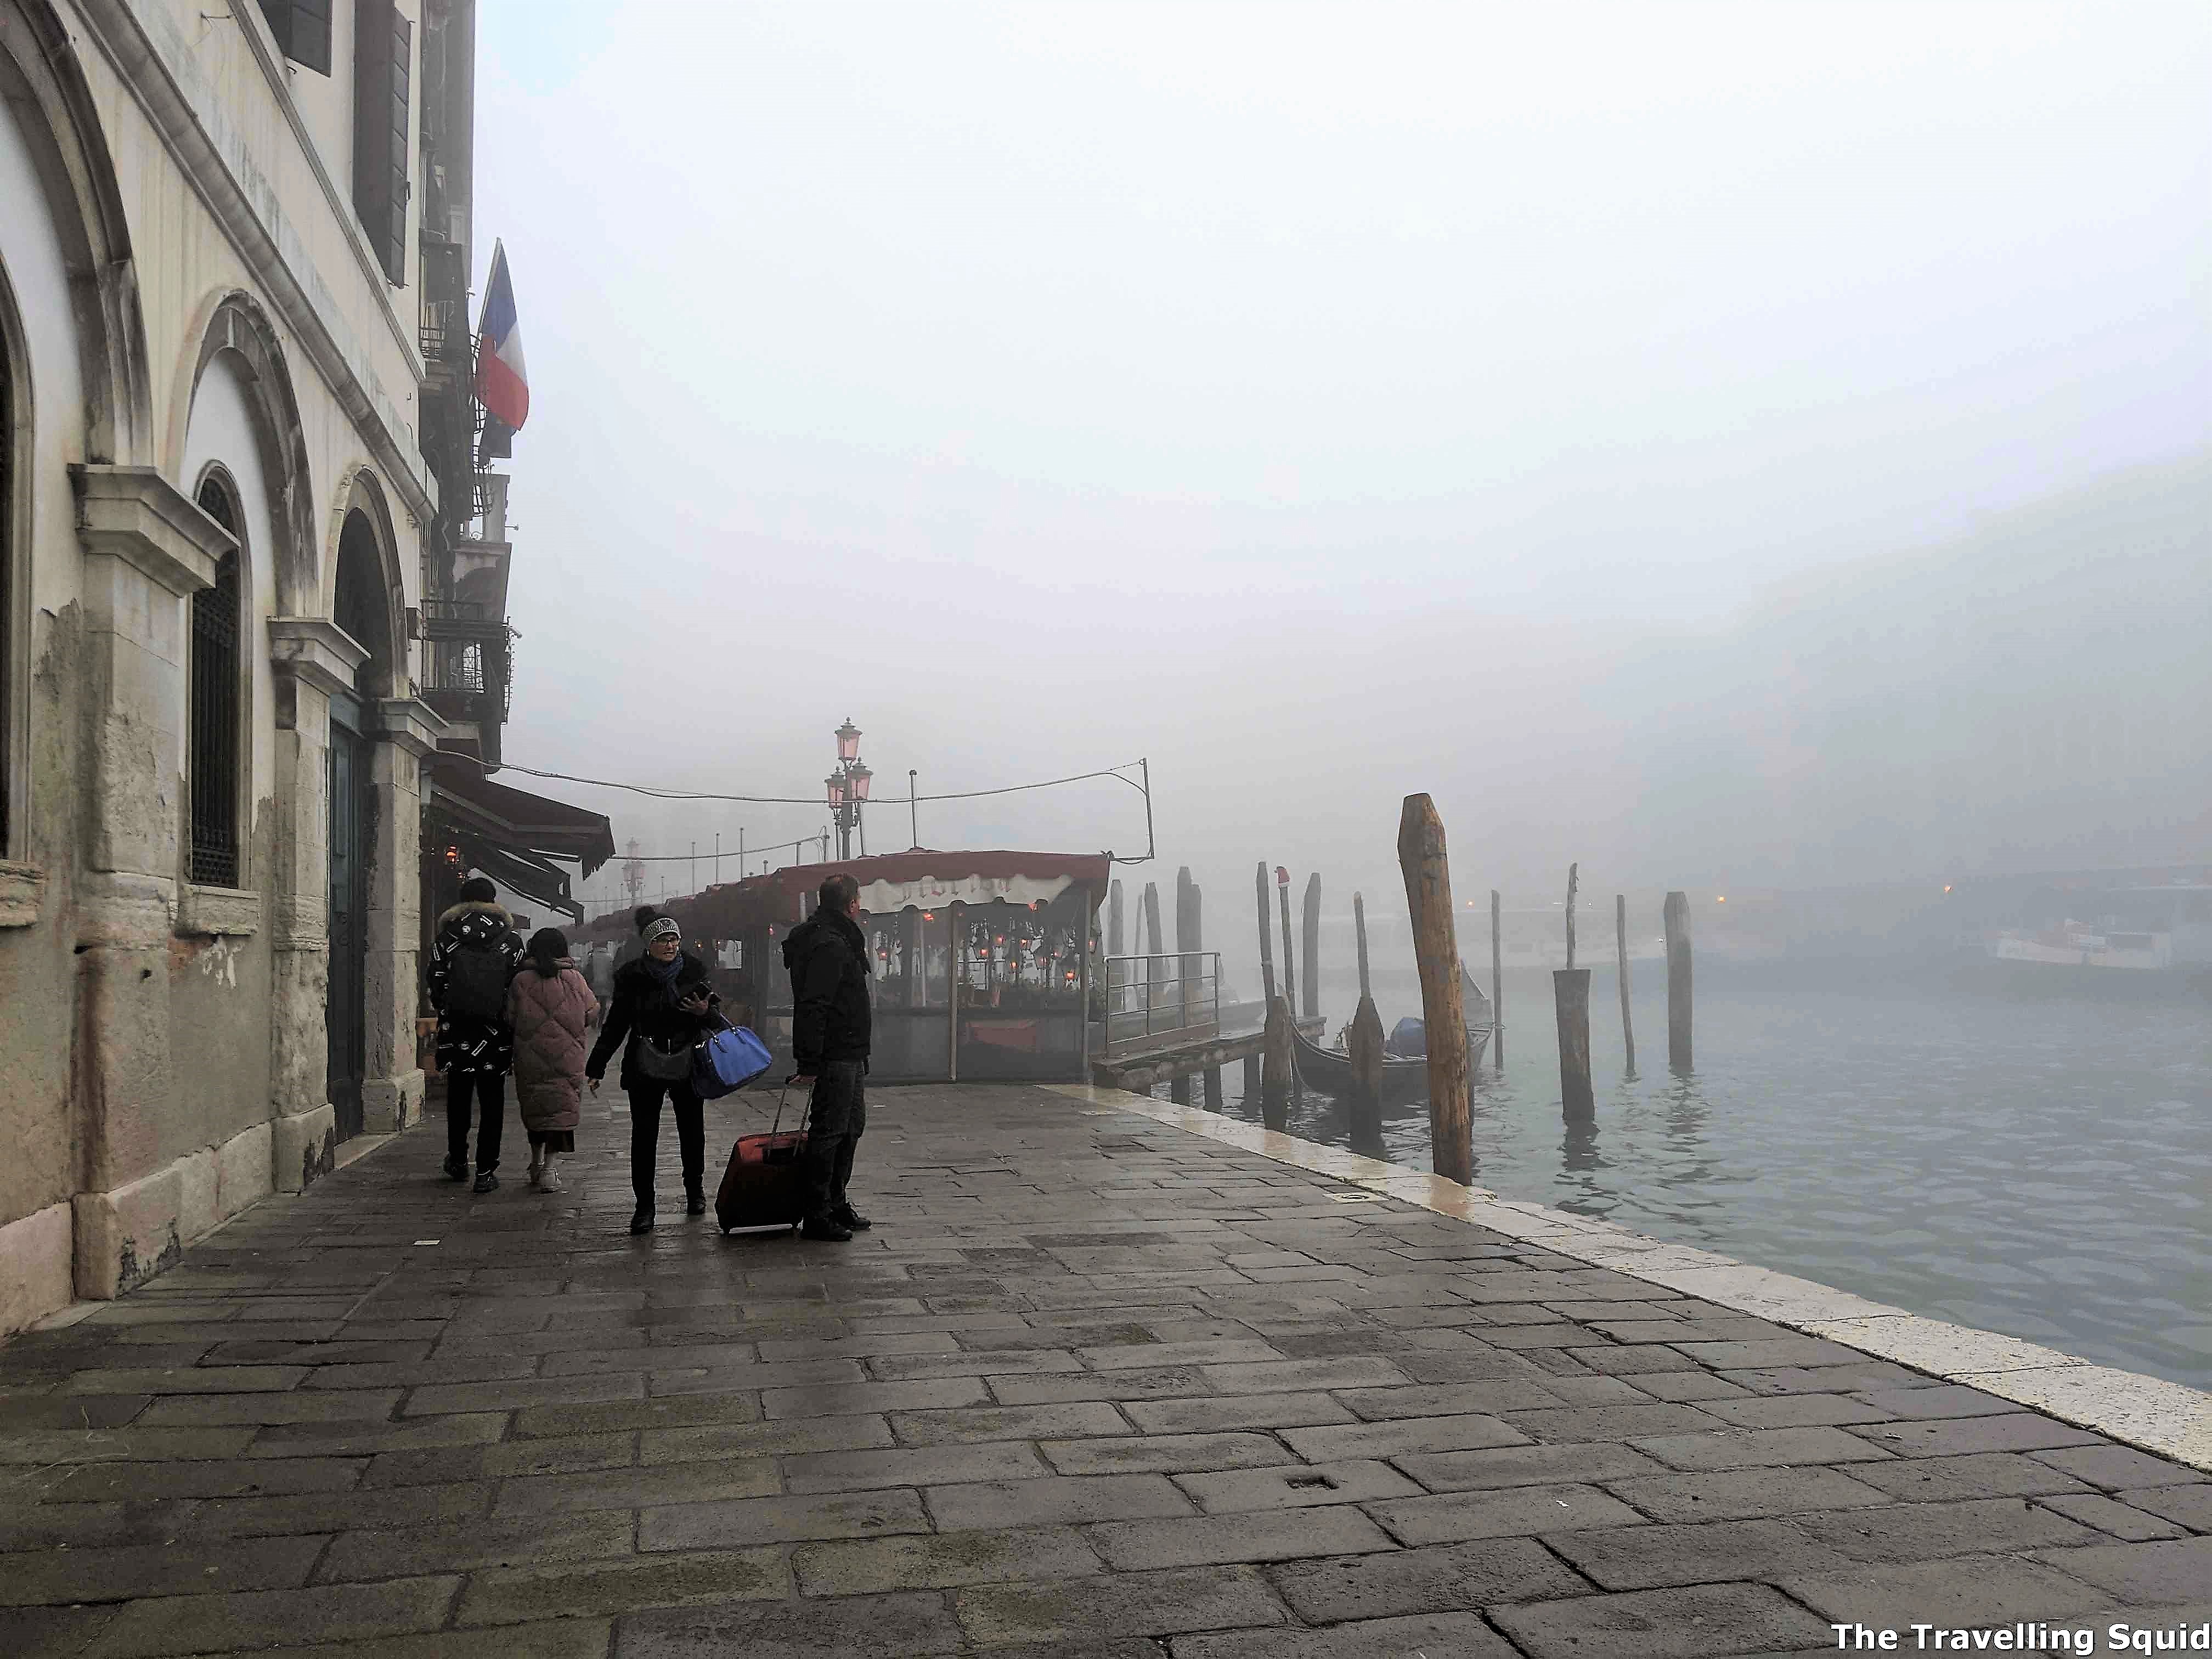
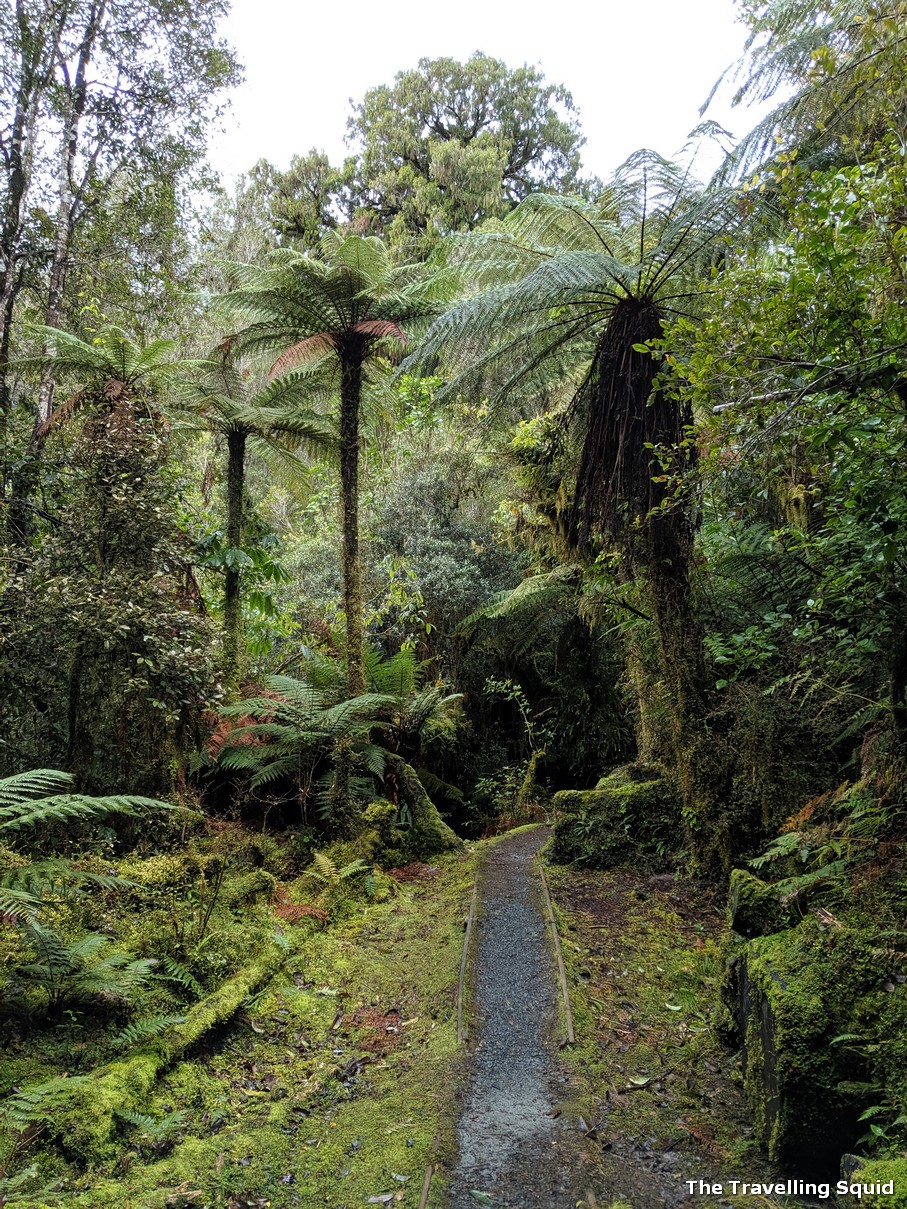
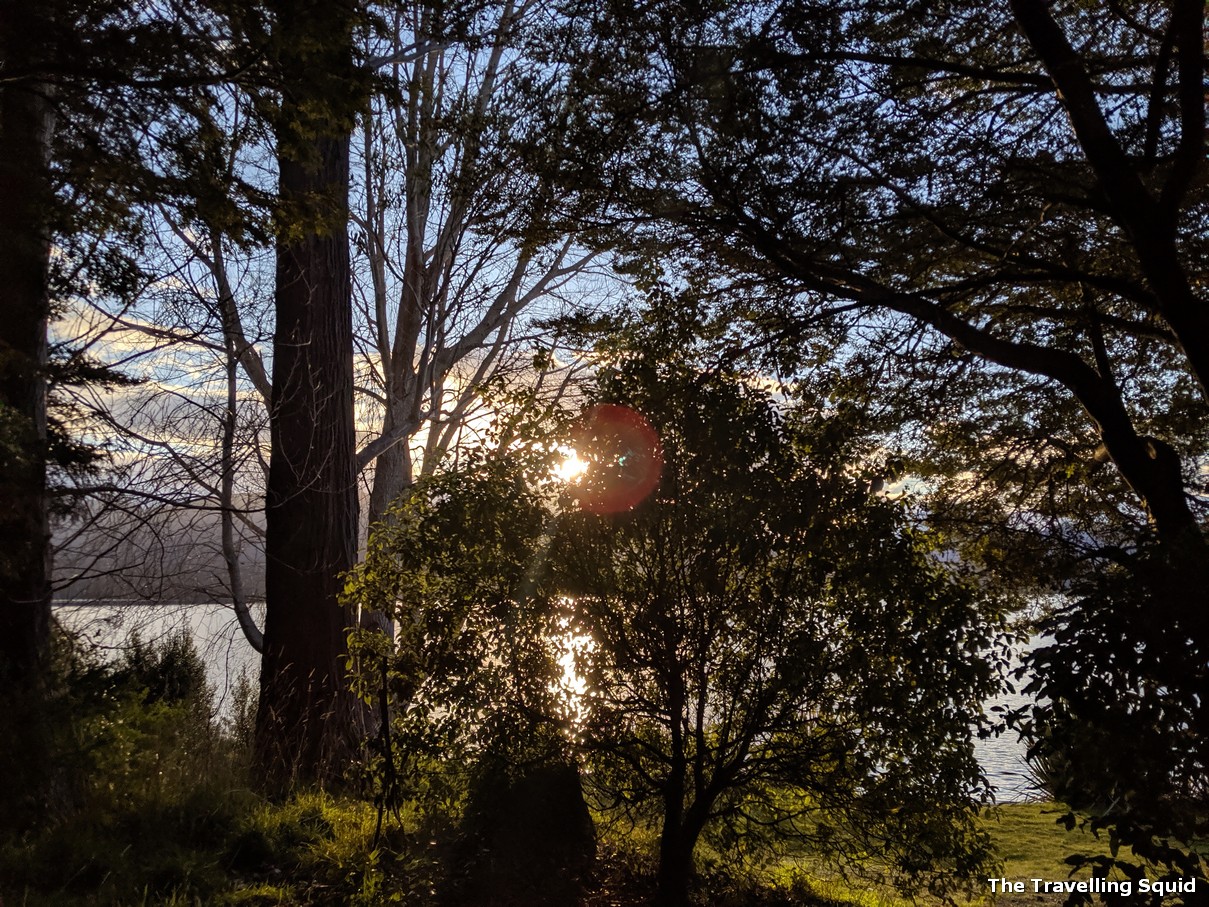
The cobblestone alley which led to Hotel Riva Del Vin. It was pretty quiet.. but once you come out… (see picture below)..
Our stay at Hotel Riva Del Vin in Venice
We arrived in Venice after taking an Italo train from Milano Centrale to the Venezia train station. We arrived at about close to 7pm in the evening, and took a river taxi which was right outside the train station to the Rialto ferry station. After crossing a large bridge, Hotel Riva Del Vin was a 5 minute walk.
It’s relatively quiet in the morning but come evening, the restaurants will be lighted up.
Location
The location is great because you don’t have to traverse many flights of steps and bridges to arrive at the hotel – just one main one. The island where the hotel is located on also has relatively more local restaurants and bars (not the ones facing the river). We visited quite a number which were pretty good. More to come in an upcoming post.
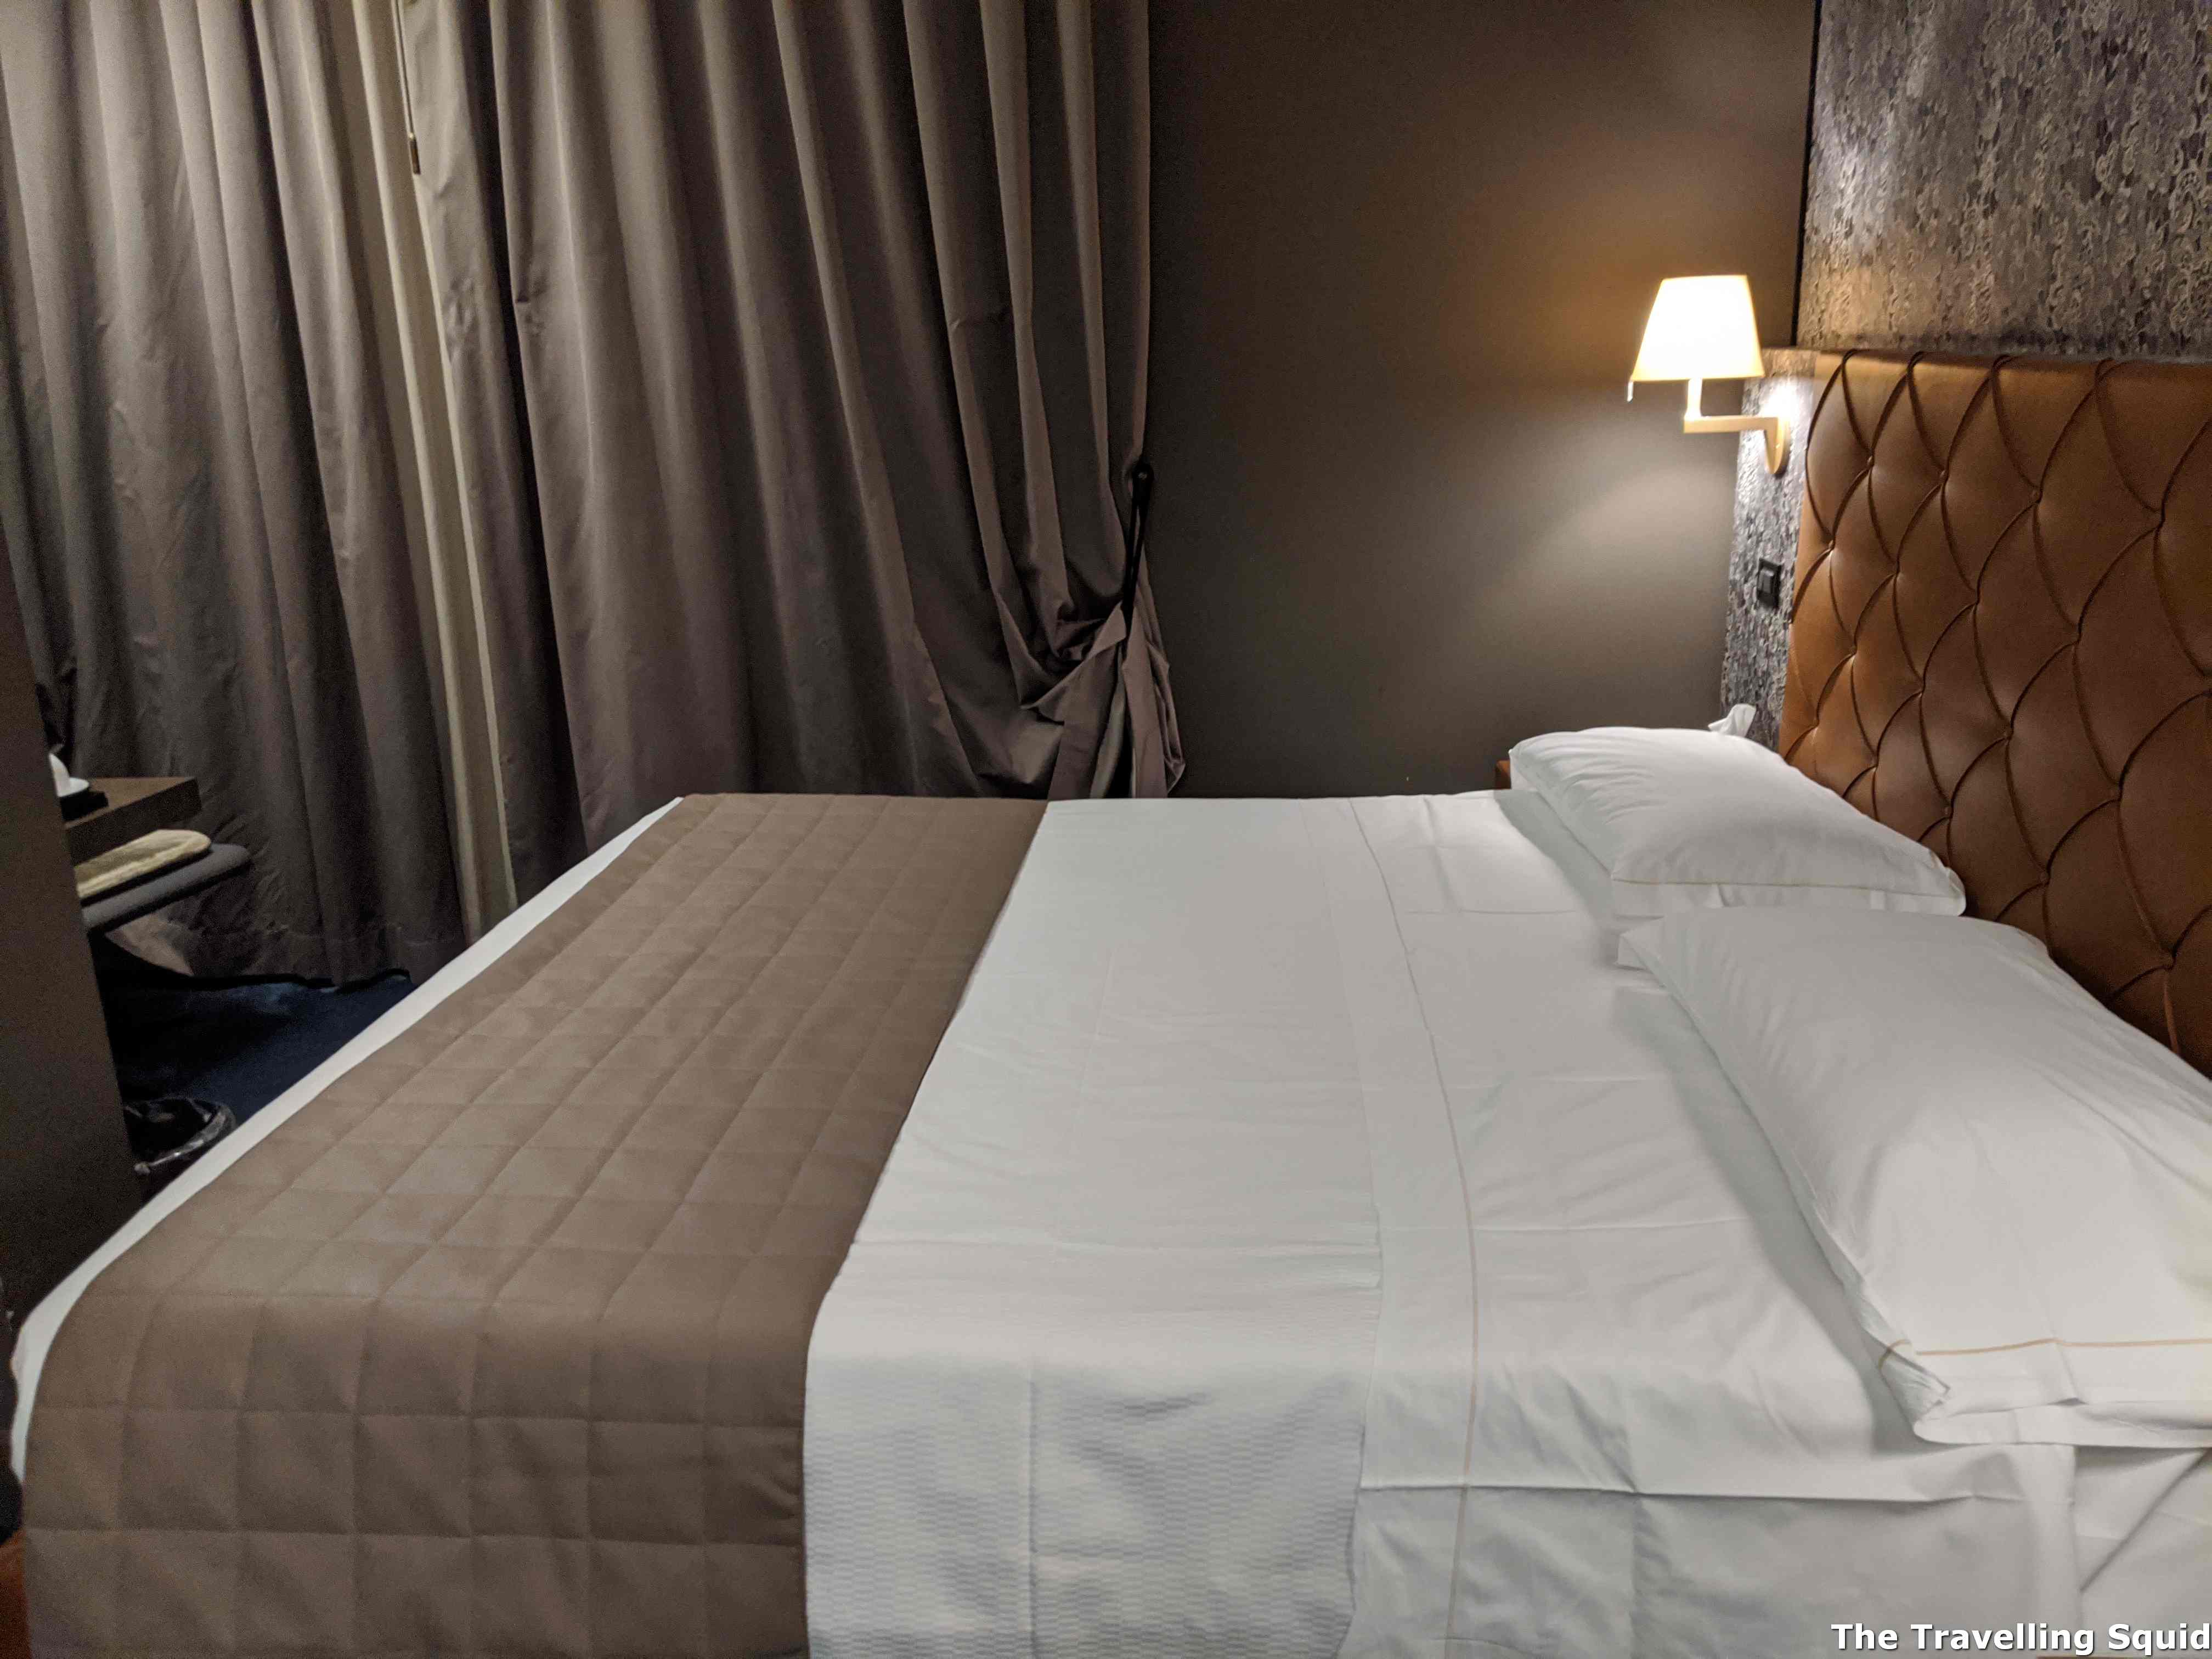
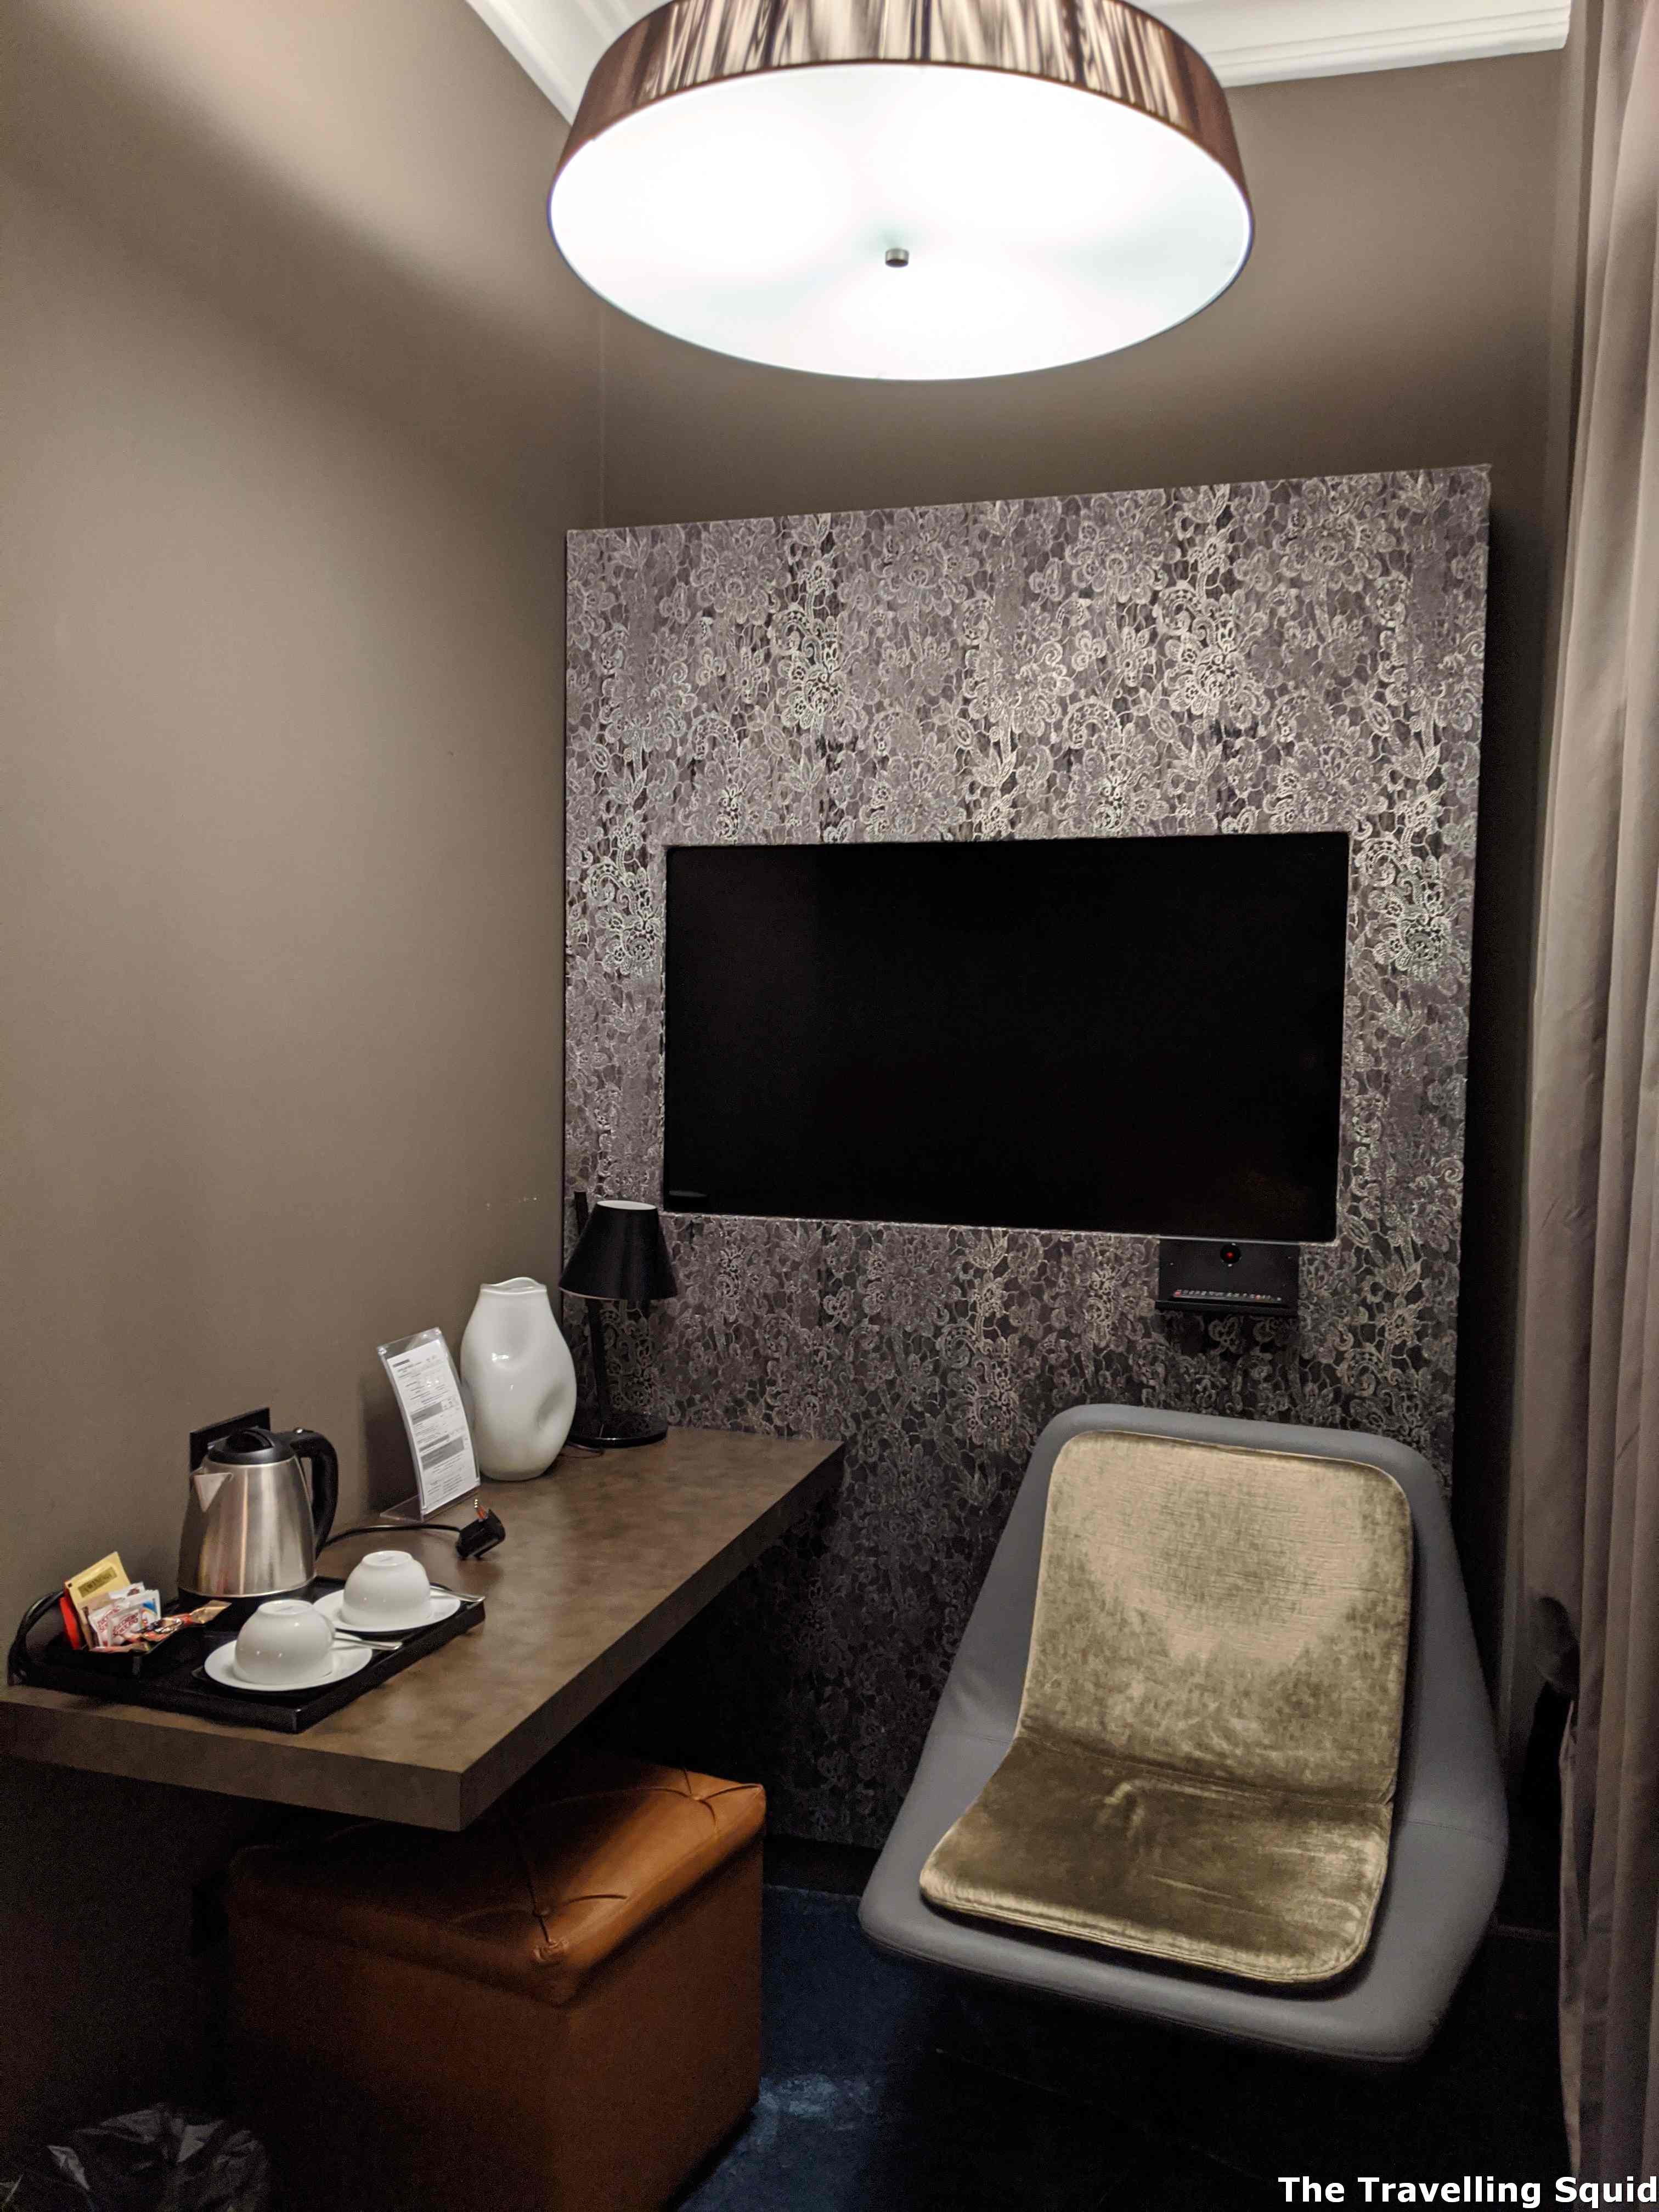
The Room
The room was pretty comfortable.
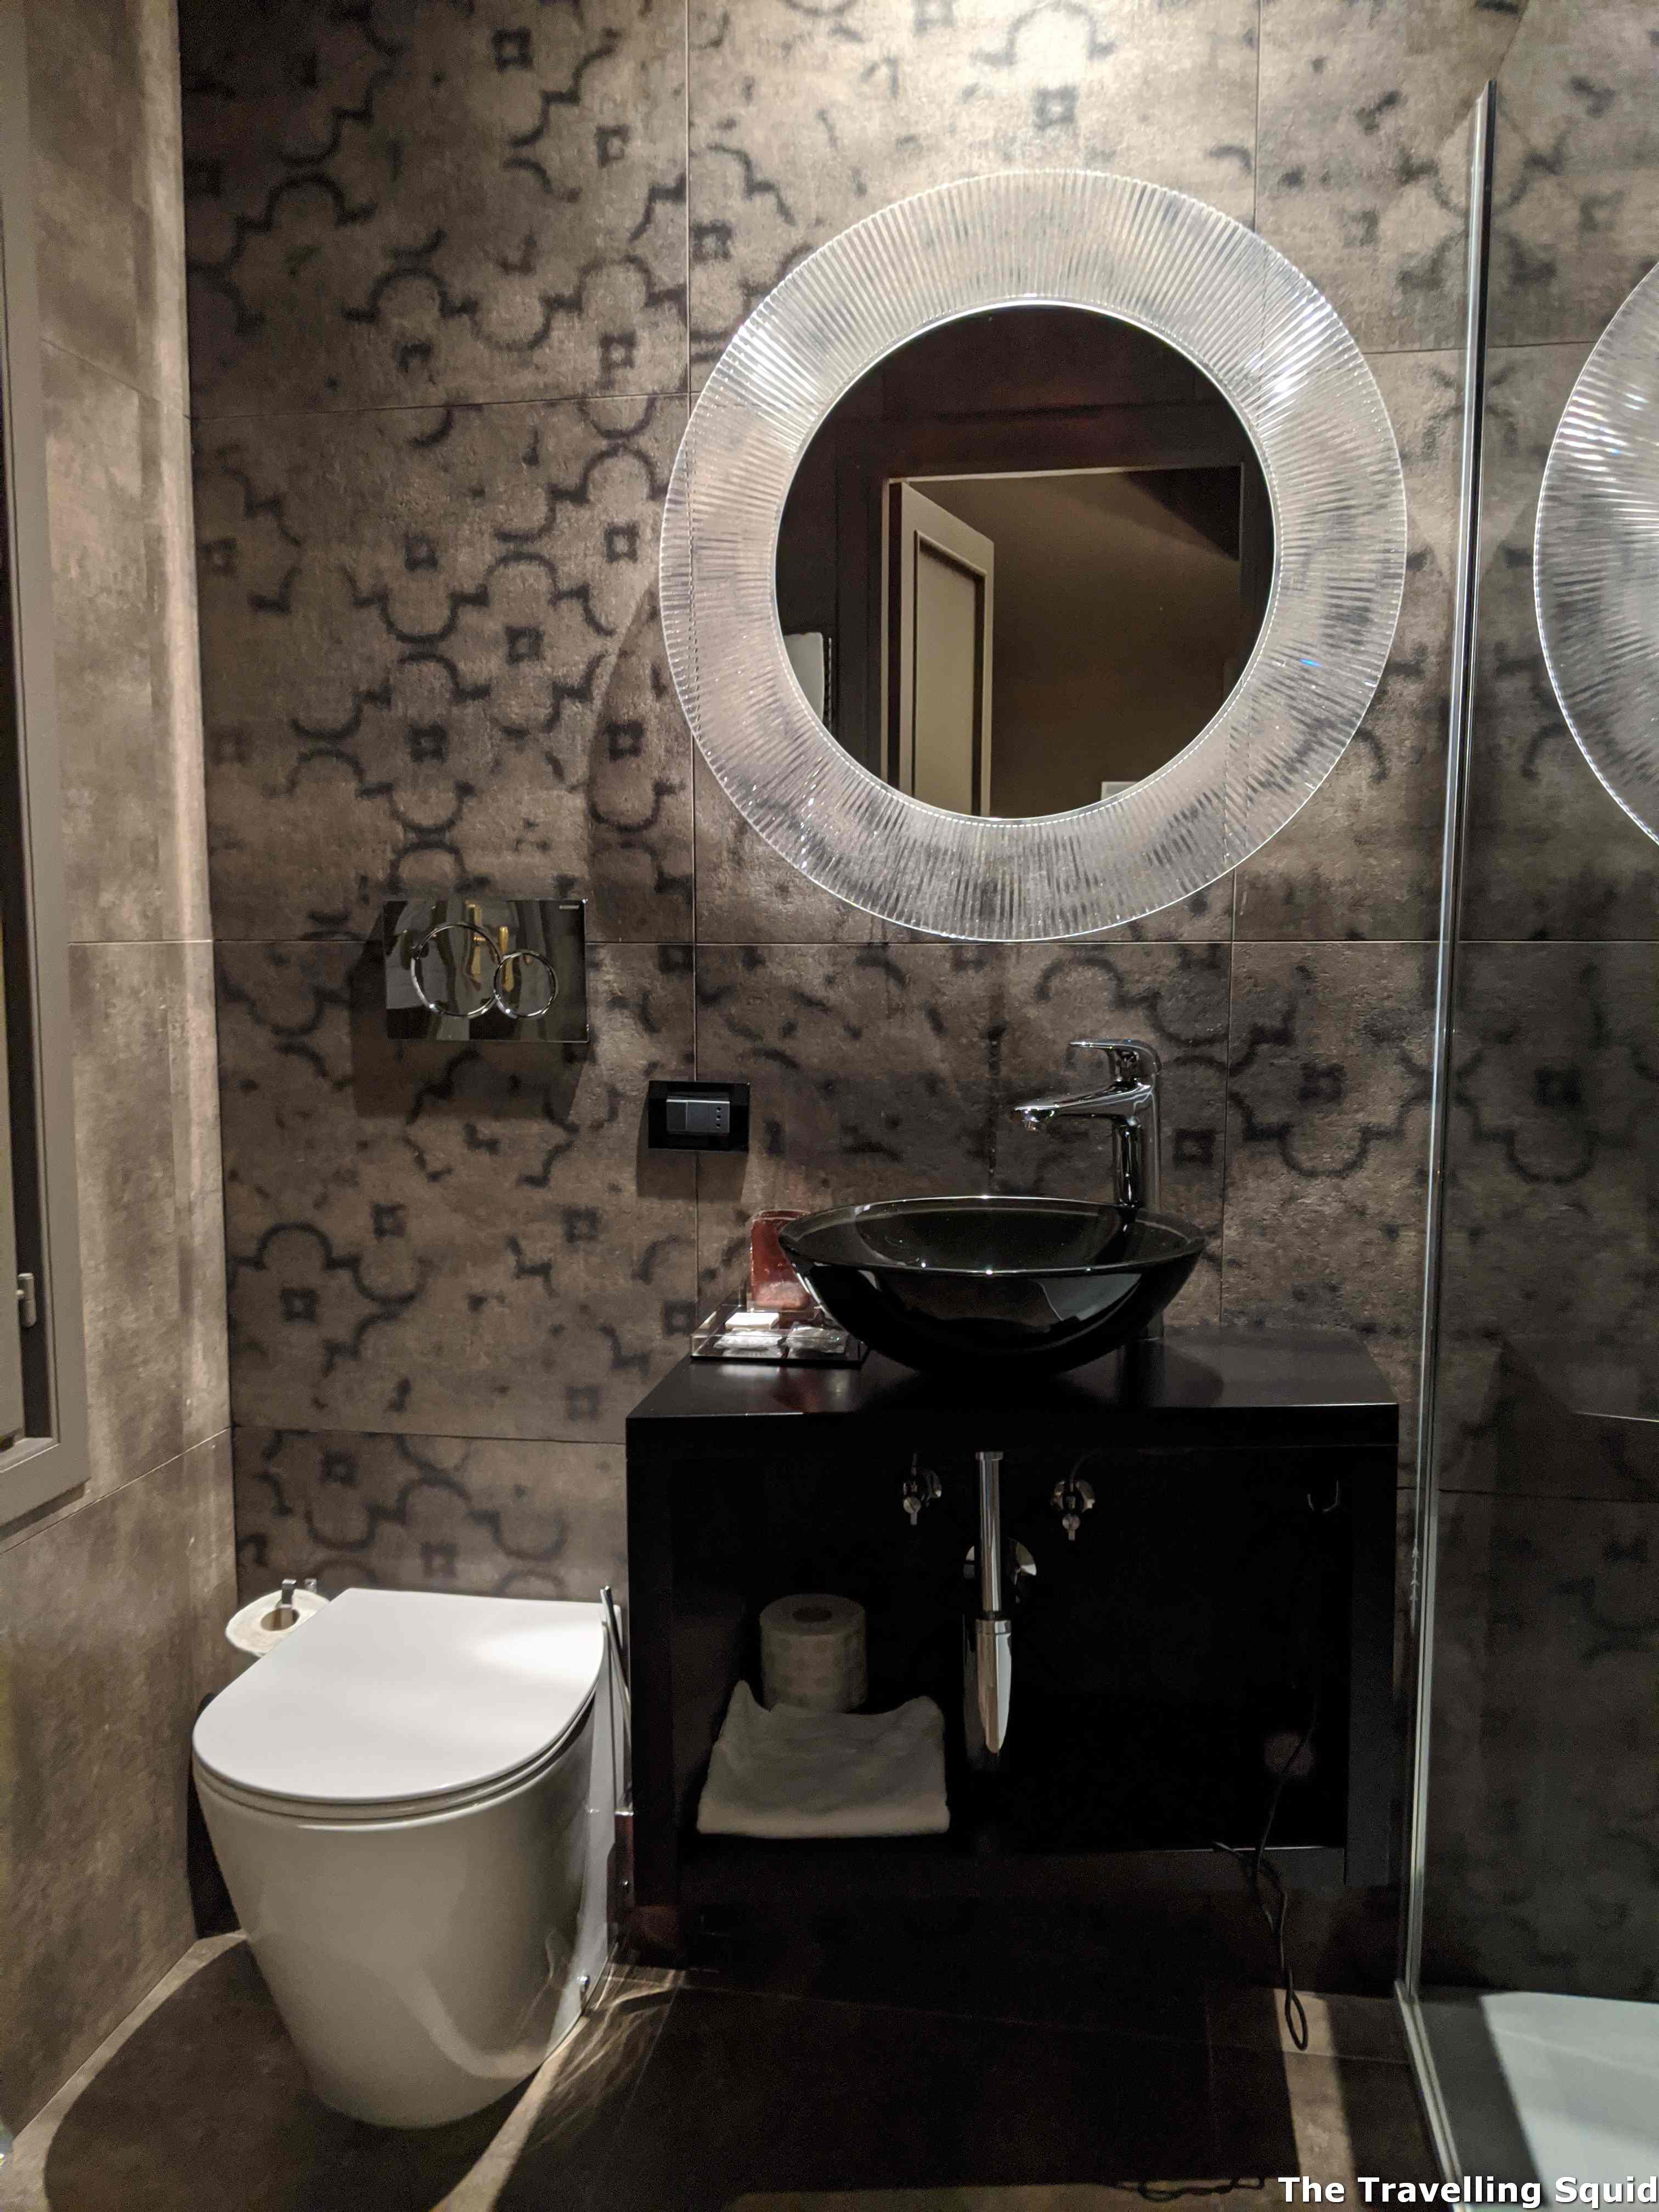
The room was basic but comfortable. There was a large bed and a table and TV at the corner. There was also a day bed, great if you are travelling in a party of three. The toilet had a rain shower function and a clothes rack which was great for drying wet clothes.
Little small space for a table and television.The toilet was clean and easy to use.
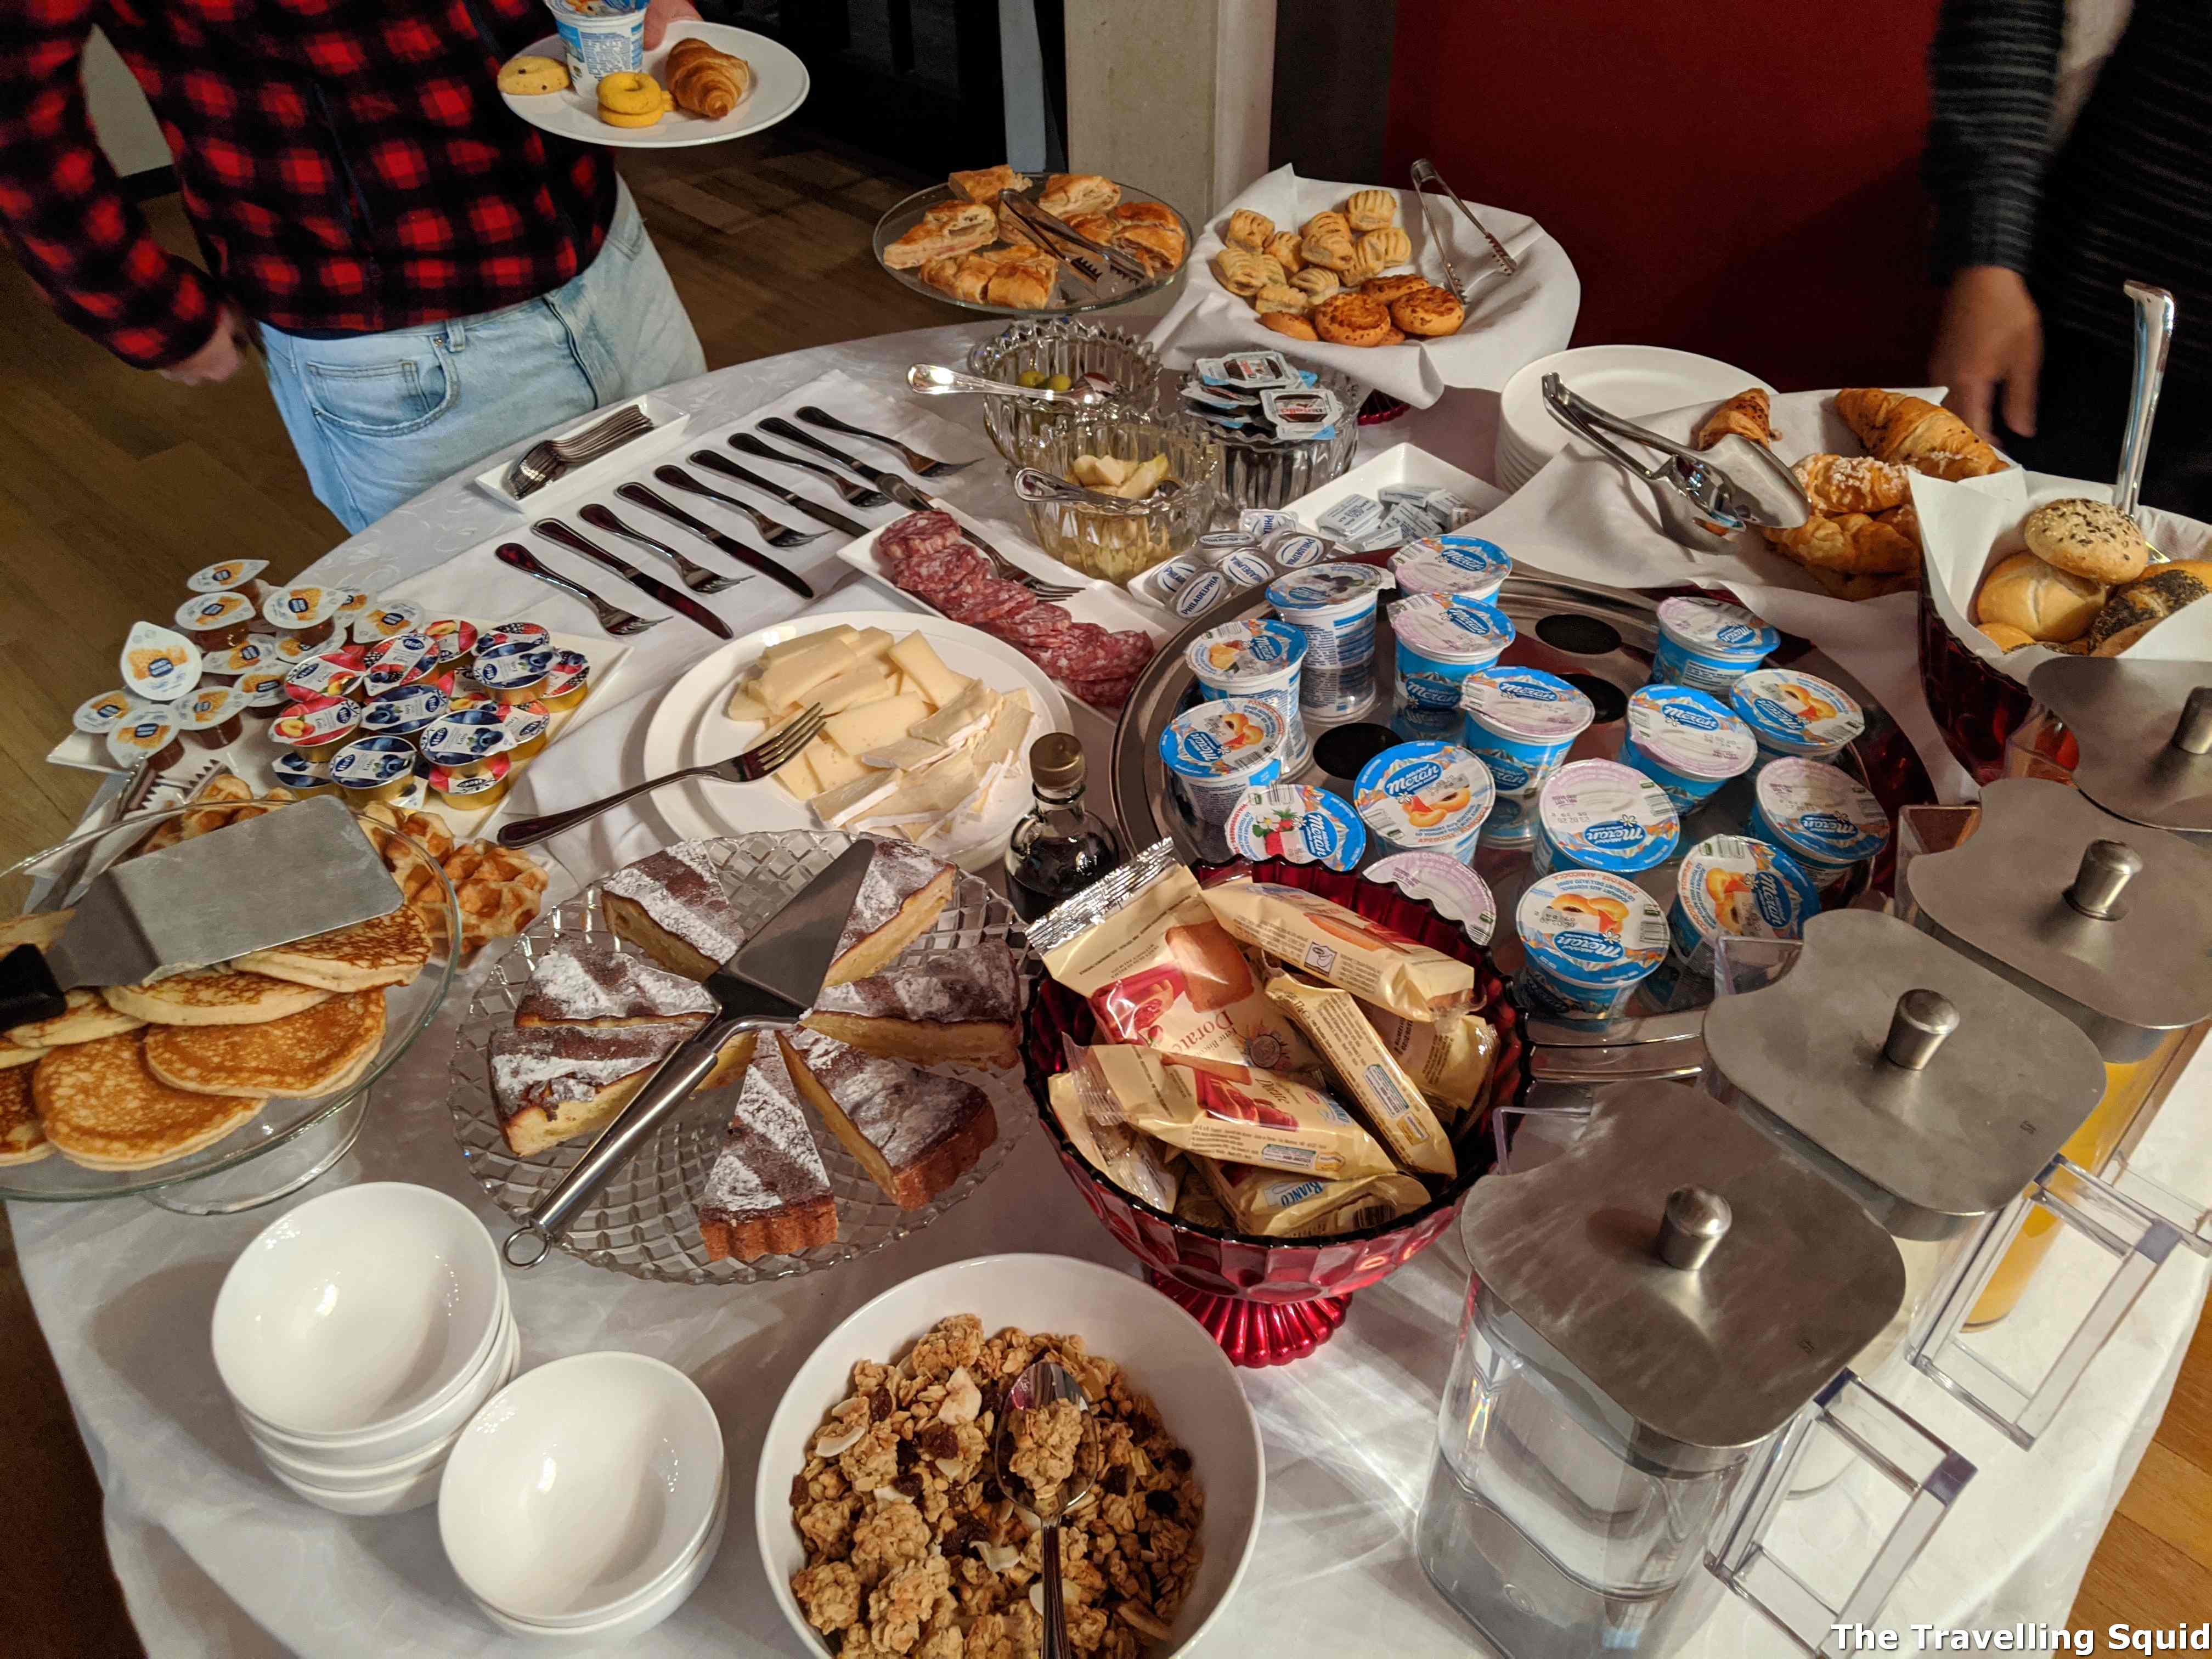
The Breakfast
The spread every morning.
Like most Bed & Breakfasts which we stayed in, the hotel came with complimentary breakfast too. We found the breakfast to be quite pleasant – made up of bread, cheese, ham and eggs. It provided just the right amount of fuel for a morning of walking ahead.
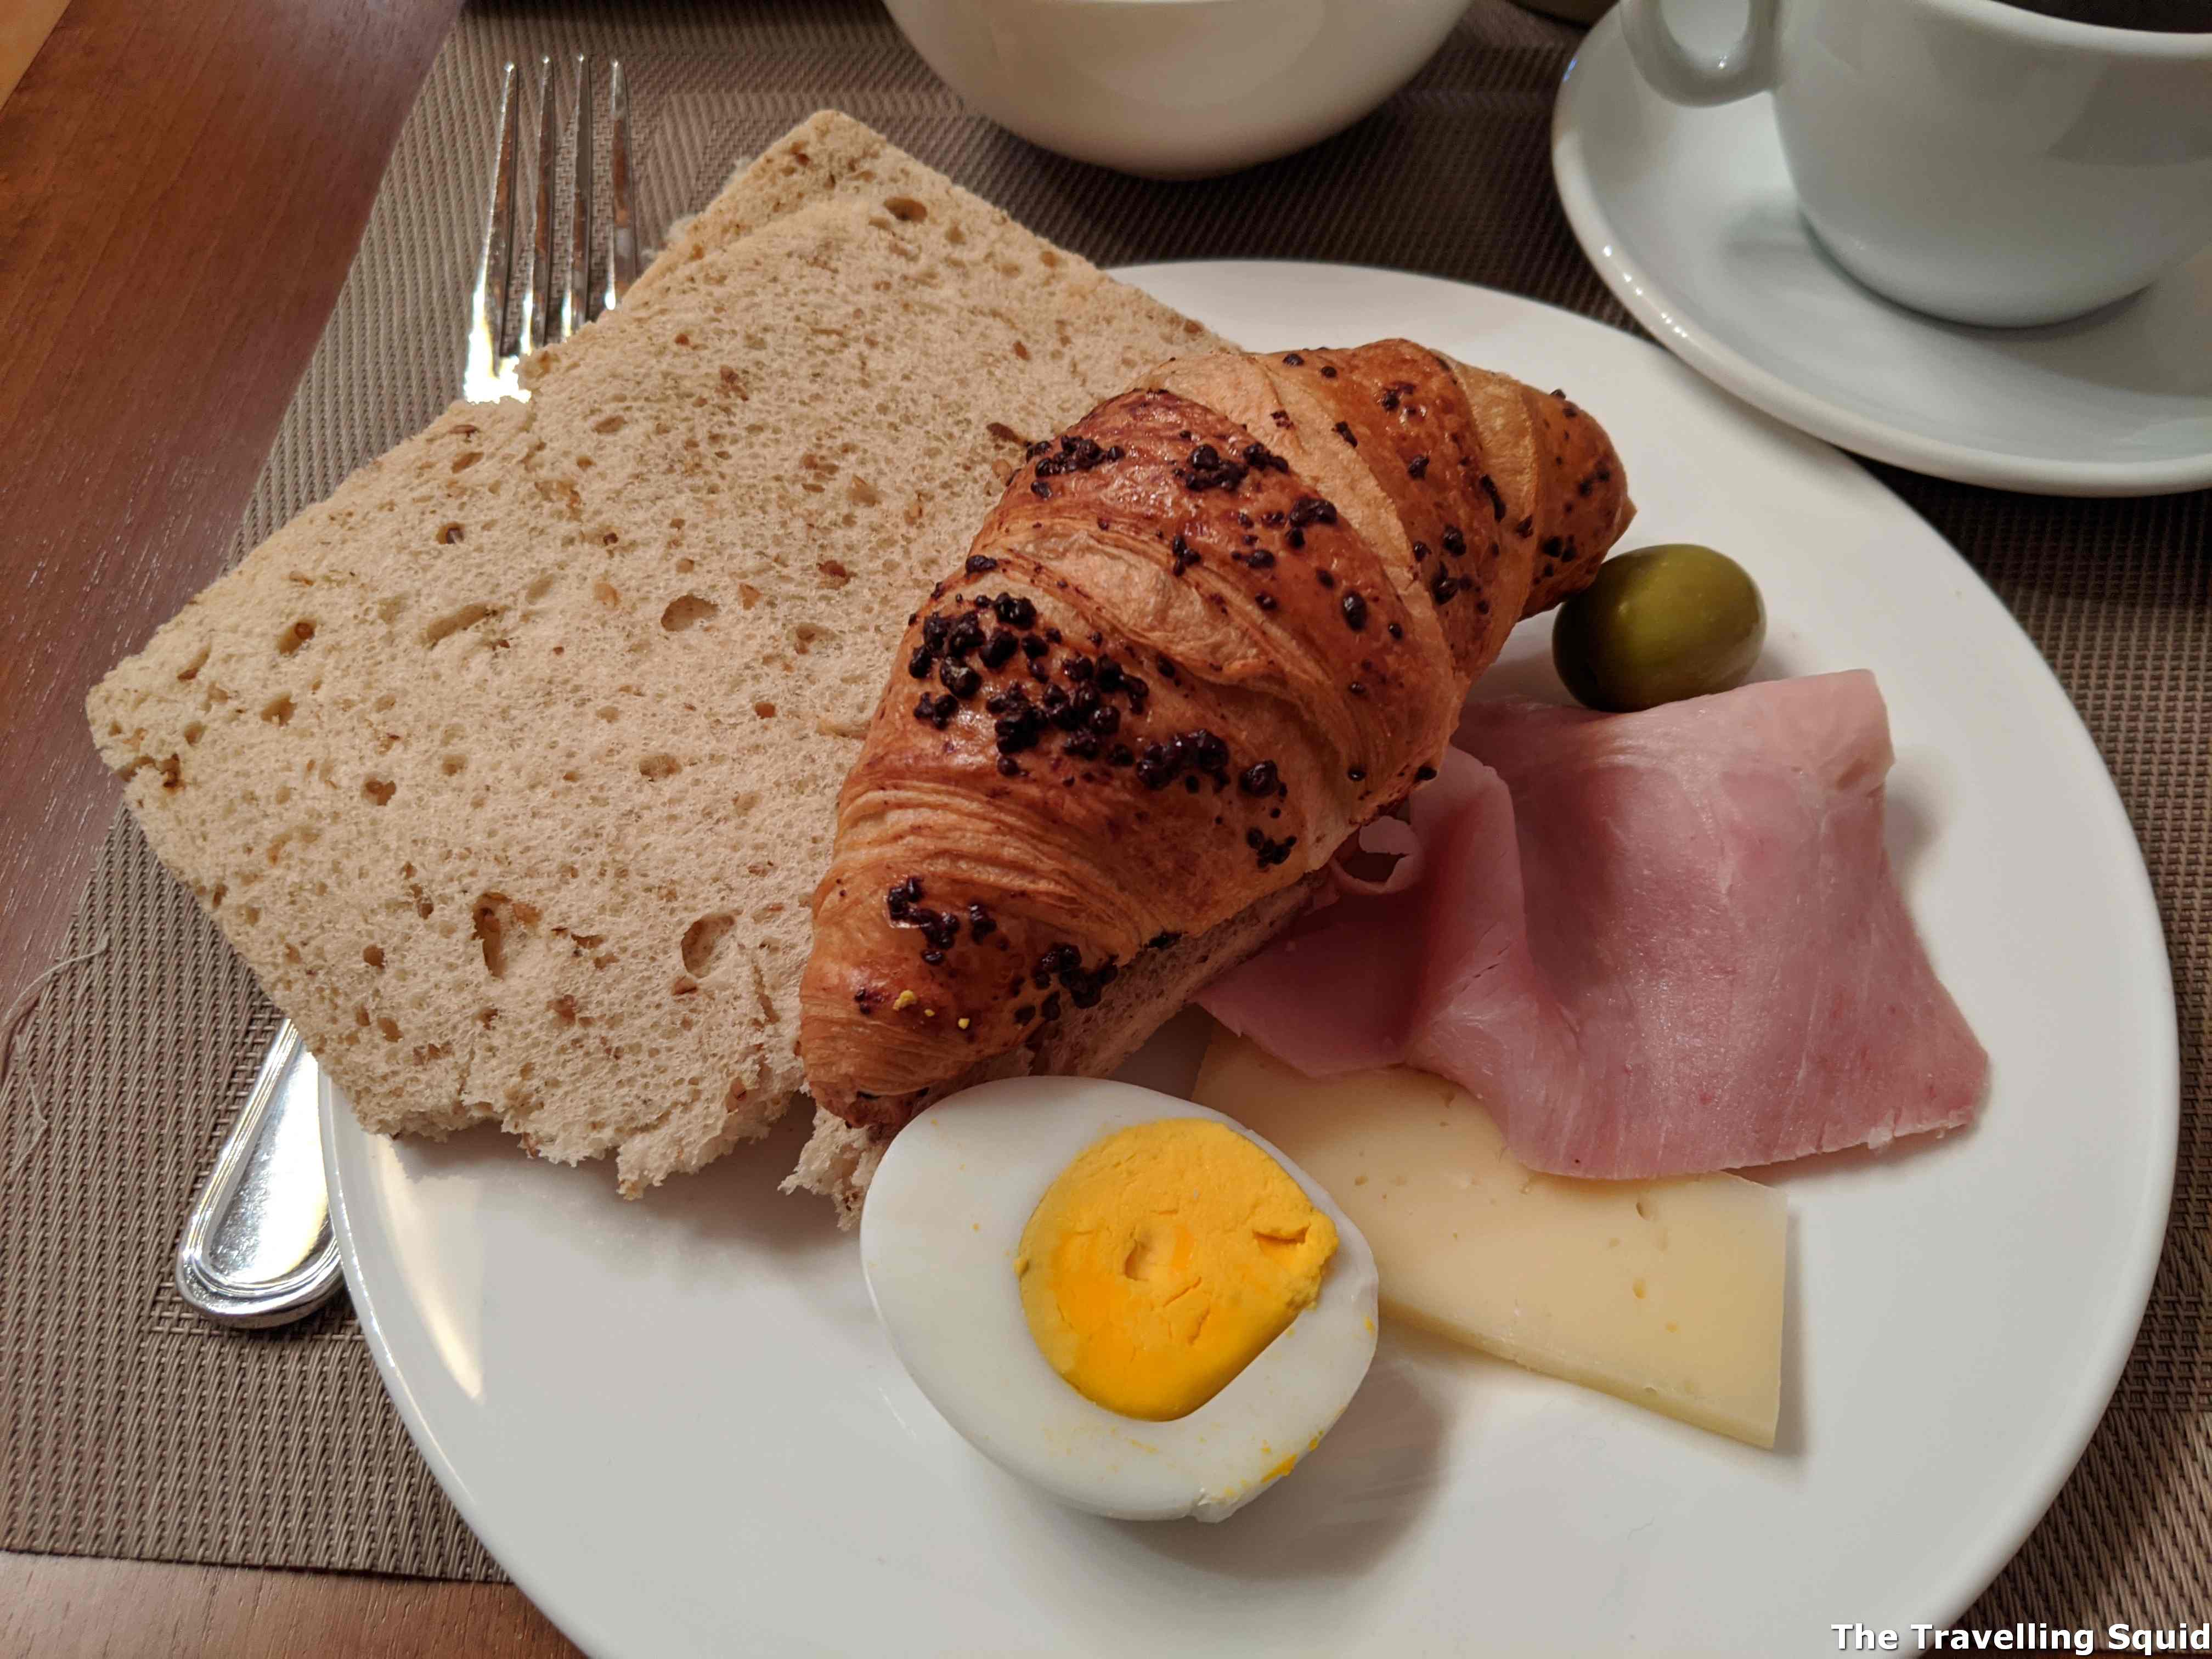
My selection of egg, croissant, cheese and ham.Cereals are are essential part of my hotel breakfast. I had them everyday.
The Travelling Squid’s Take
We would definitely recommend a stay at Hotel Riva Del Vin in Venice as the location was in a central area, near many more local shops, bars and restaurants. The room was spacious and clean, and the breakfast was hearty. Do check it out if you’re planning a trip to Venice.
***
Stay at Hotel Riva Del Vin in Venice
Address: Calle del Sturion, 677/A-678, 30125 San Polo, Venice – Italy
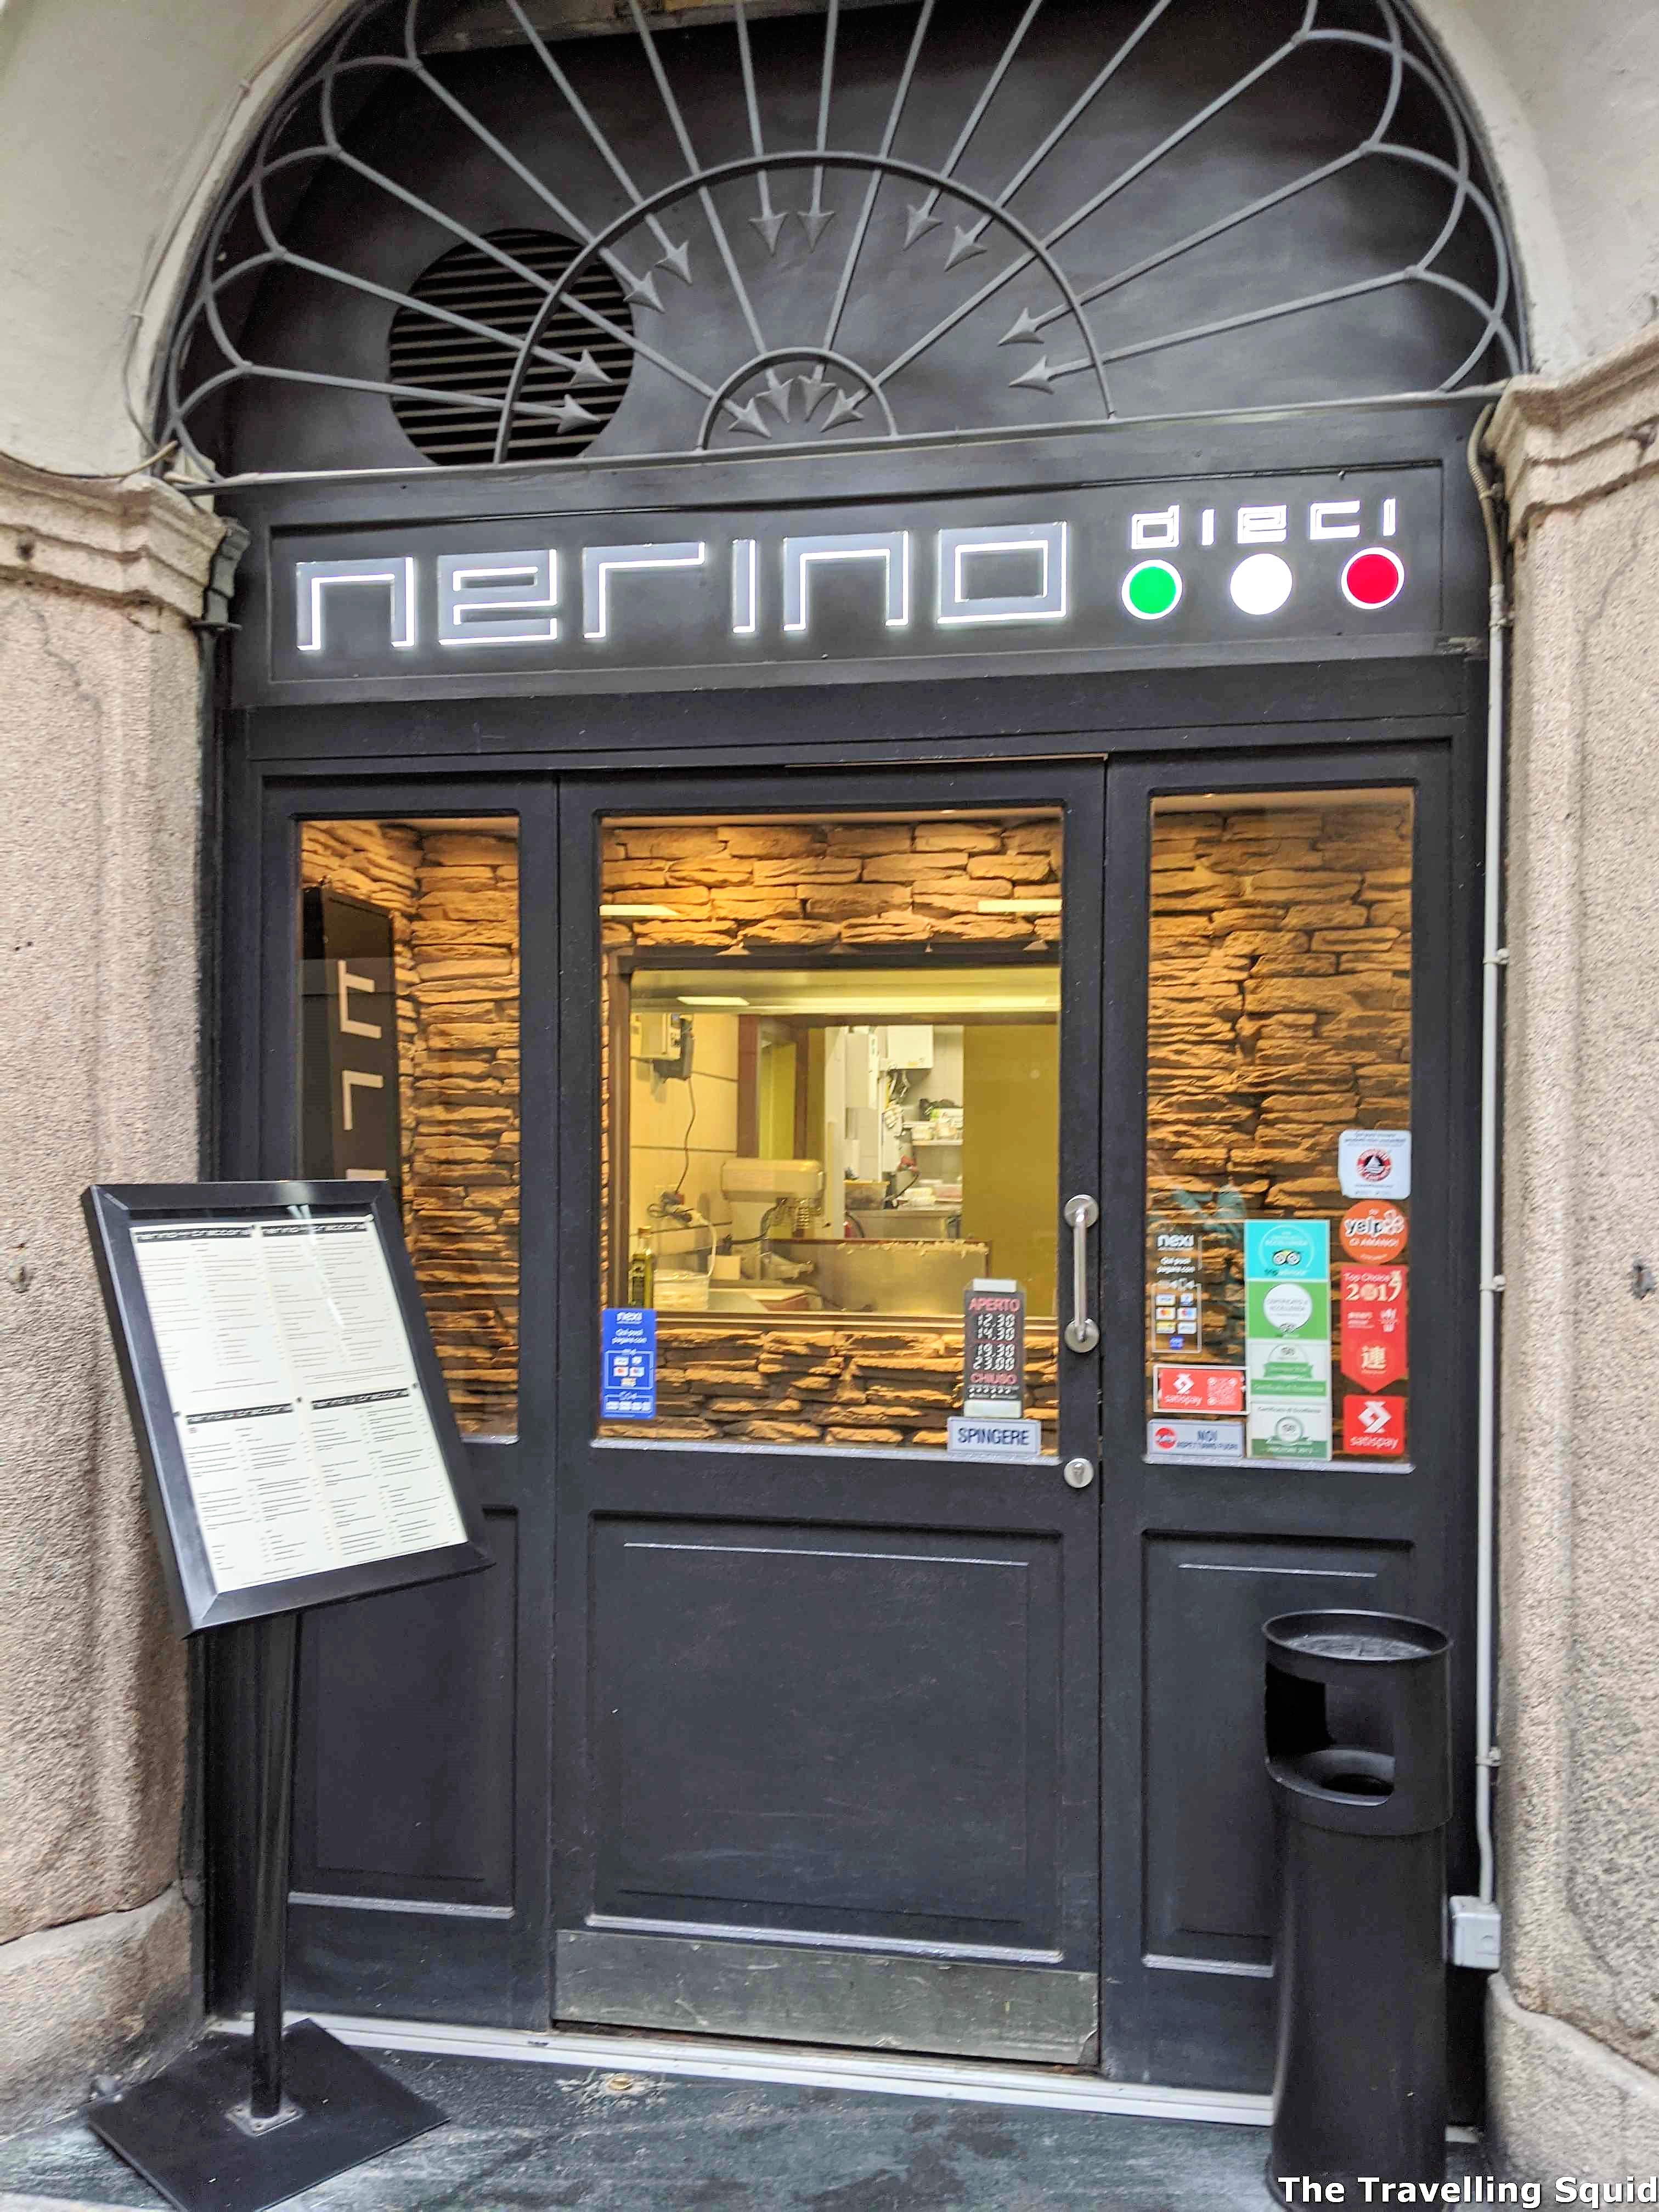
We visited the Duomo di Milano and Galleria Vittorio Emanuele II when we first arrived in Milan and found the area to be quite touristy. As lunchtime approached, we wanted to dine at a local restaurant and found Nerino Dieci Trattoria on Google. While we had to walk about 15 minutes from the town square to get to the lunch place, it was worth it. Here is our experience having lunch at Nerino Dieci Trattoria in Milan.
The doors open at 12.30pm, no earlier.
Lunch at Nerino Dieci Trattoria in Milan
We found Nerino Dieci Trattoria on Google and it had very good ratings. It was noon when we decided to walk over and we got there at about 12.15pm. Unfortunately they open at 12.30pm so we went off to have a gelato before returning at 12.25pm. I realise that Italian restaurants would only open their doors at the stated time of opening – 12.30pm.
At 12.30pm, the restaurant staff opened their doors and ushered us to the high tables and chairs as we did not have a reservation. It was good that we went early as the restaurant was soon filled.
The people having lunch at Nerino Dieci Trattoria in Milan were from different walks of life. There were people in their twenties having lunch with friends over wine. In particular, I remembered an older man who sat at the table next to us – you could tell he was a frequent customer as he exchanged pleasantries and jokes with the waiter. He had a really simple meal, just the complimentary bread and a plate of pasta. No wine, appetisers or dessert. It was like a lunch place for a working person and that made me think of my own experience in Singapore. I concluded that Nerino Dieci Trattoria in Milan must be legit as locals would only visit and return to a restaurant with good ingredients and local flavours.
The Food
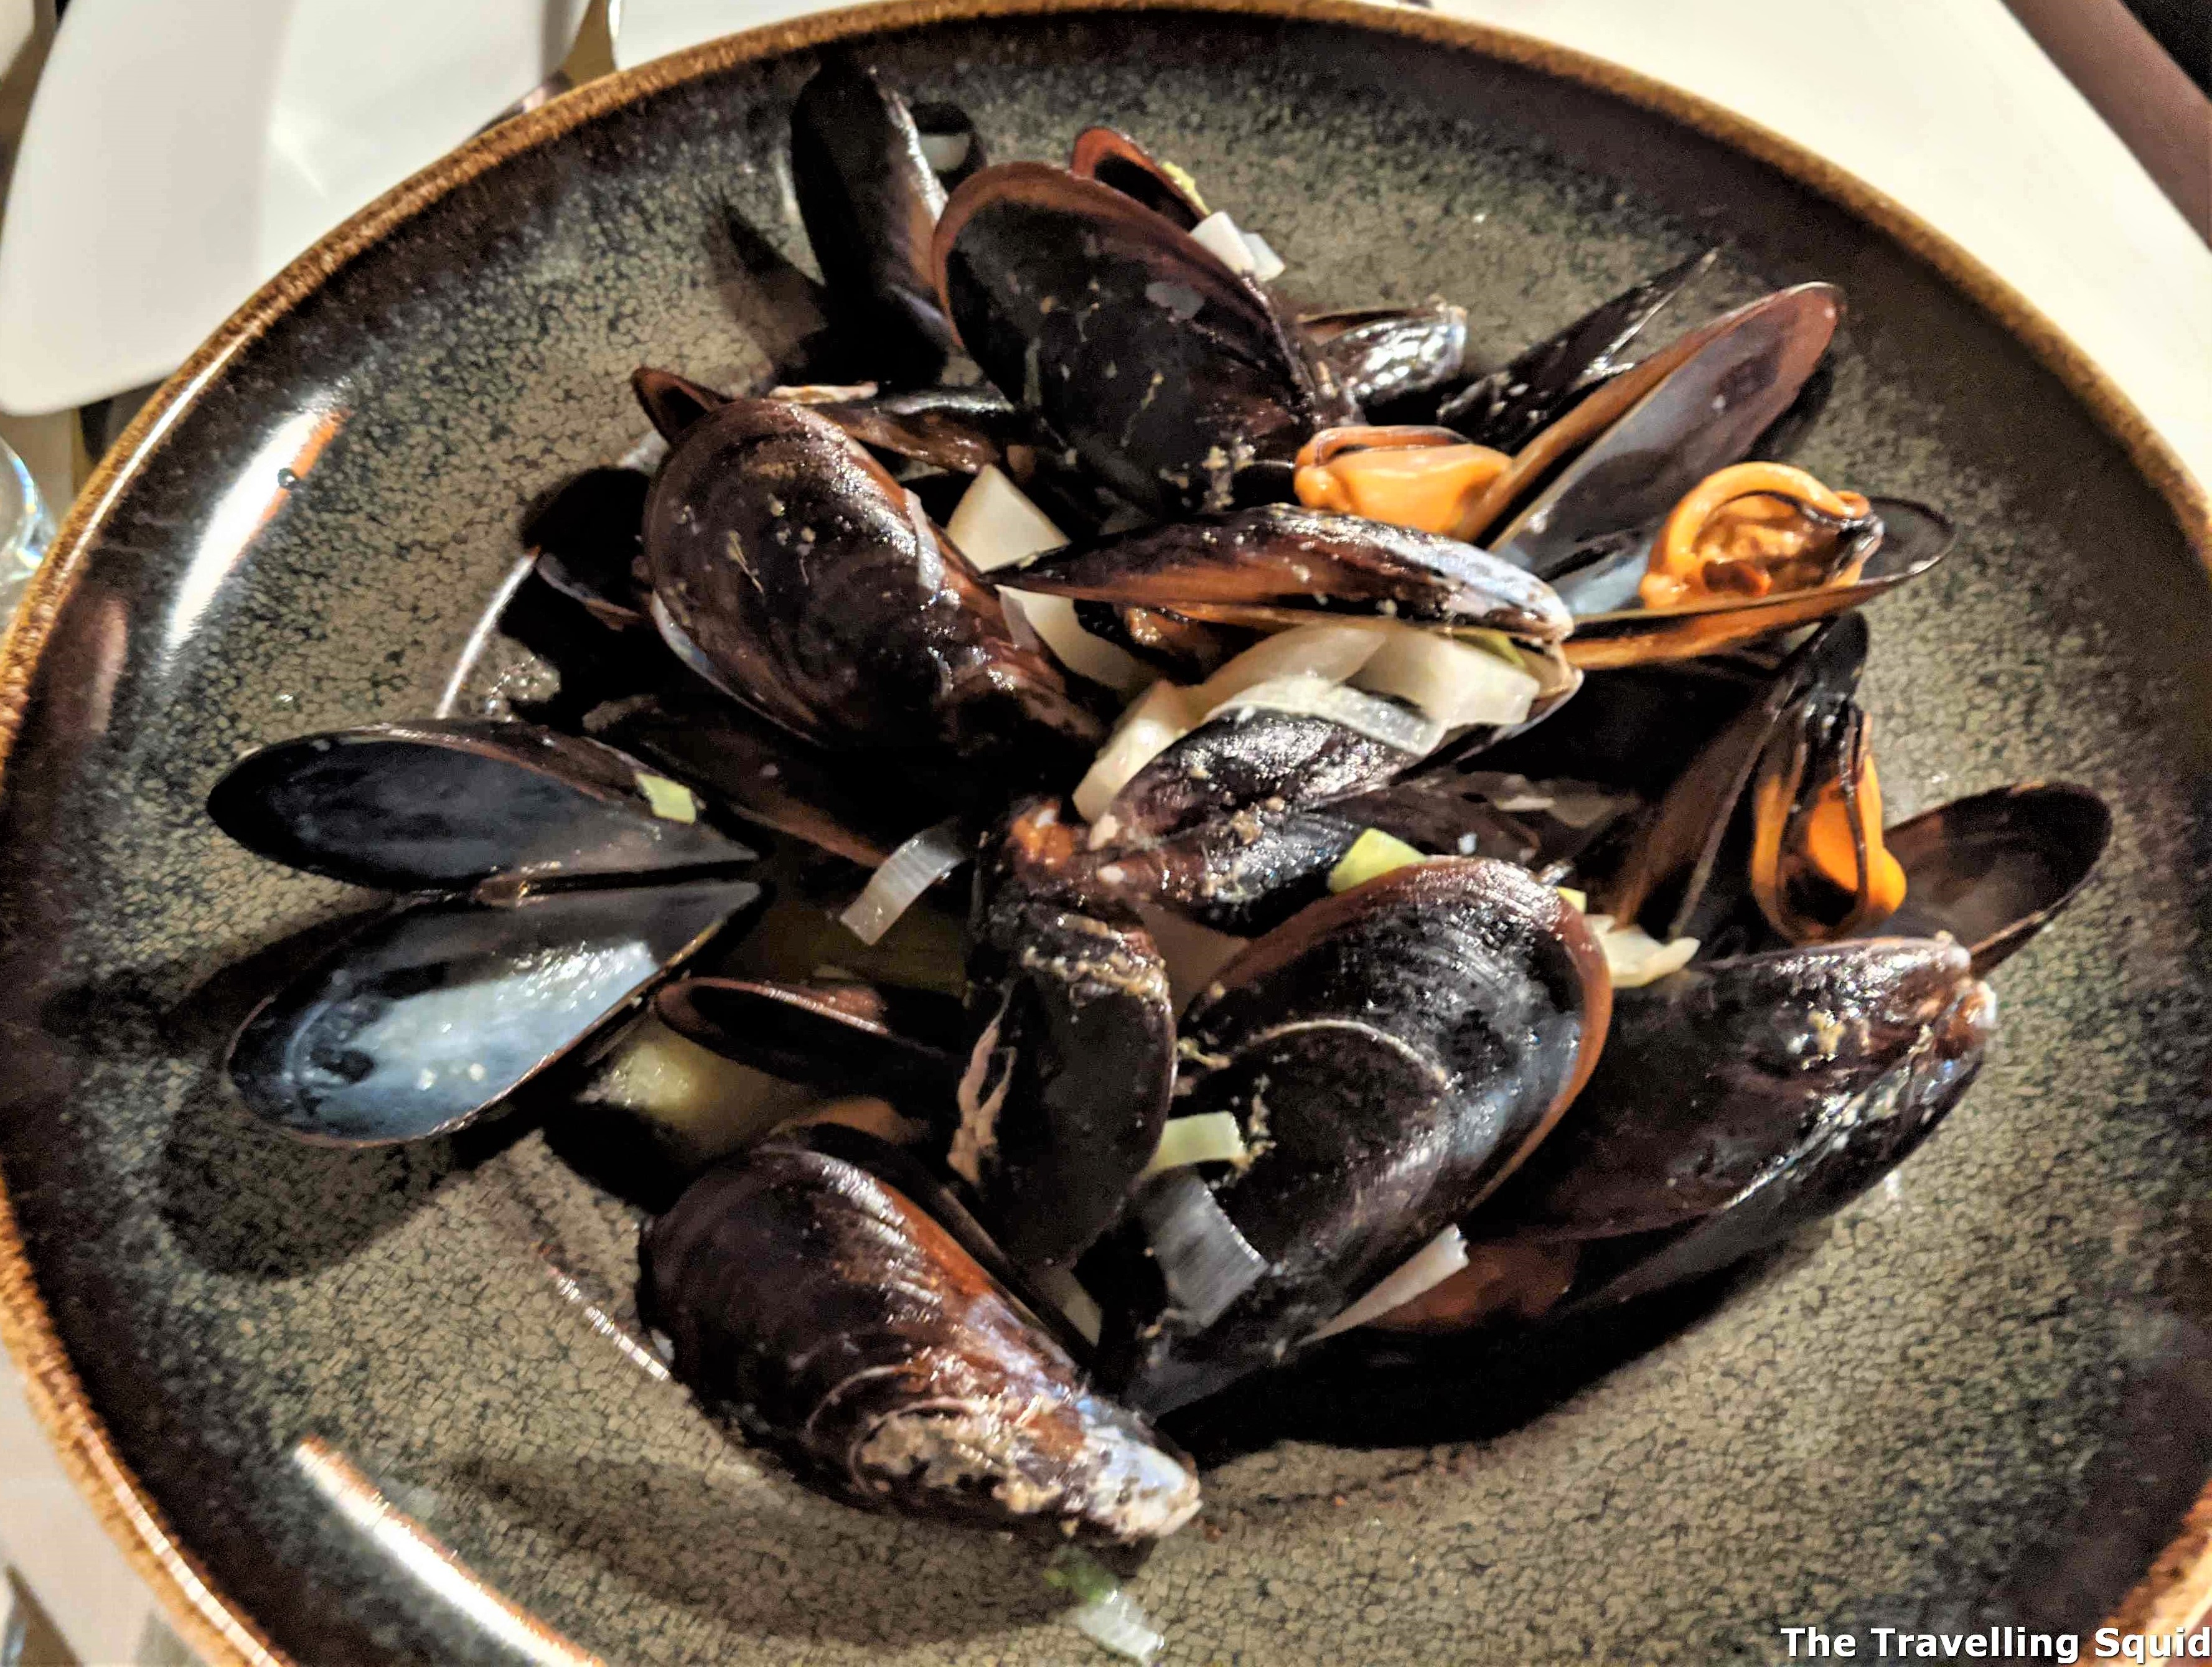
Mussels
Mussels
The mussels were the special of the day. They were tossed in a white wine and garlic sauce, which brought out the flavours of the mussels.
Fried dumplings with Culatello Ham and truffle honey – €14
Fried dumplings with Culatello Ham and truffle honey
As most of the appetisers had cheese and S doesn’t really take that, we had the fried dumpling dish instead. The dumplings were unlike Asian dumplings. They had a thicker skin and was airy in the middle. The honey went well with the Culatello Ham.
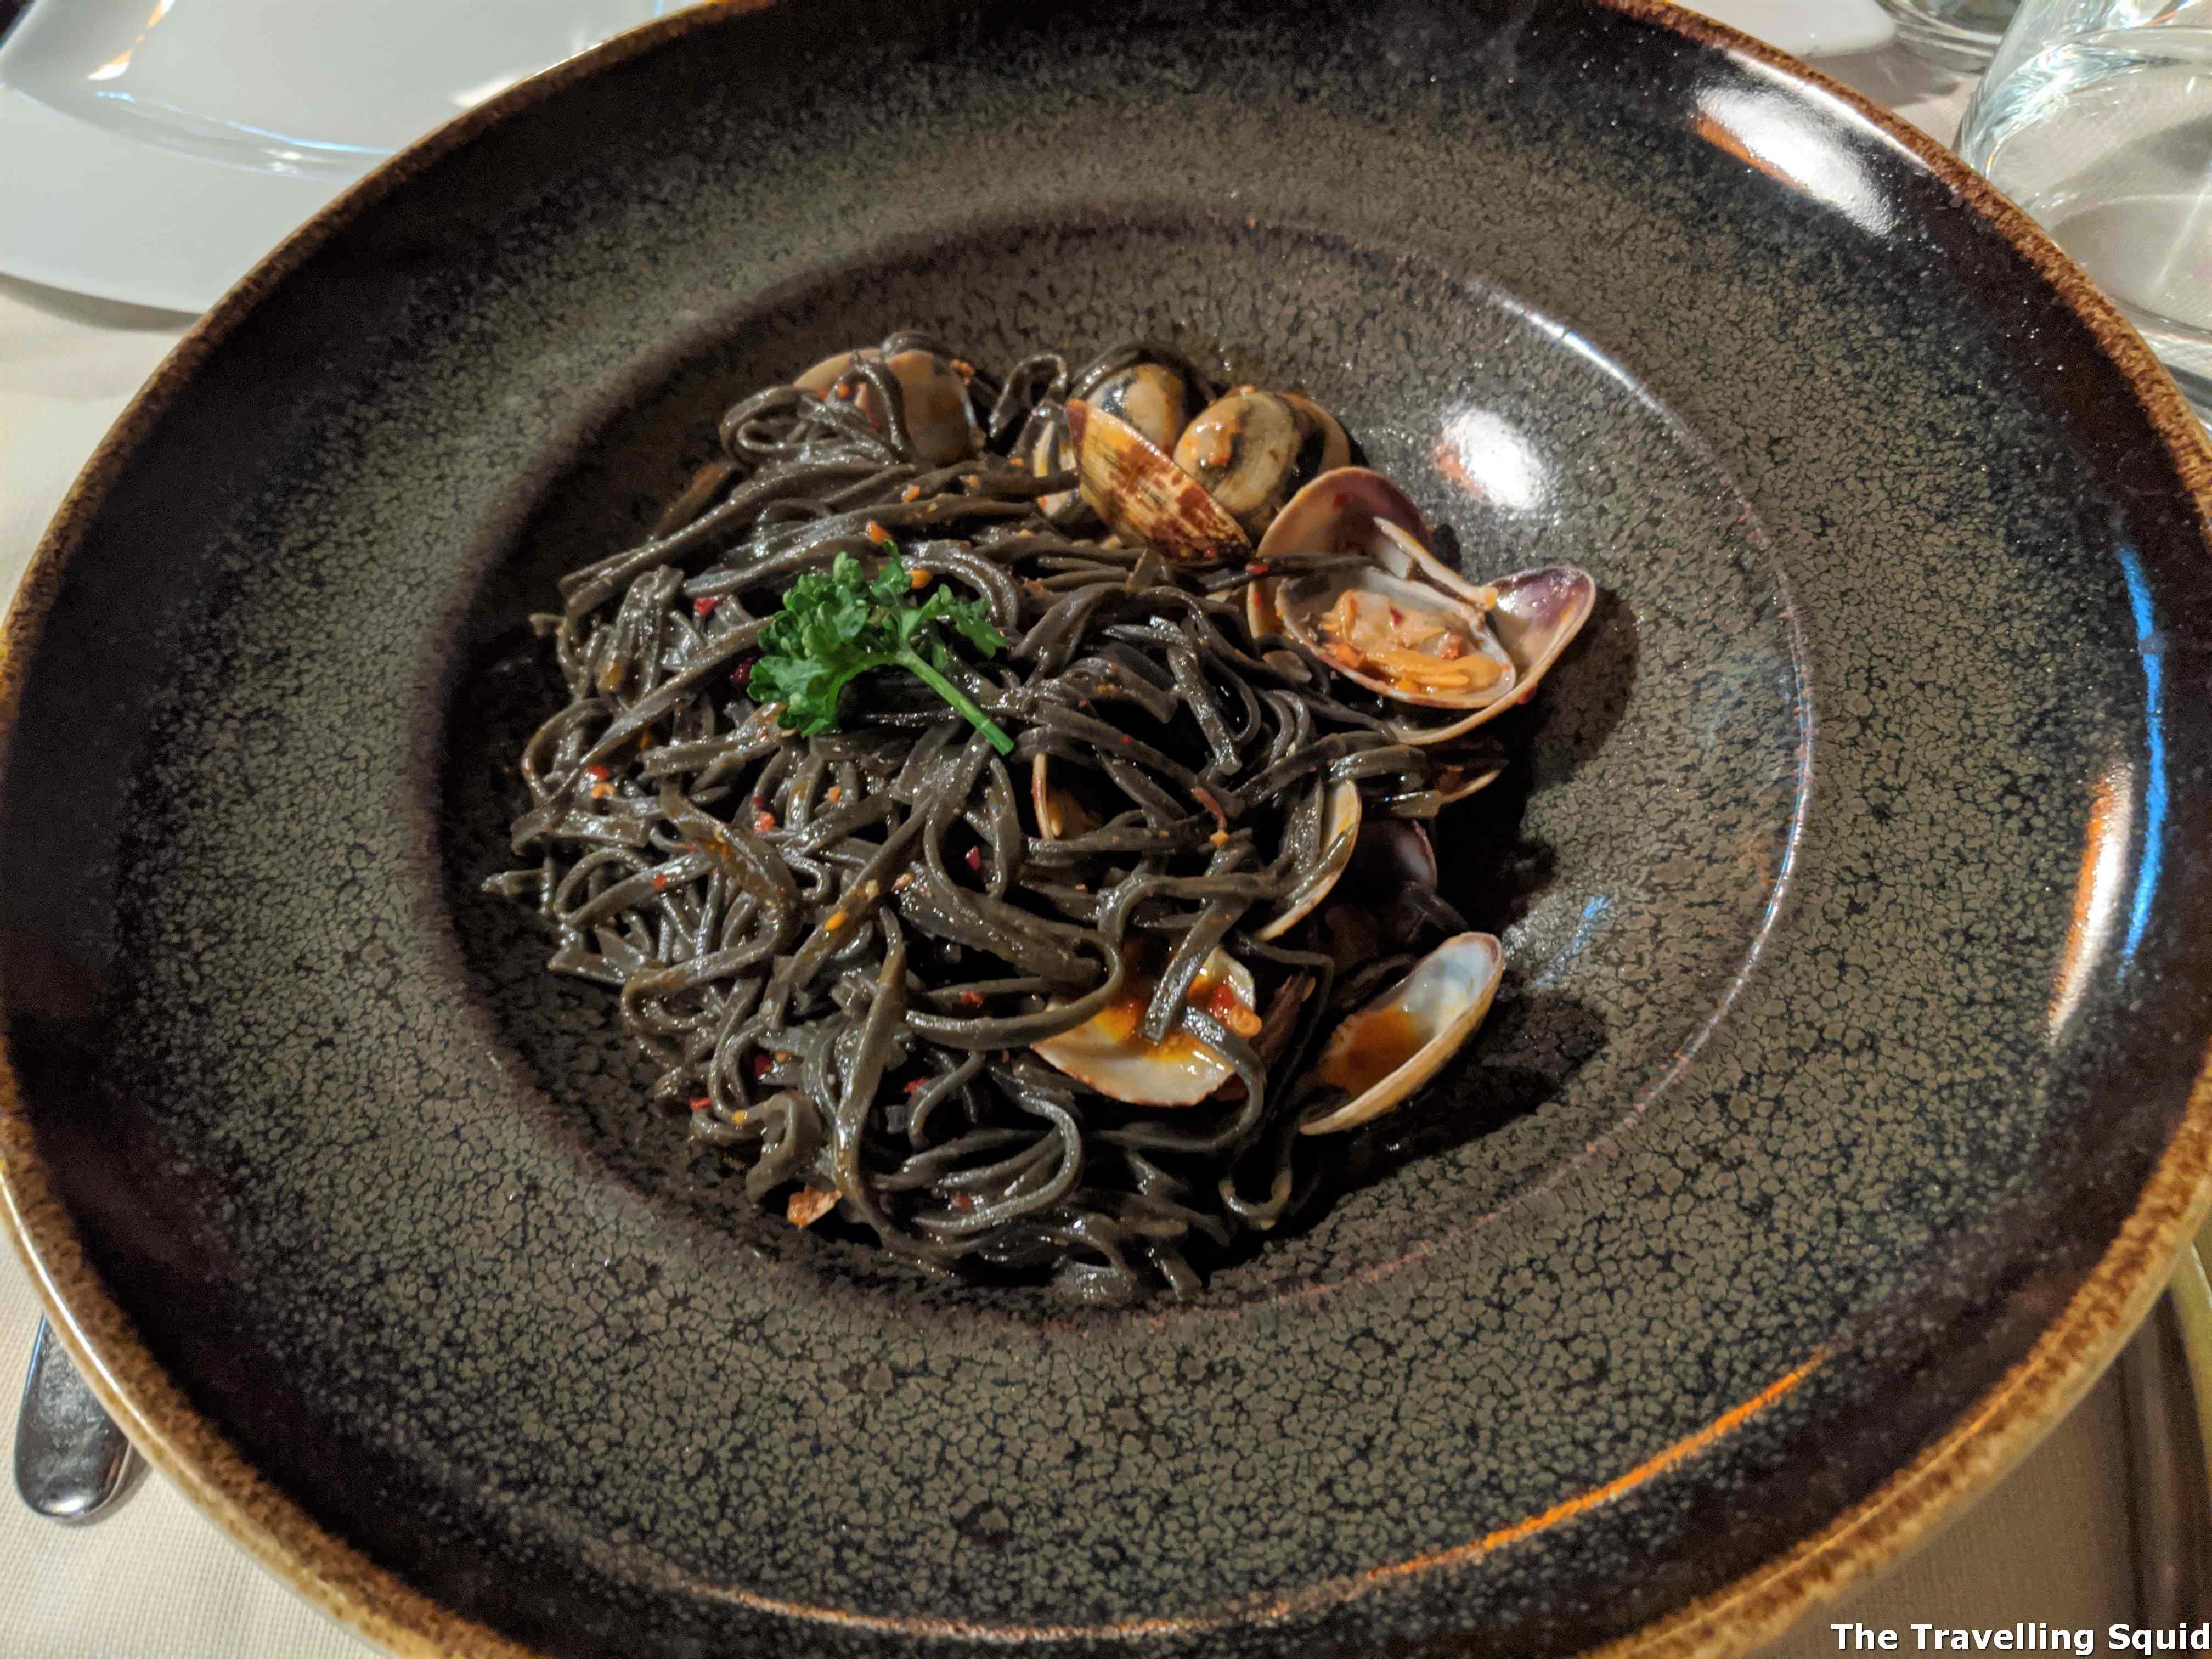
Black noodles with clams and spicy salami – €12 [Recommended]
Black noodles with clams and spicy salami
The black noodles were super tasty. I wish I had ordered this too. There was good seafood flavours and the spicy salami made the dish very appetising with its little spice. It was a combination of good ingredients and cooking technique.
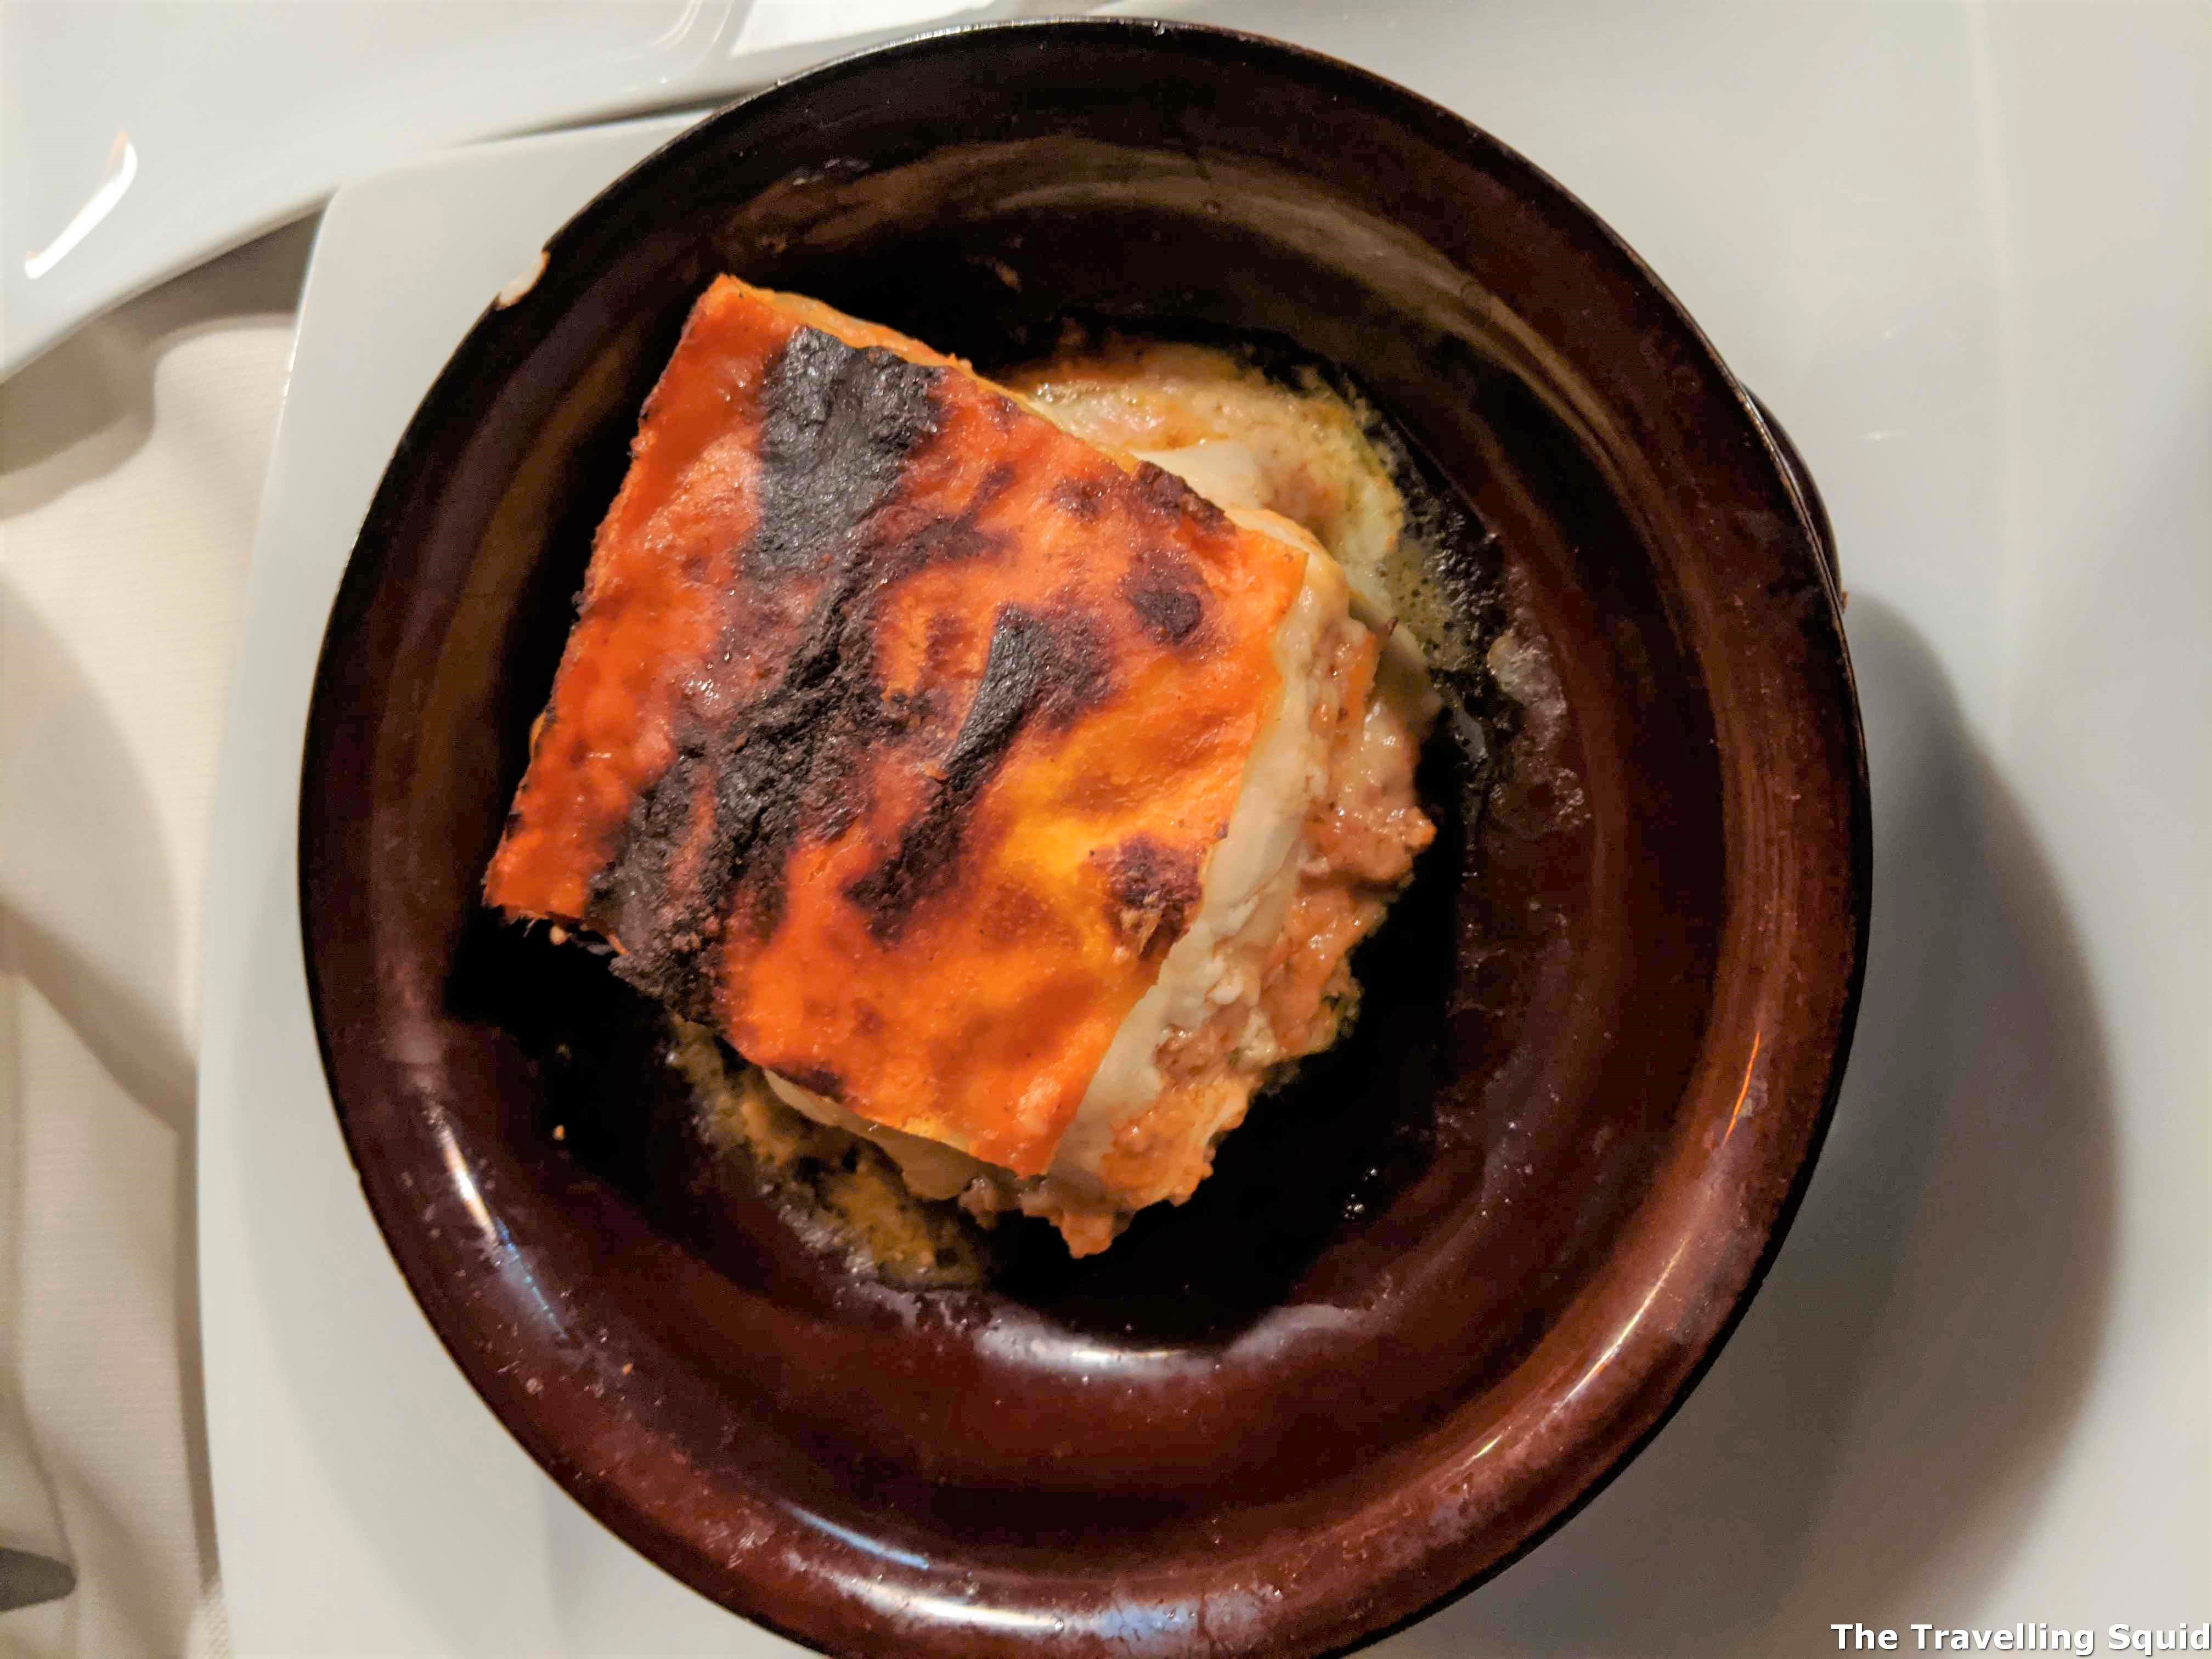
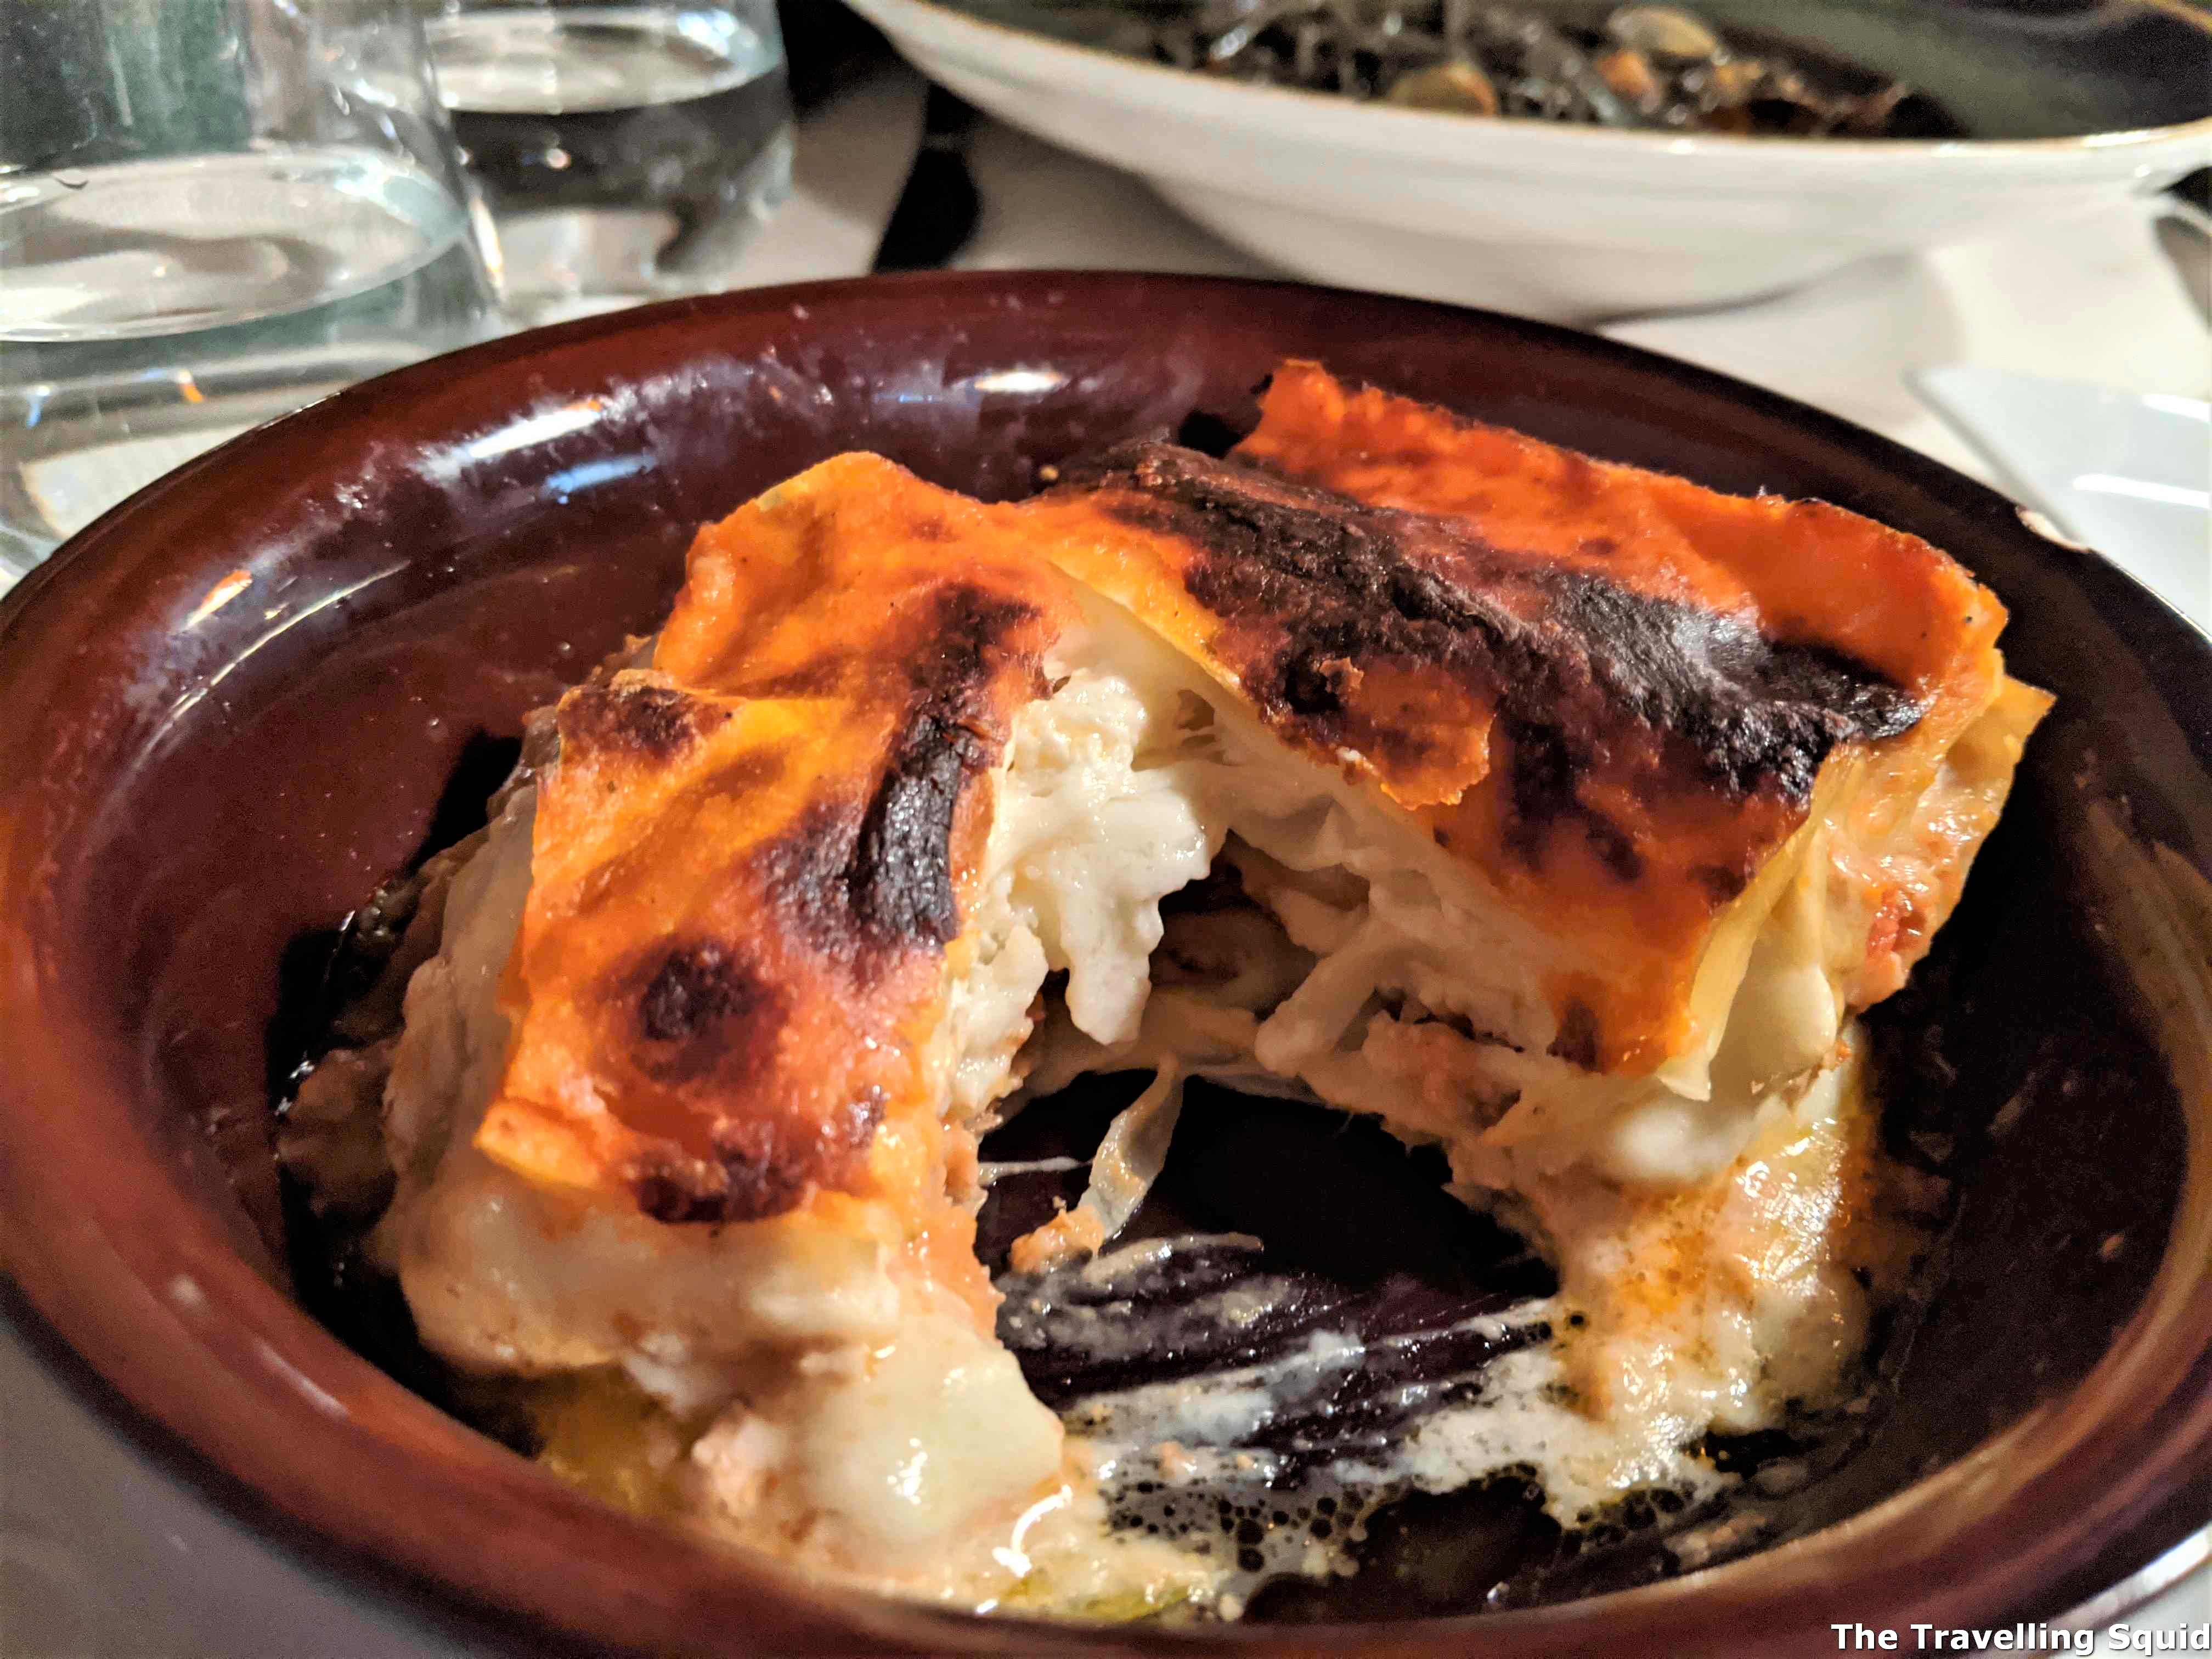
Lasagna with beef ragu and smoked buffalo mozzarella – €10
Lasagna with beef ragu and smoked buffalo mozzarella
The lasagna was good but I realised that a true test of a chef’s skill is with the pastas as they had to be done on the spot. Lasagnas could be done in advance and warmed up later on. But it was still good, just a little on the heavy side with lots of cheese.
It was quite a filling meal.
The Travelling Squid’s Take
If you’re visiting the Duomo and are looking for a place to have lunch, do consider having lunch at Nerino Dieci Trattoria in Milan. The prices are reasonable and the pastas and mussels are highly recommended. Personally, I found it to be very legitimate as it was visited by the people working in the area.
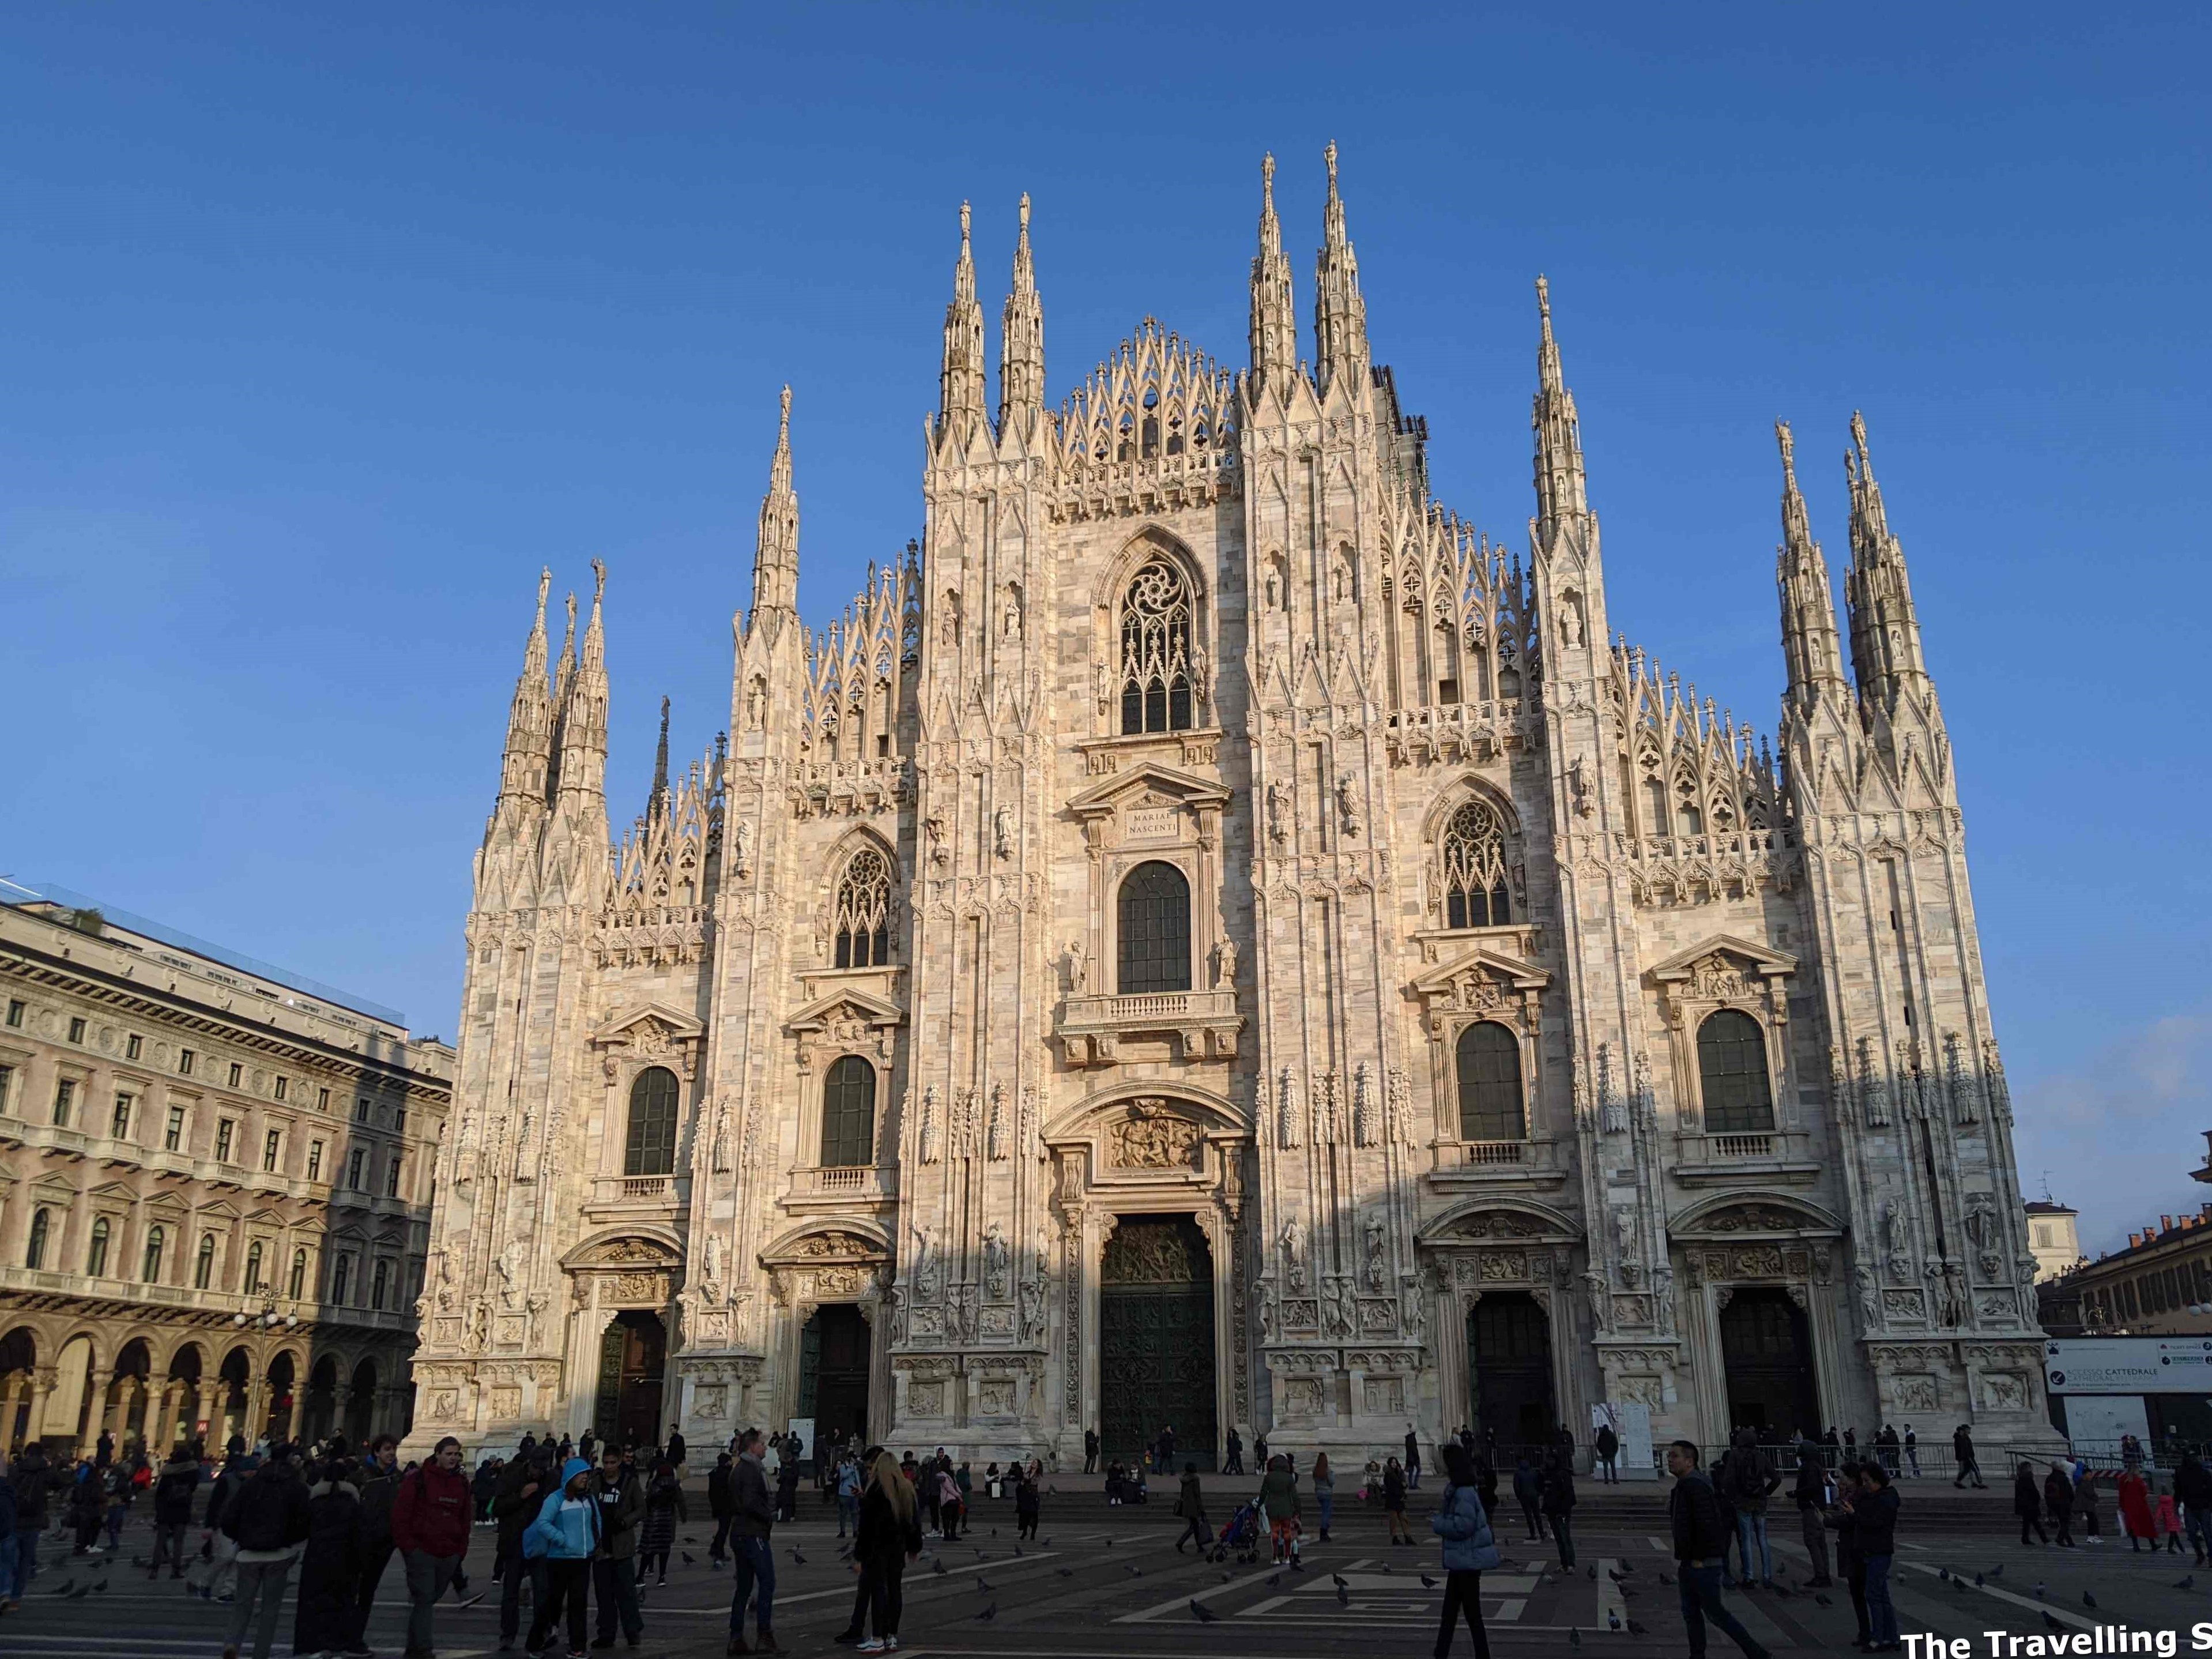
We arrived in Milan at 7am in the morning after our Cathay Pacific flight from Hong Kong to Milan. We were heading to Venice that very evening, and left our suitcases at the Milano Centrale railway station before heading to see the Duomo di Milano, also know as Milan Cathedral, a key attraction of Milan. As we walked through the streets to get there, we were greeted by a construction facade which said that part of the Duomo was under restoration works. We then wondered if it is worth entering the Milan Cathedral, and if it would look like the churches we had seen in Jerusalem.
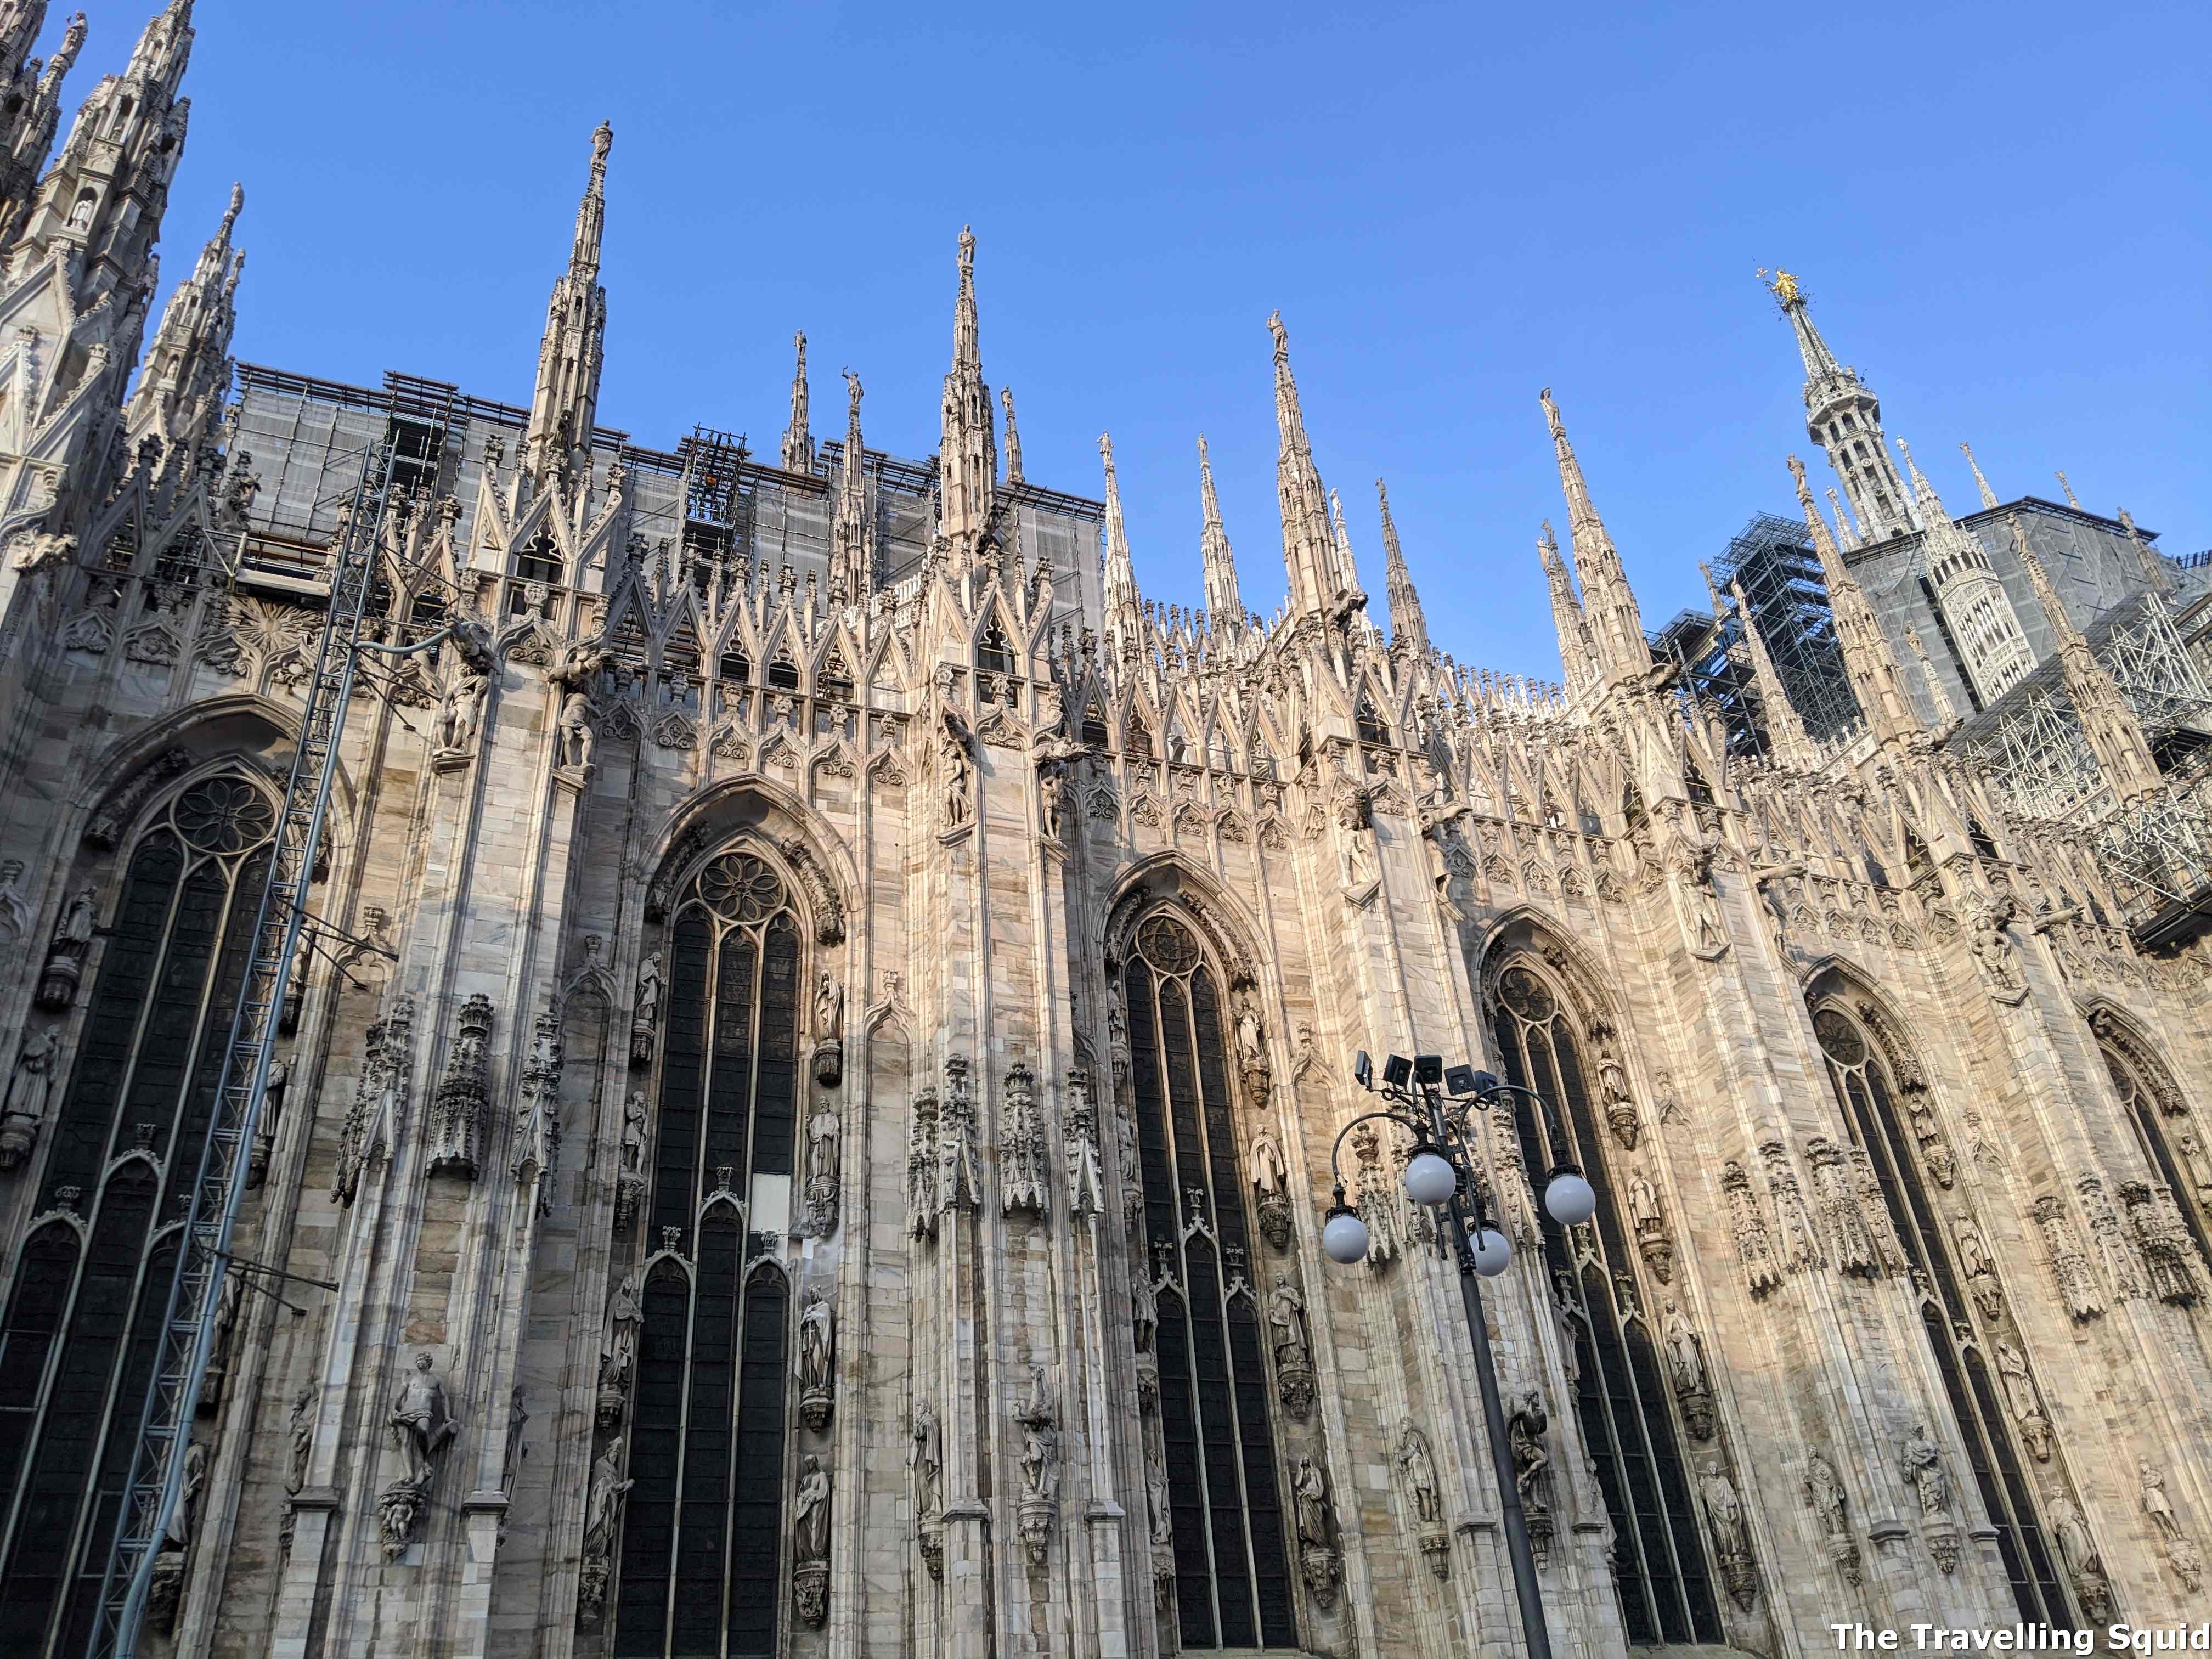
The facade of the cathedral. Work was ongoing to clean up the facade. I observed one man doing so and it took him about an hour to clean the head of a statue. The town square – full of people feeling pigeons. (noooo)
Is it worth entering the Milan Cathedral?
Ticket prices
We later realised that the ticket prices were relatively cheaper than other attractions, like the Leaning Tower of Pisa, which was €18. It cost €13 to take the stairs up the rooftop, which was about 10 floors in height. It’s very doable if you’re in need of exercise (that’s me), or decide to take it slow. If you wish to take a lift to the rooftop, it will cost you €17. Click here for more on the ticketing pricing. The ticket comes with access to the Cathedral, Duomo Museum as well as the archaeological site on the ground floor.
Cathedral
Apparently the Duomo is still a working church.
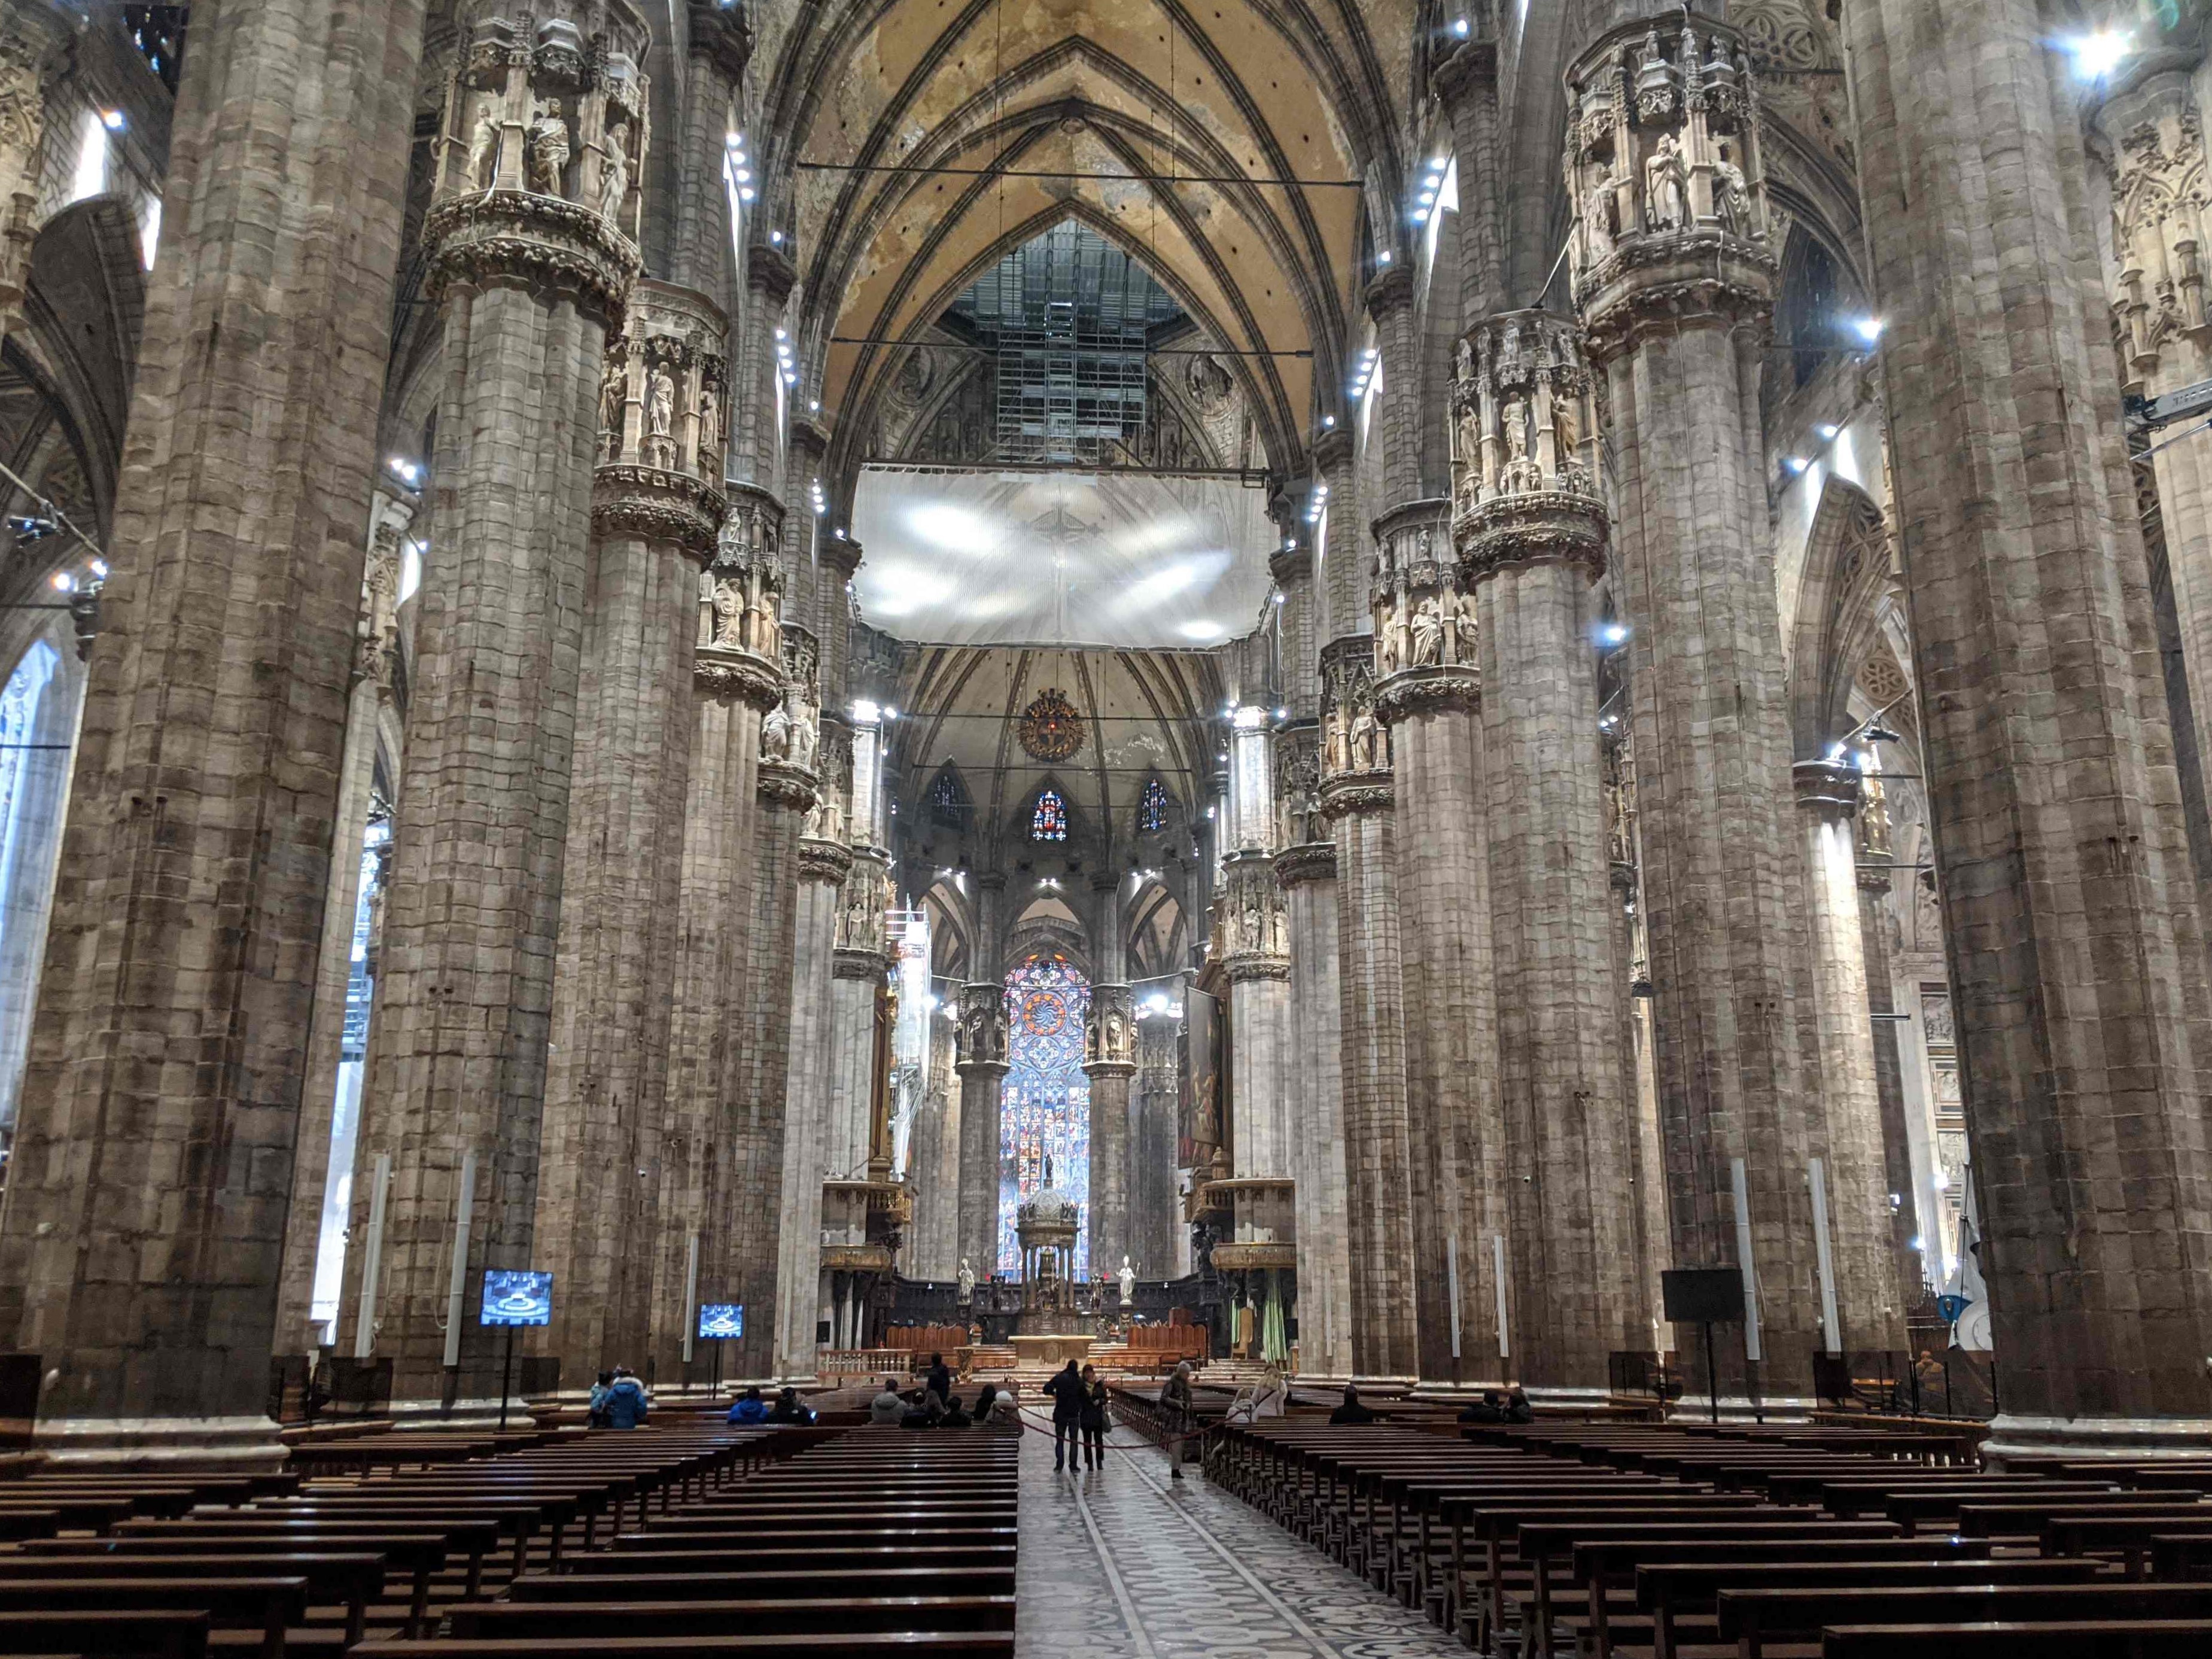
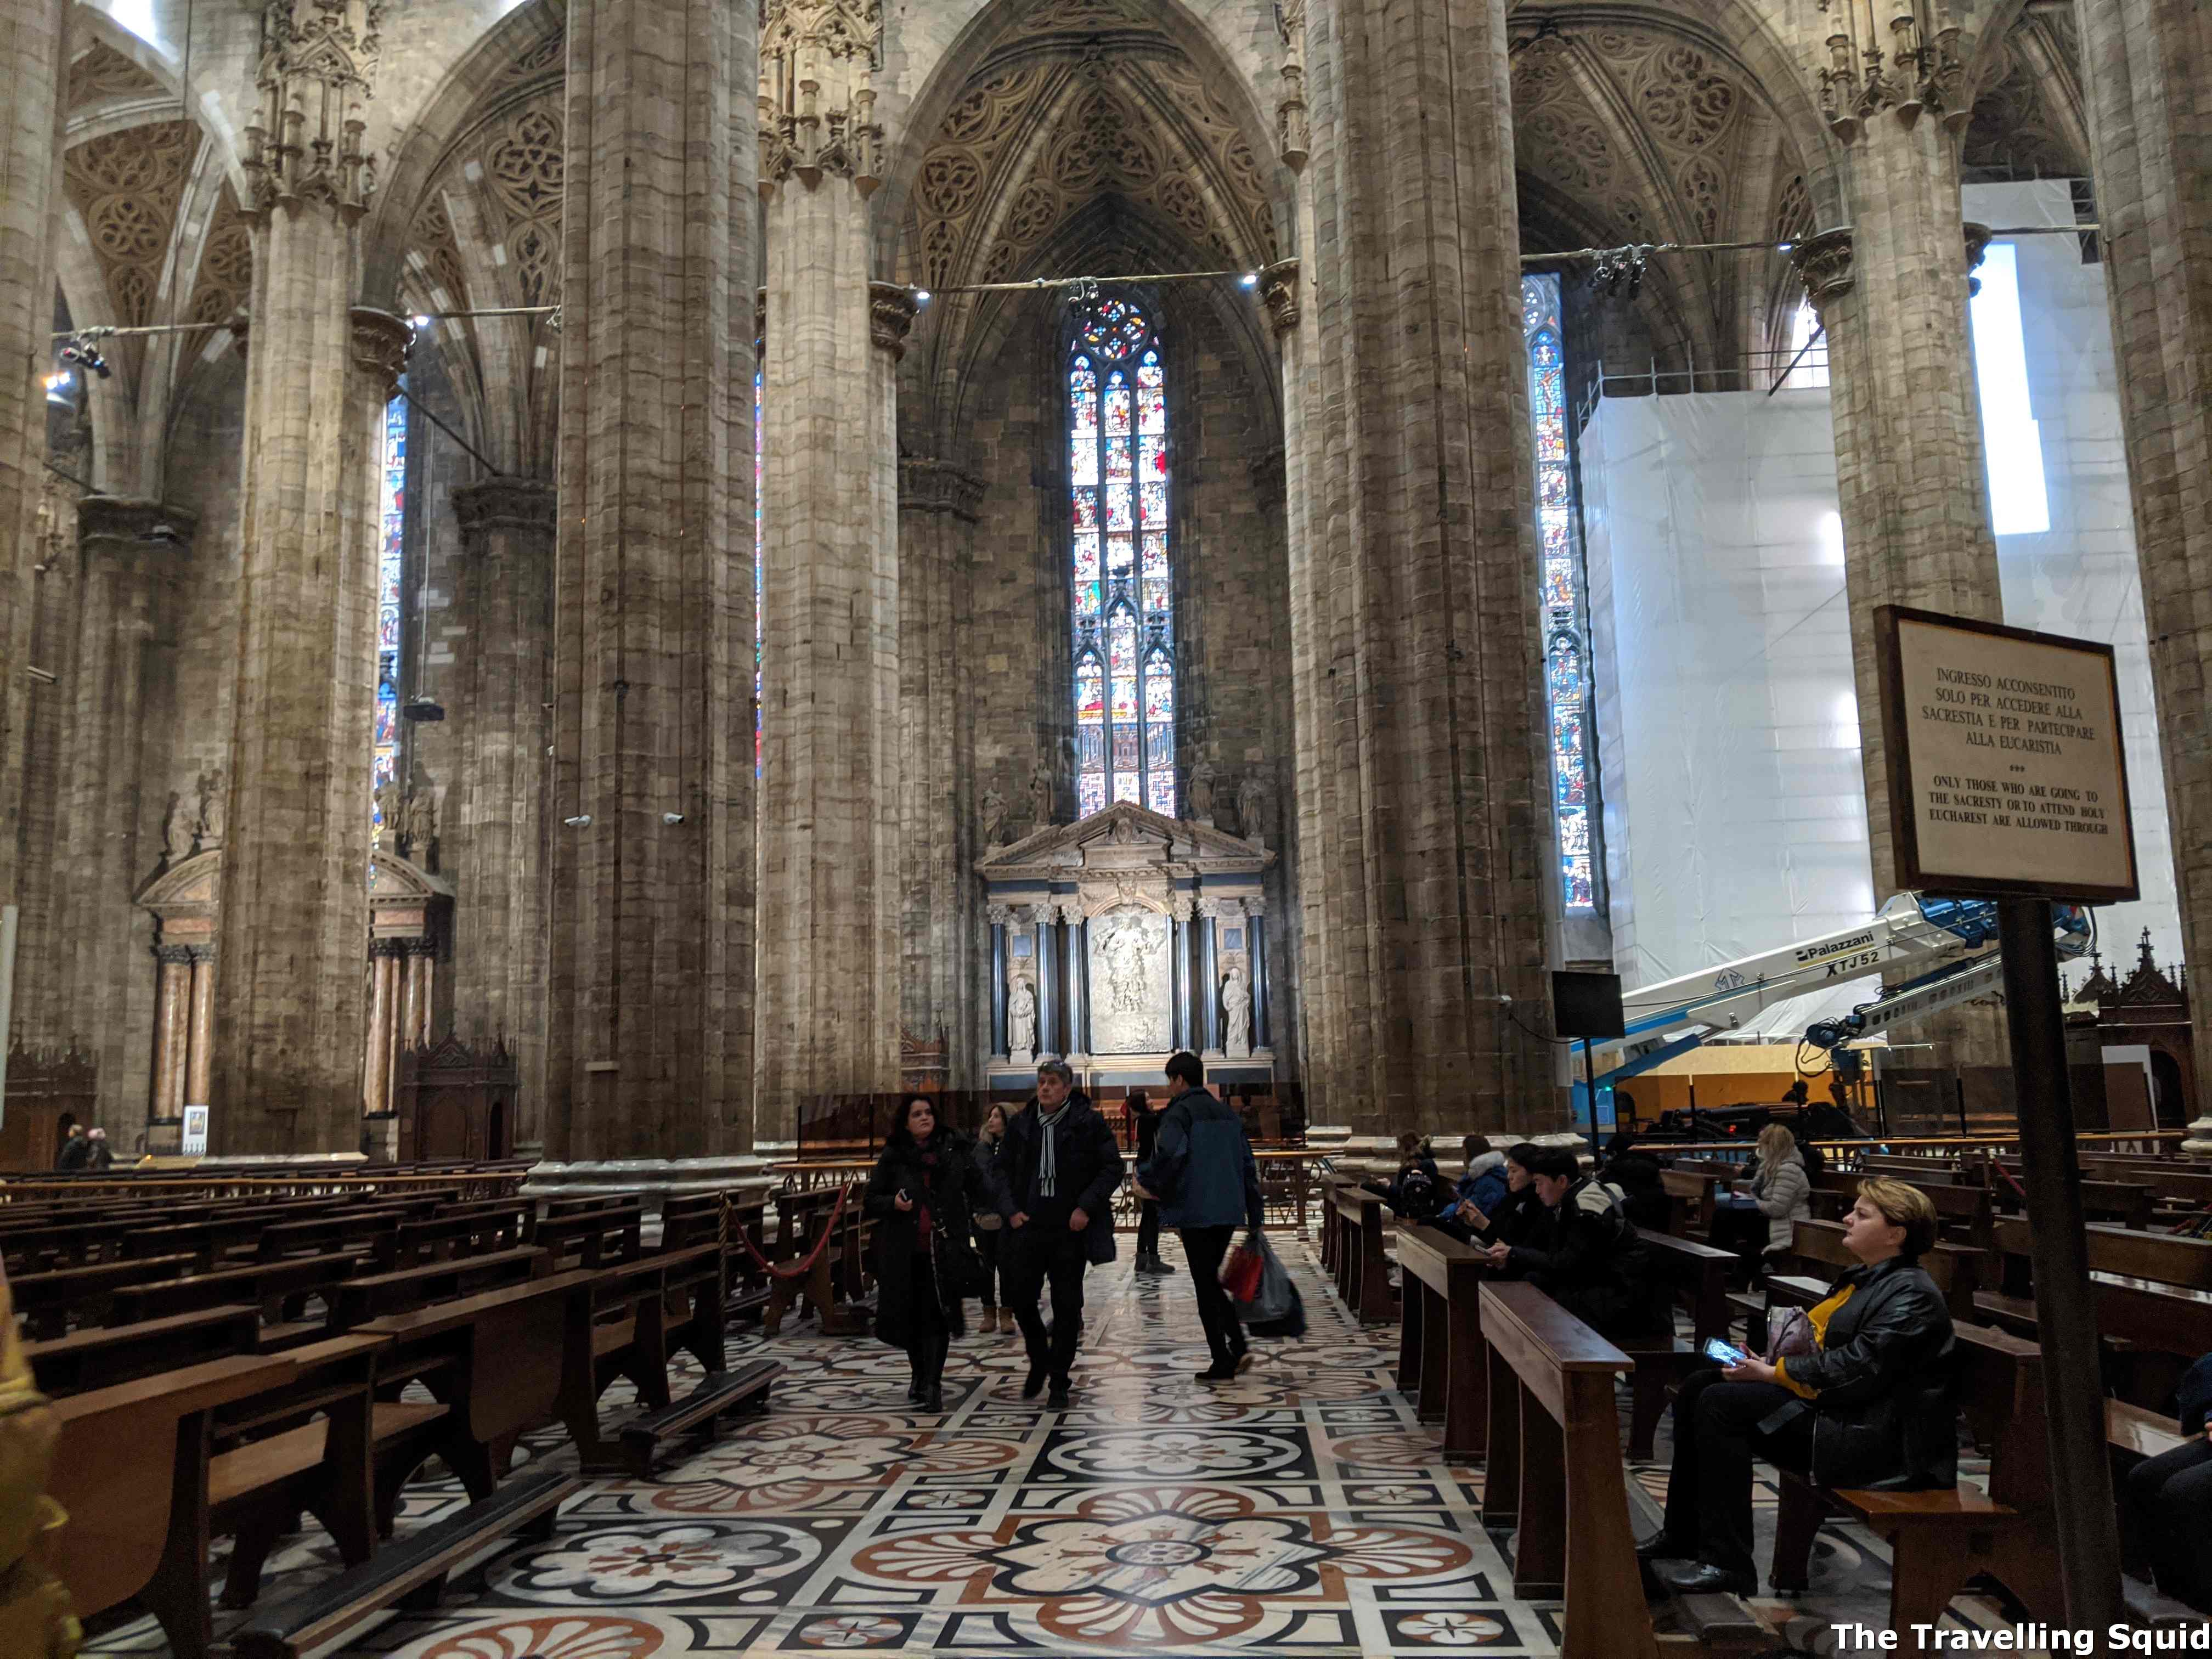
In all honesty, we spent a really short time in the Cathedral. It’s a structure which would make you go ‘wow’, but it is not unlike other churches we have seen in Europe and Israel.
The worship area.Is it worth entering the Milan Cathedral?
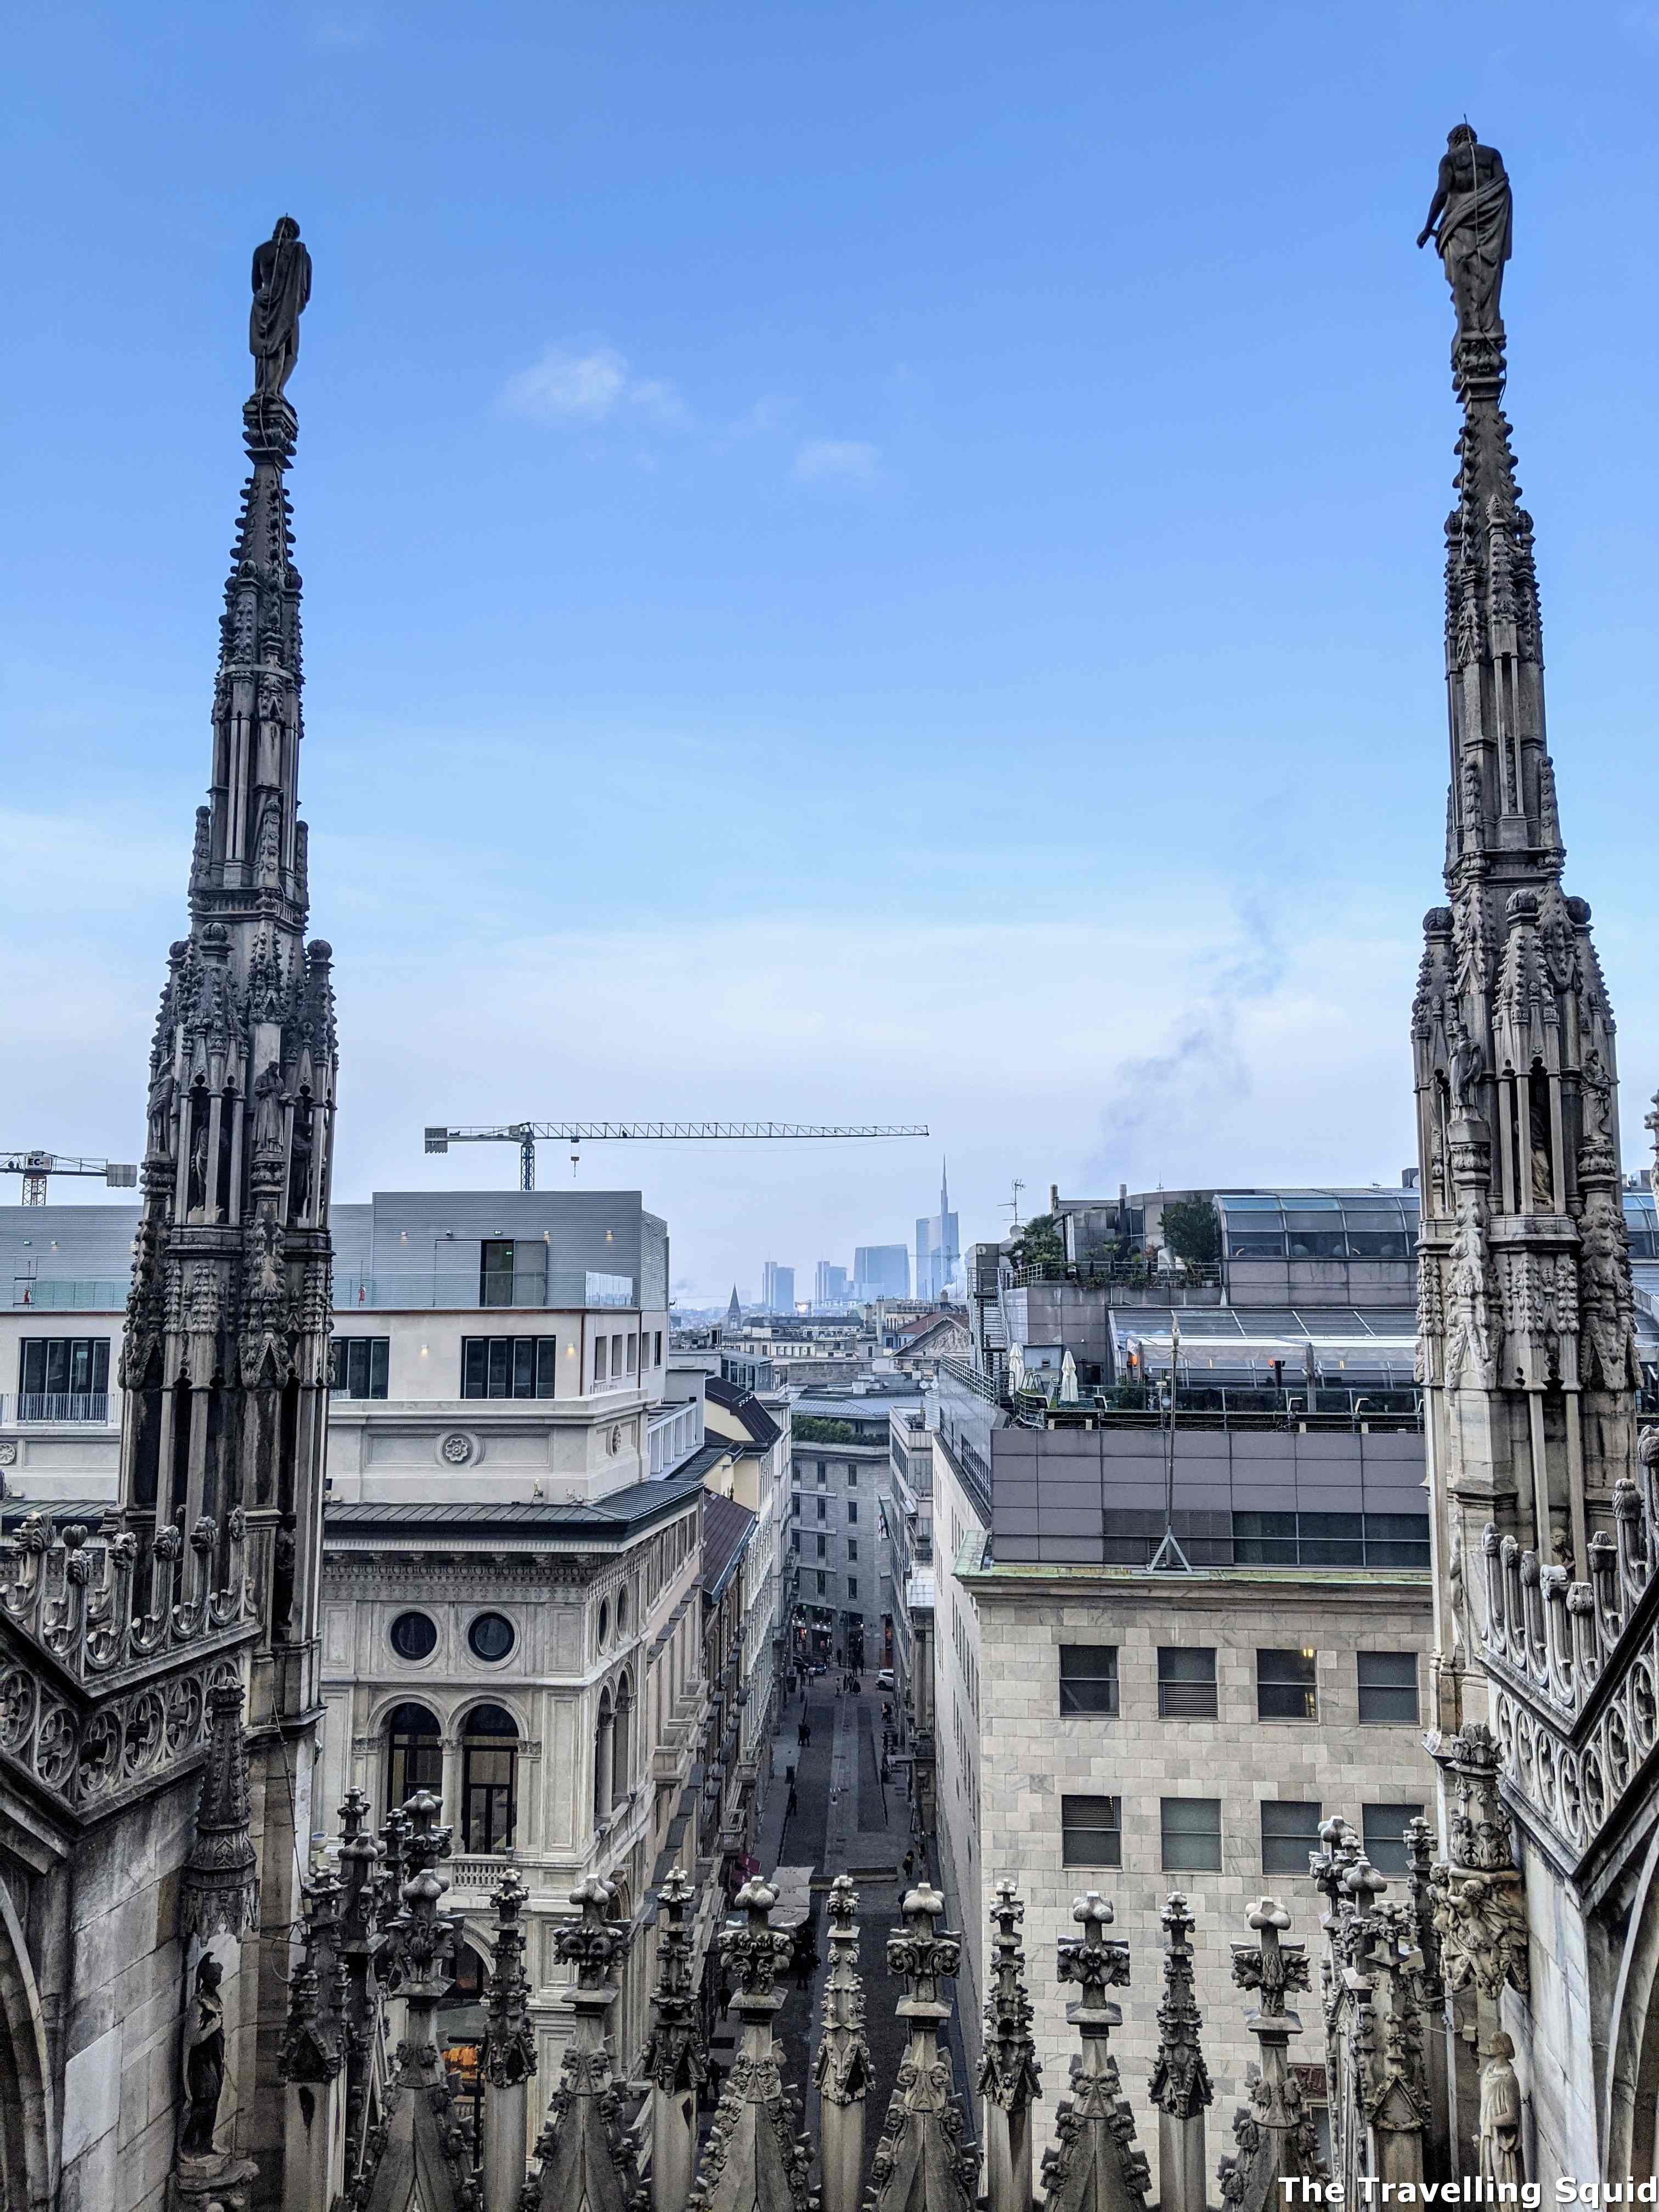
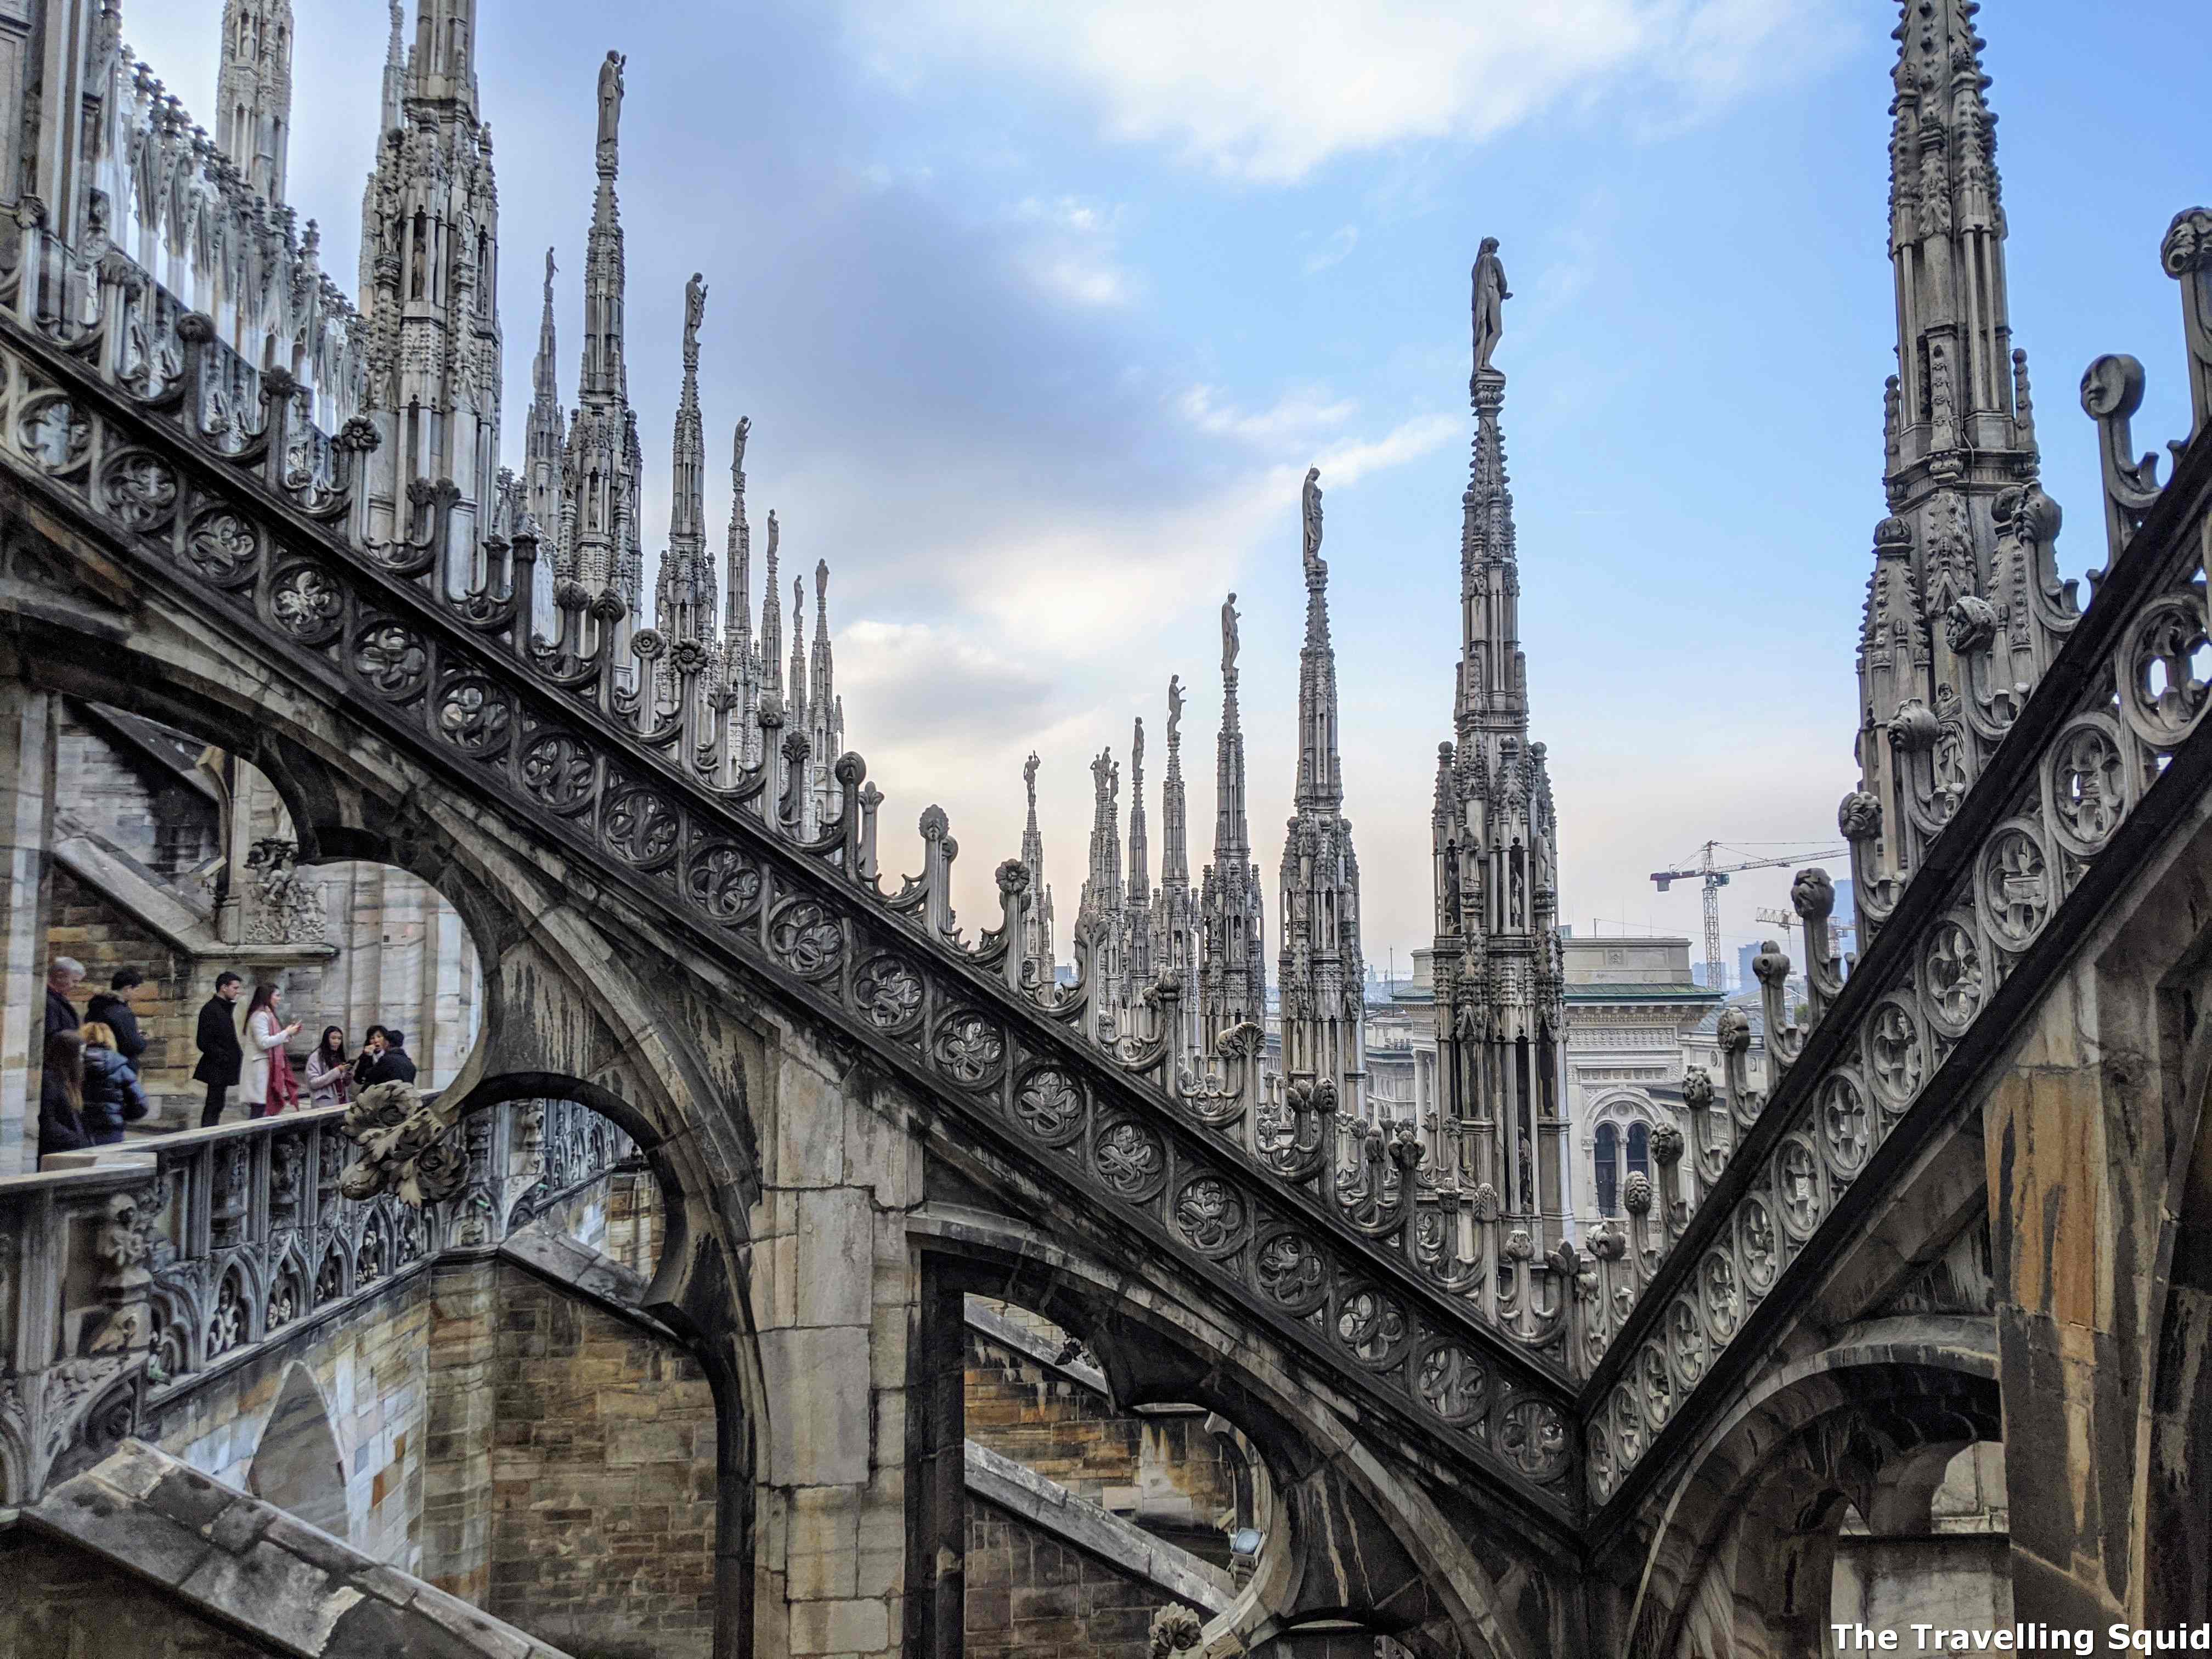
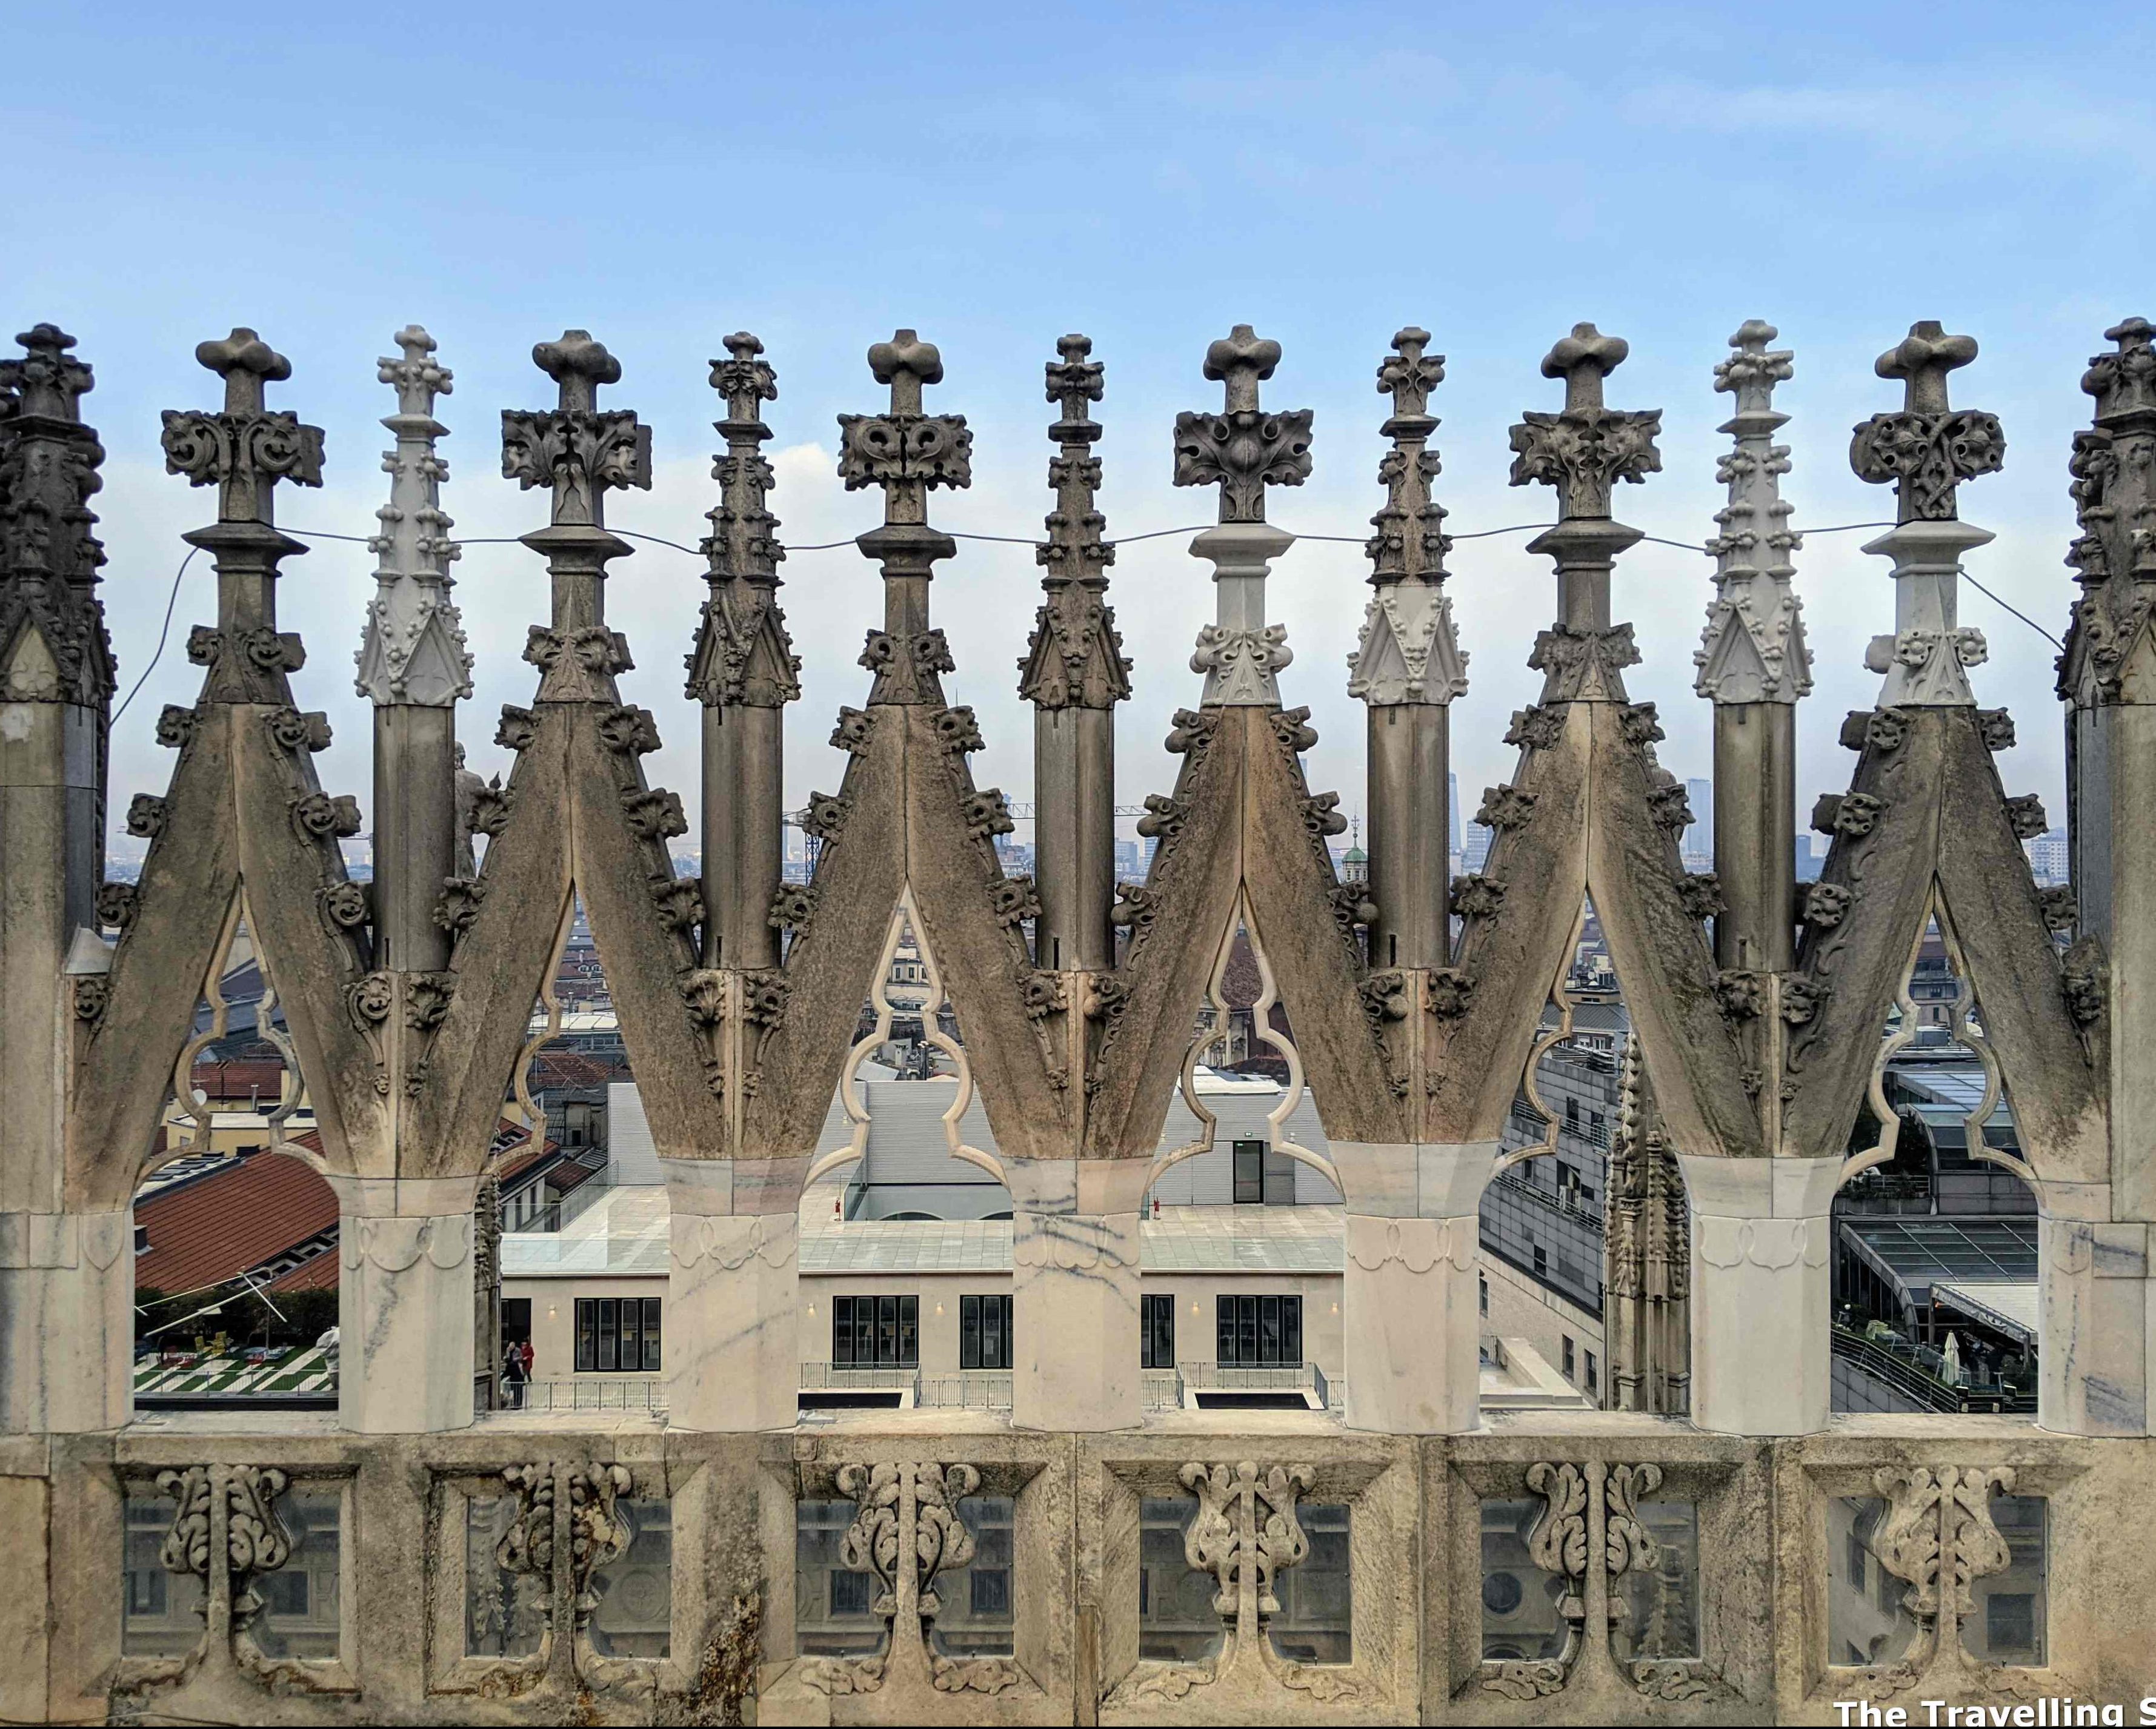
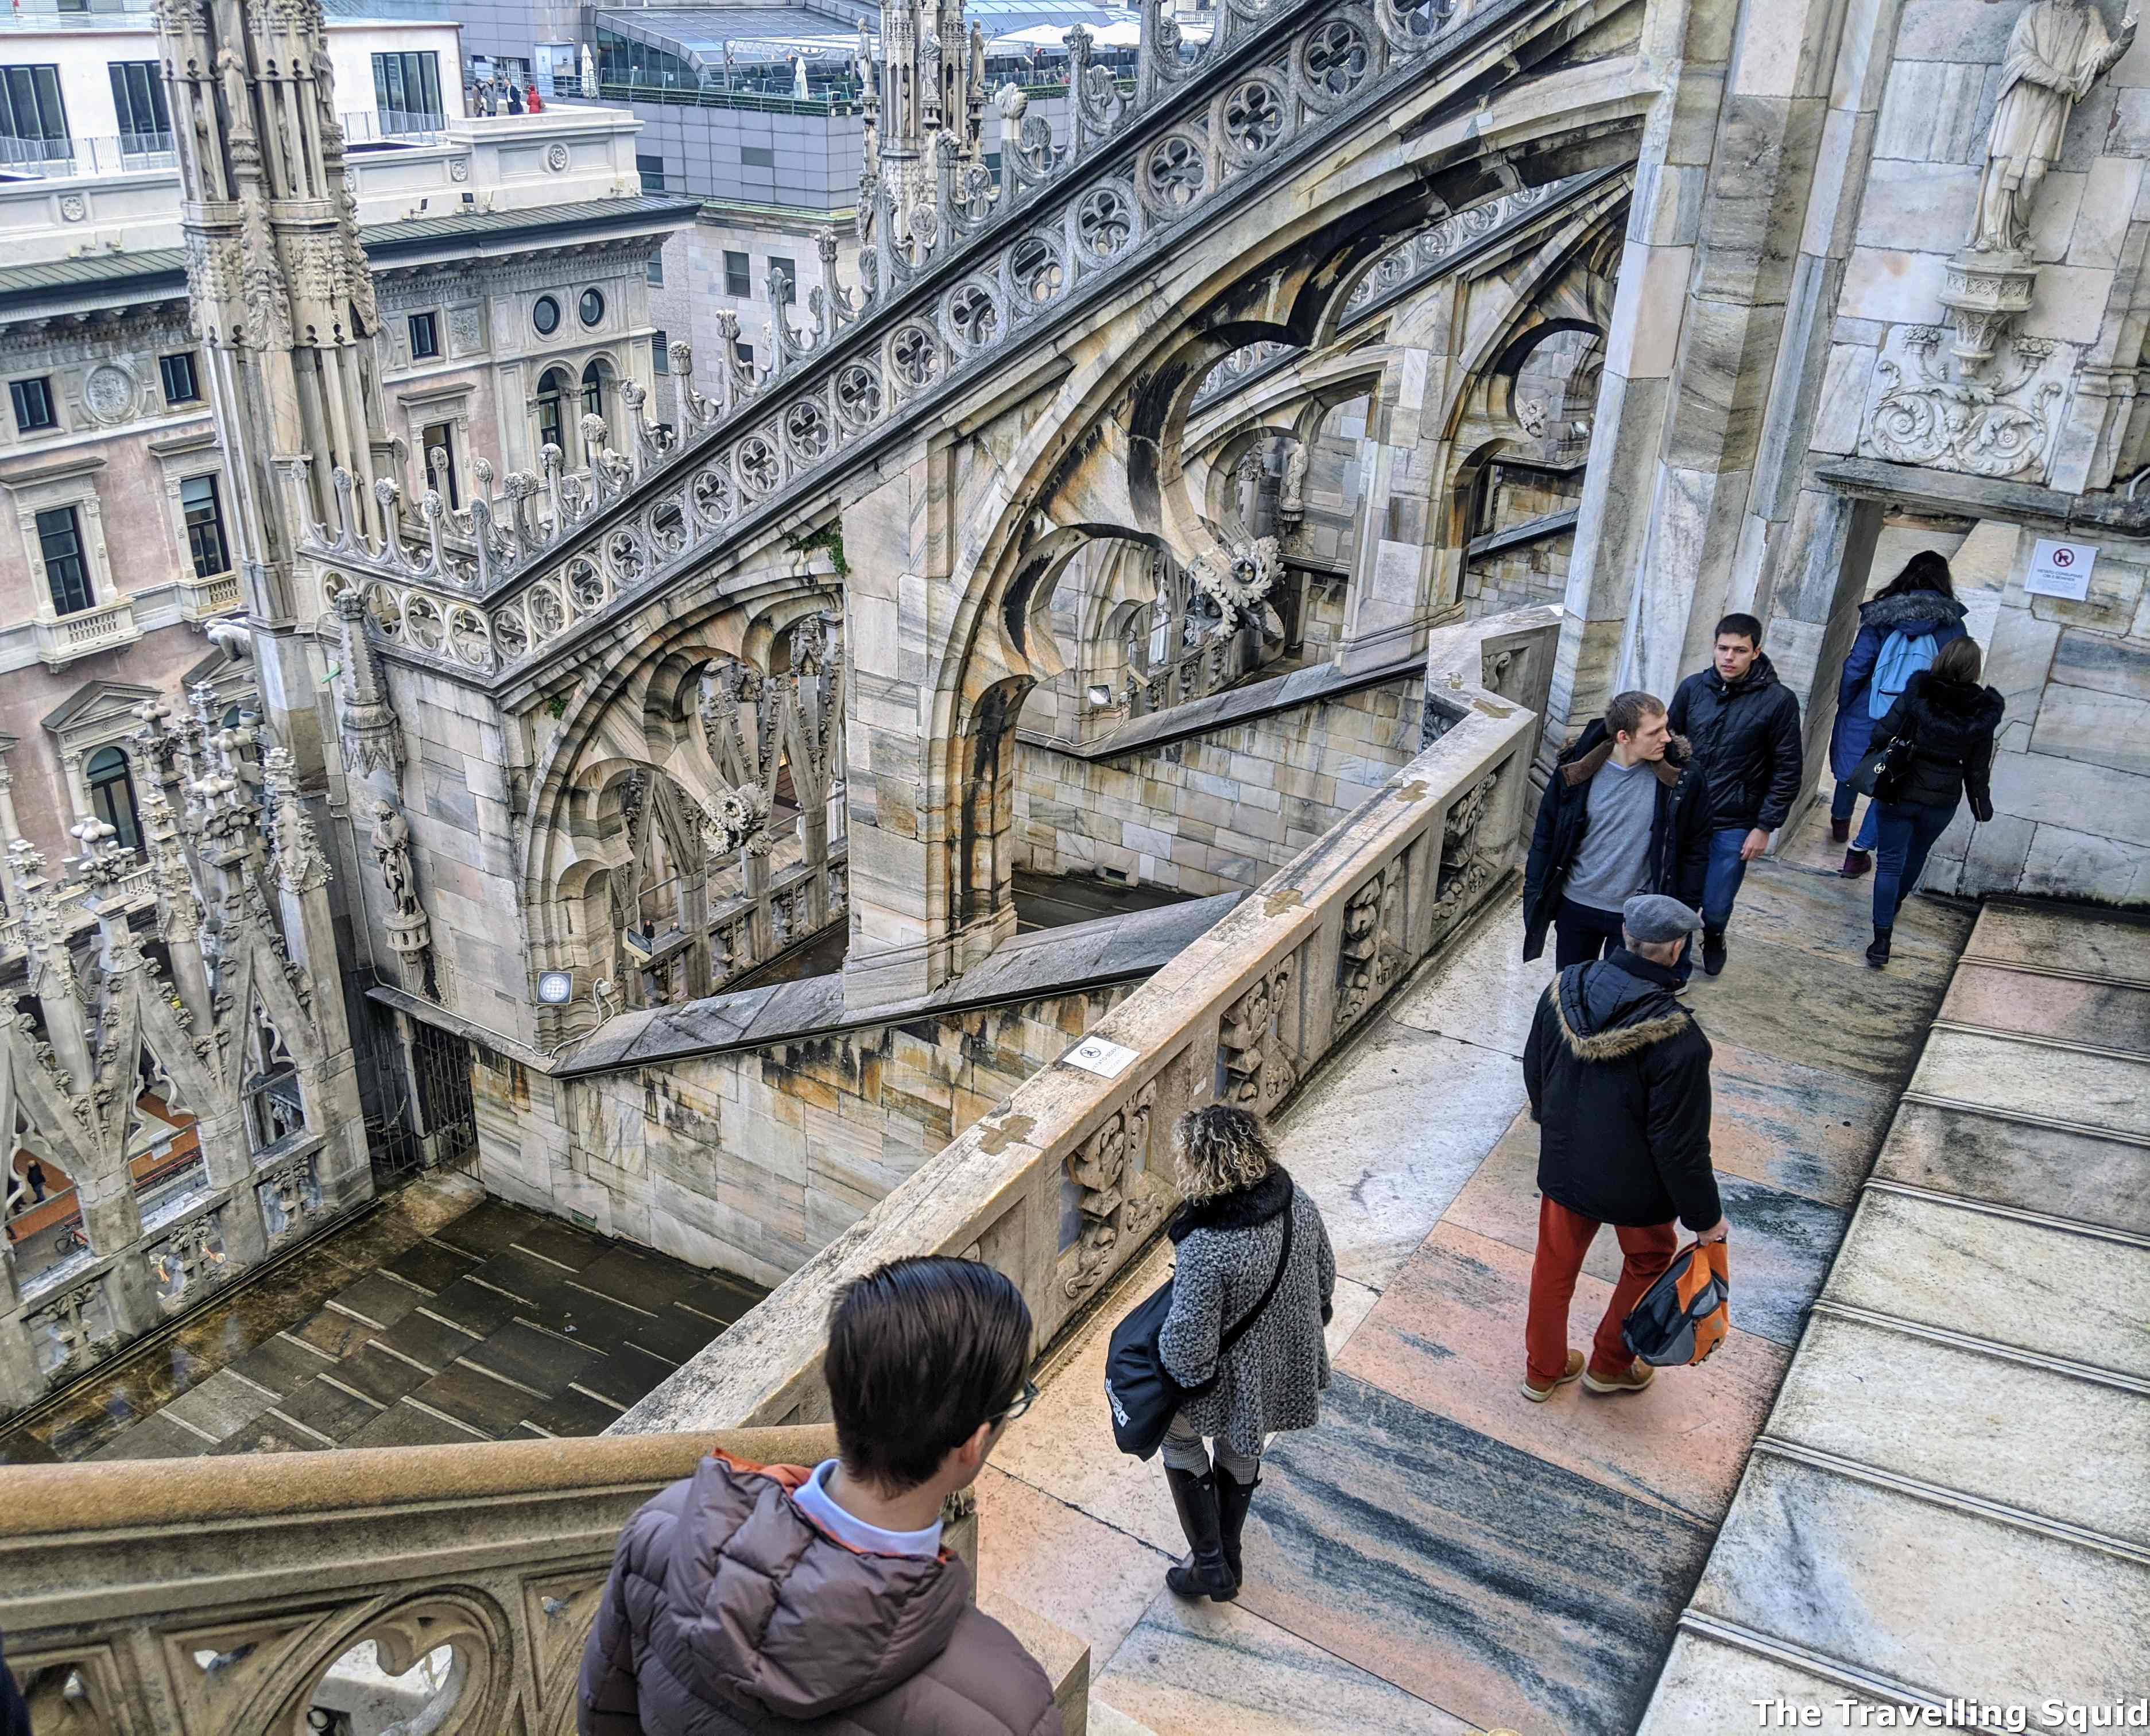
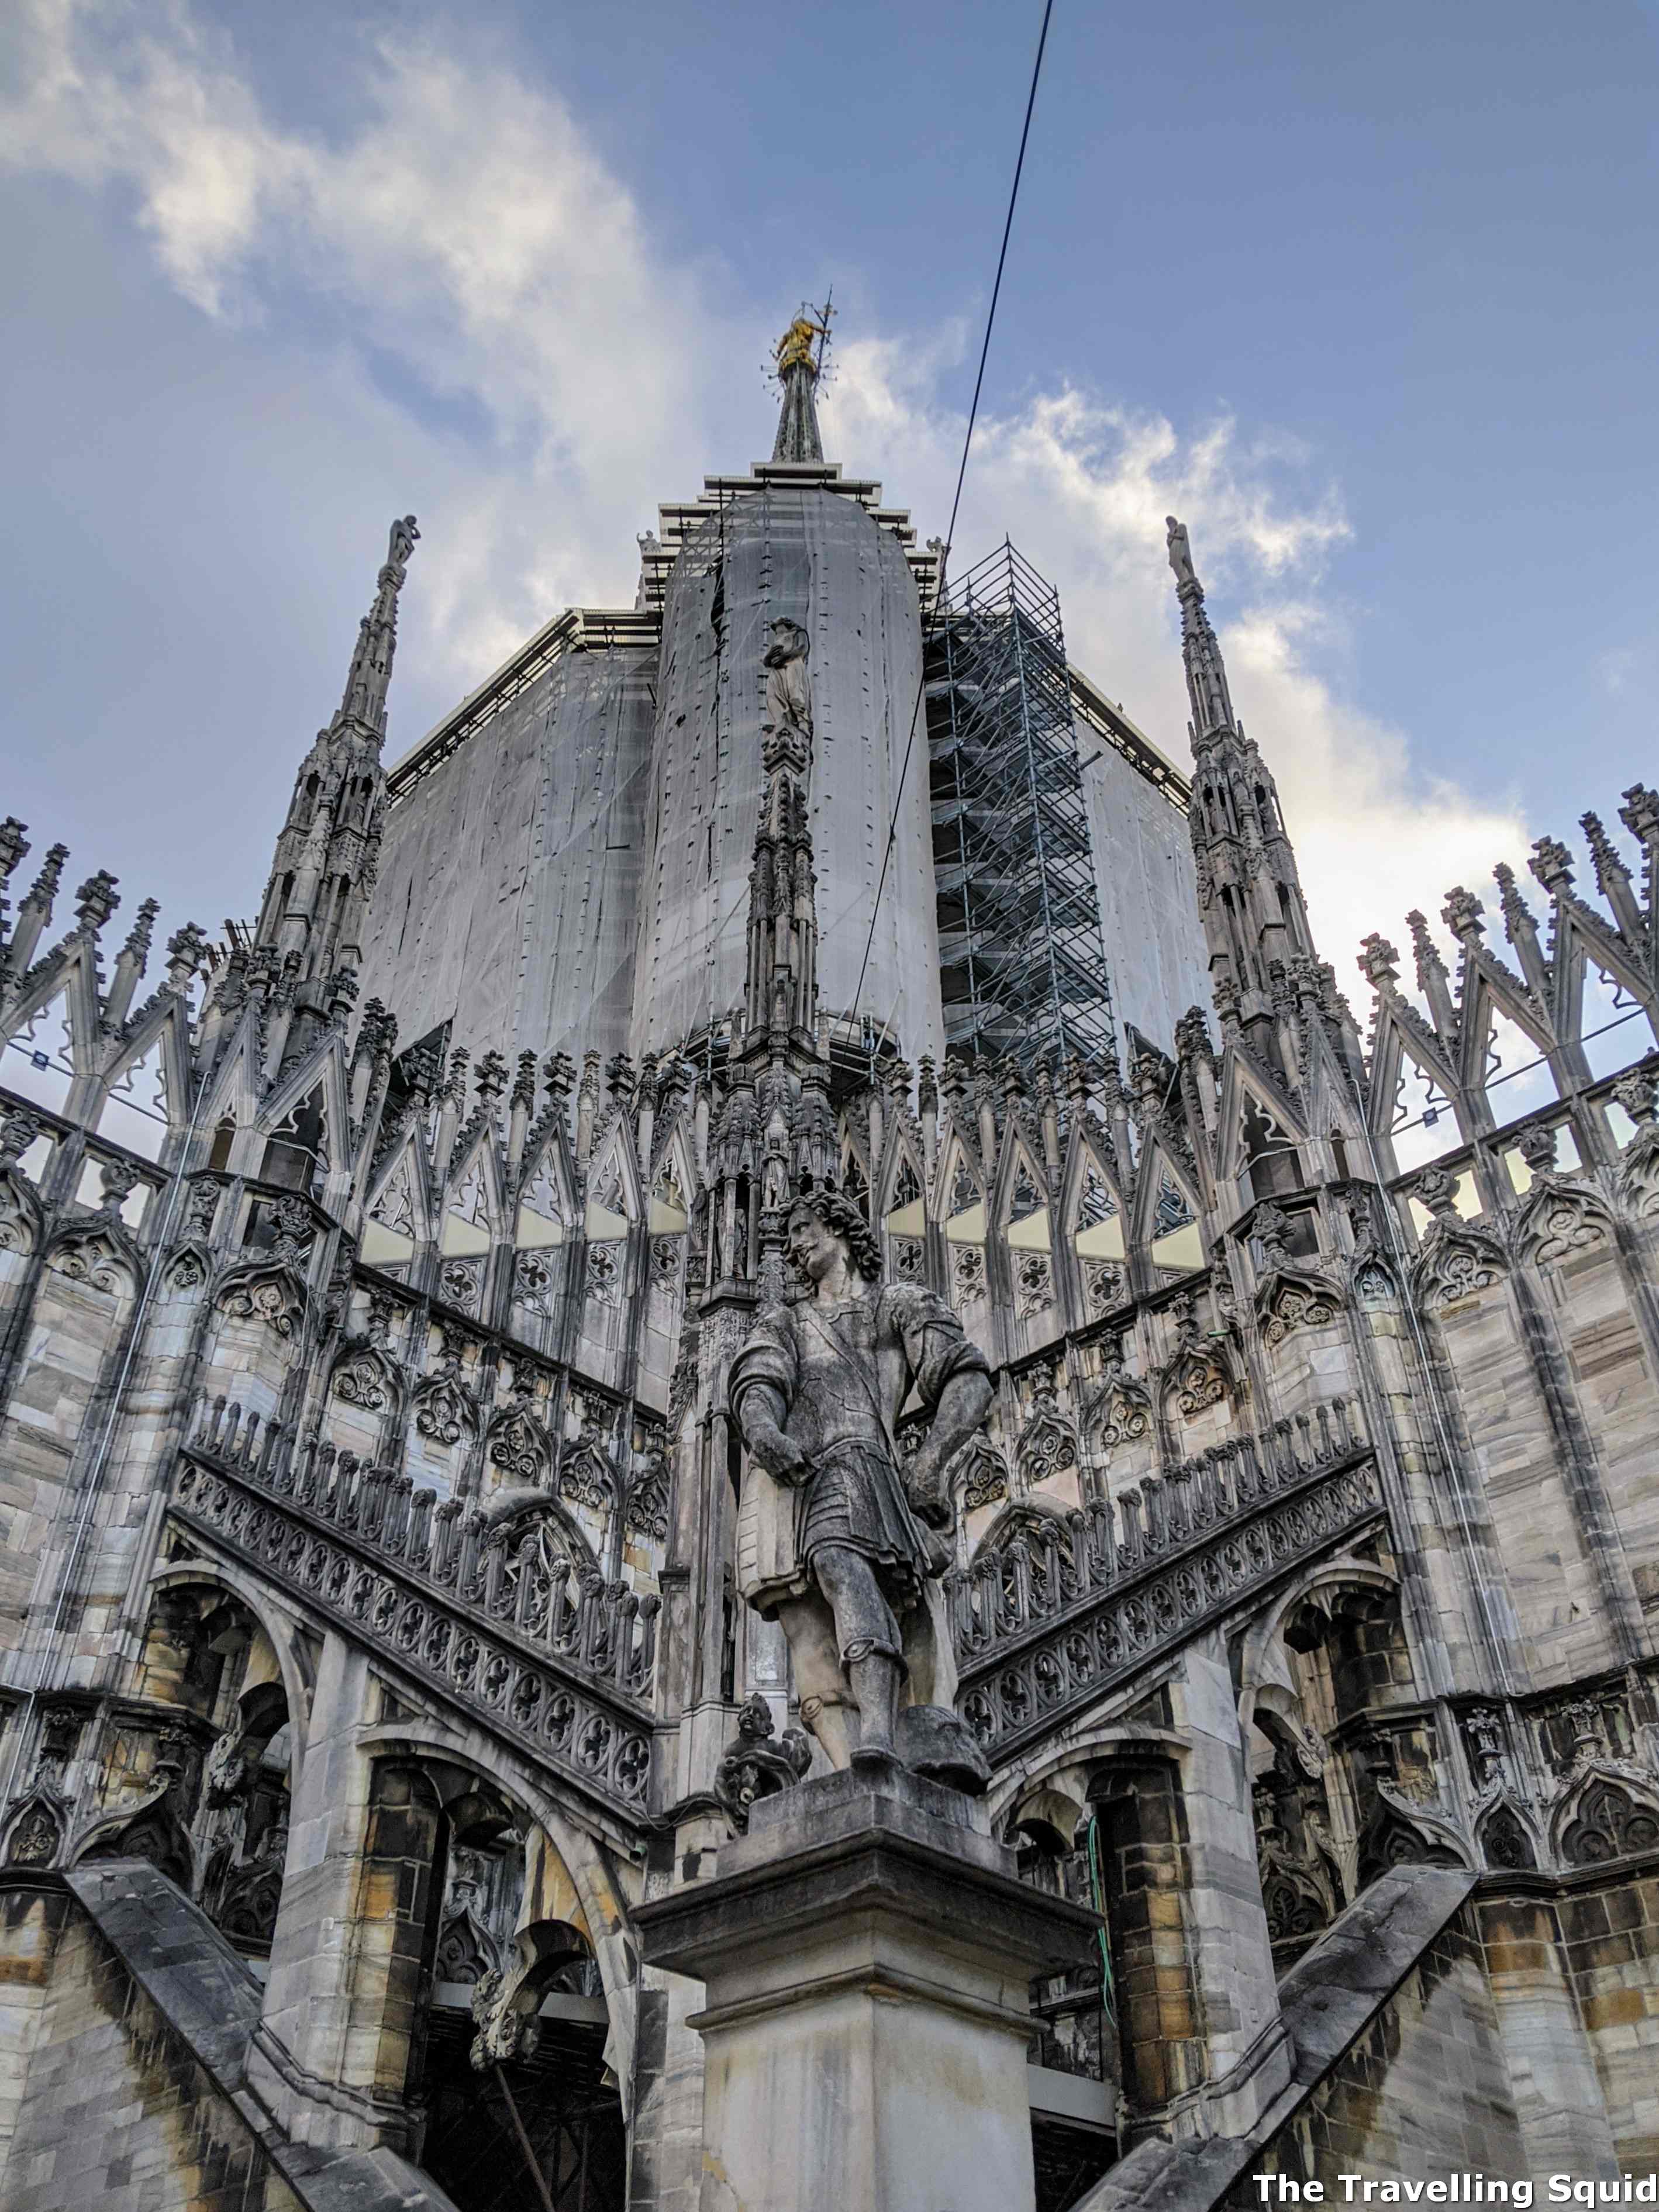
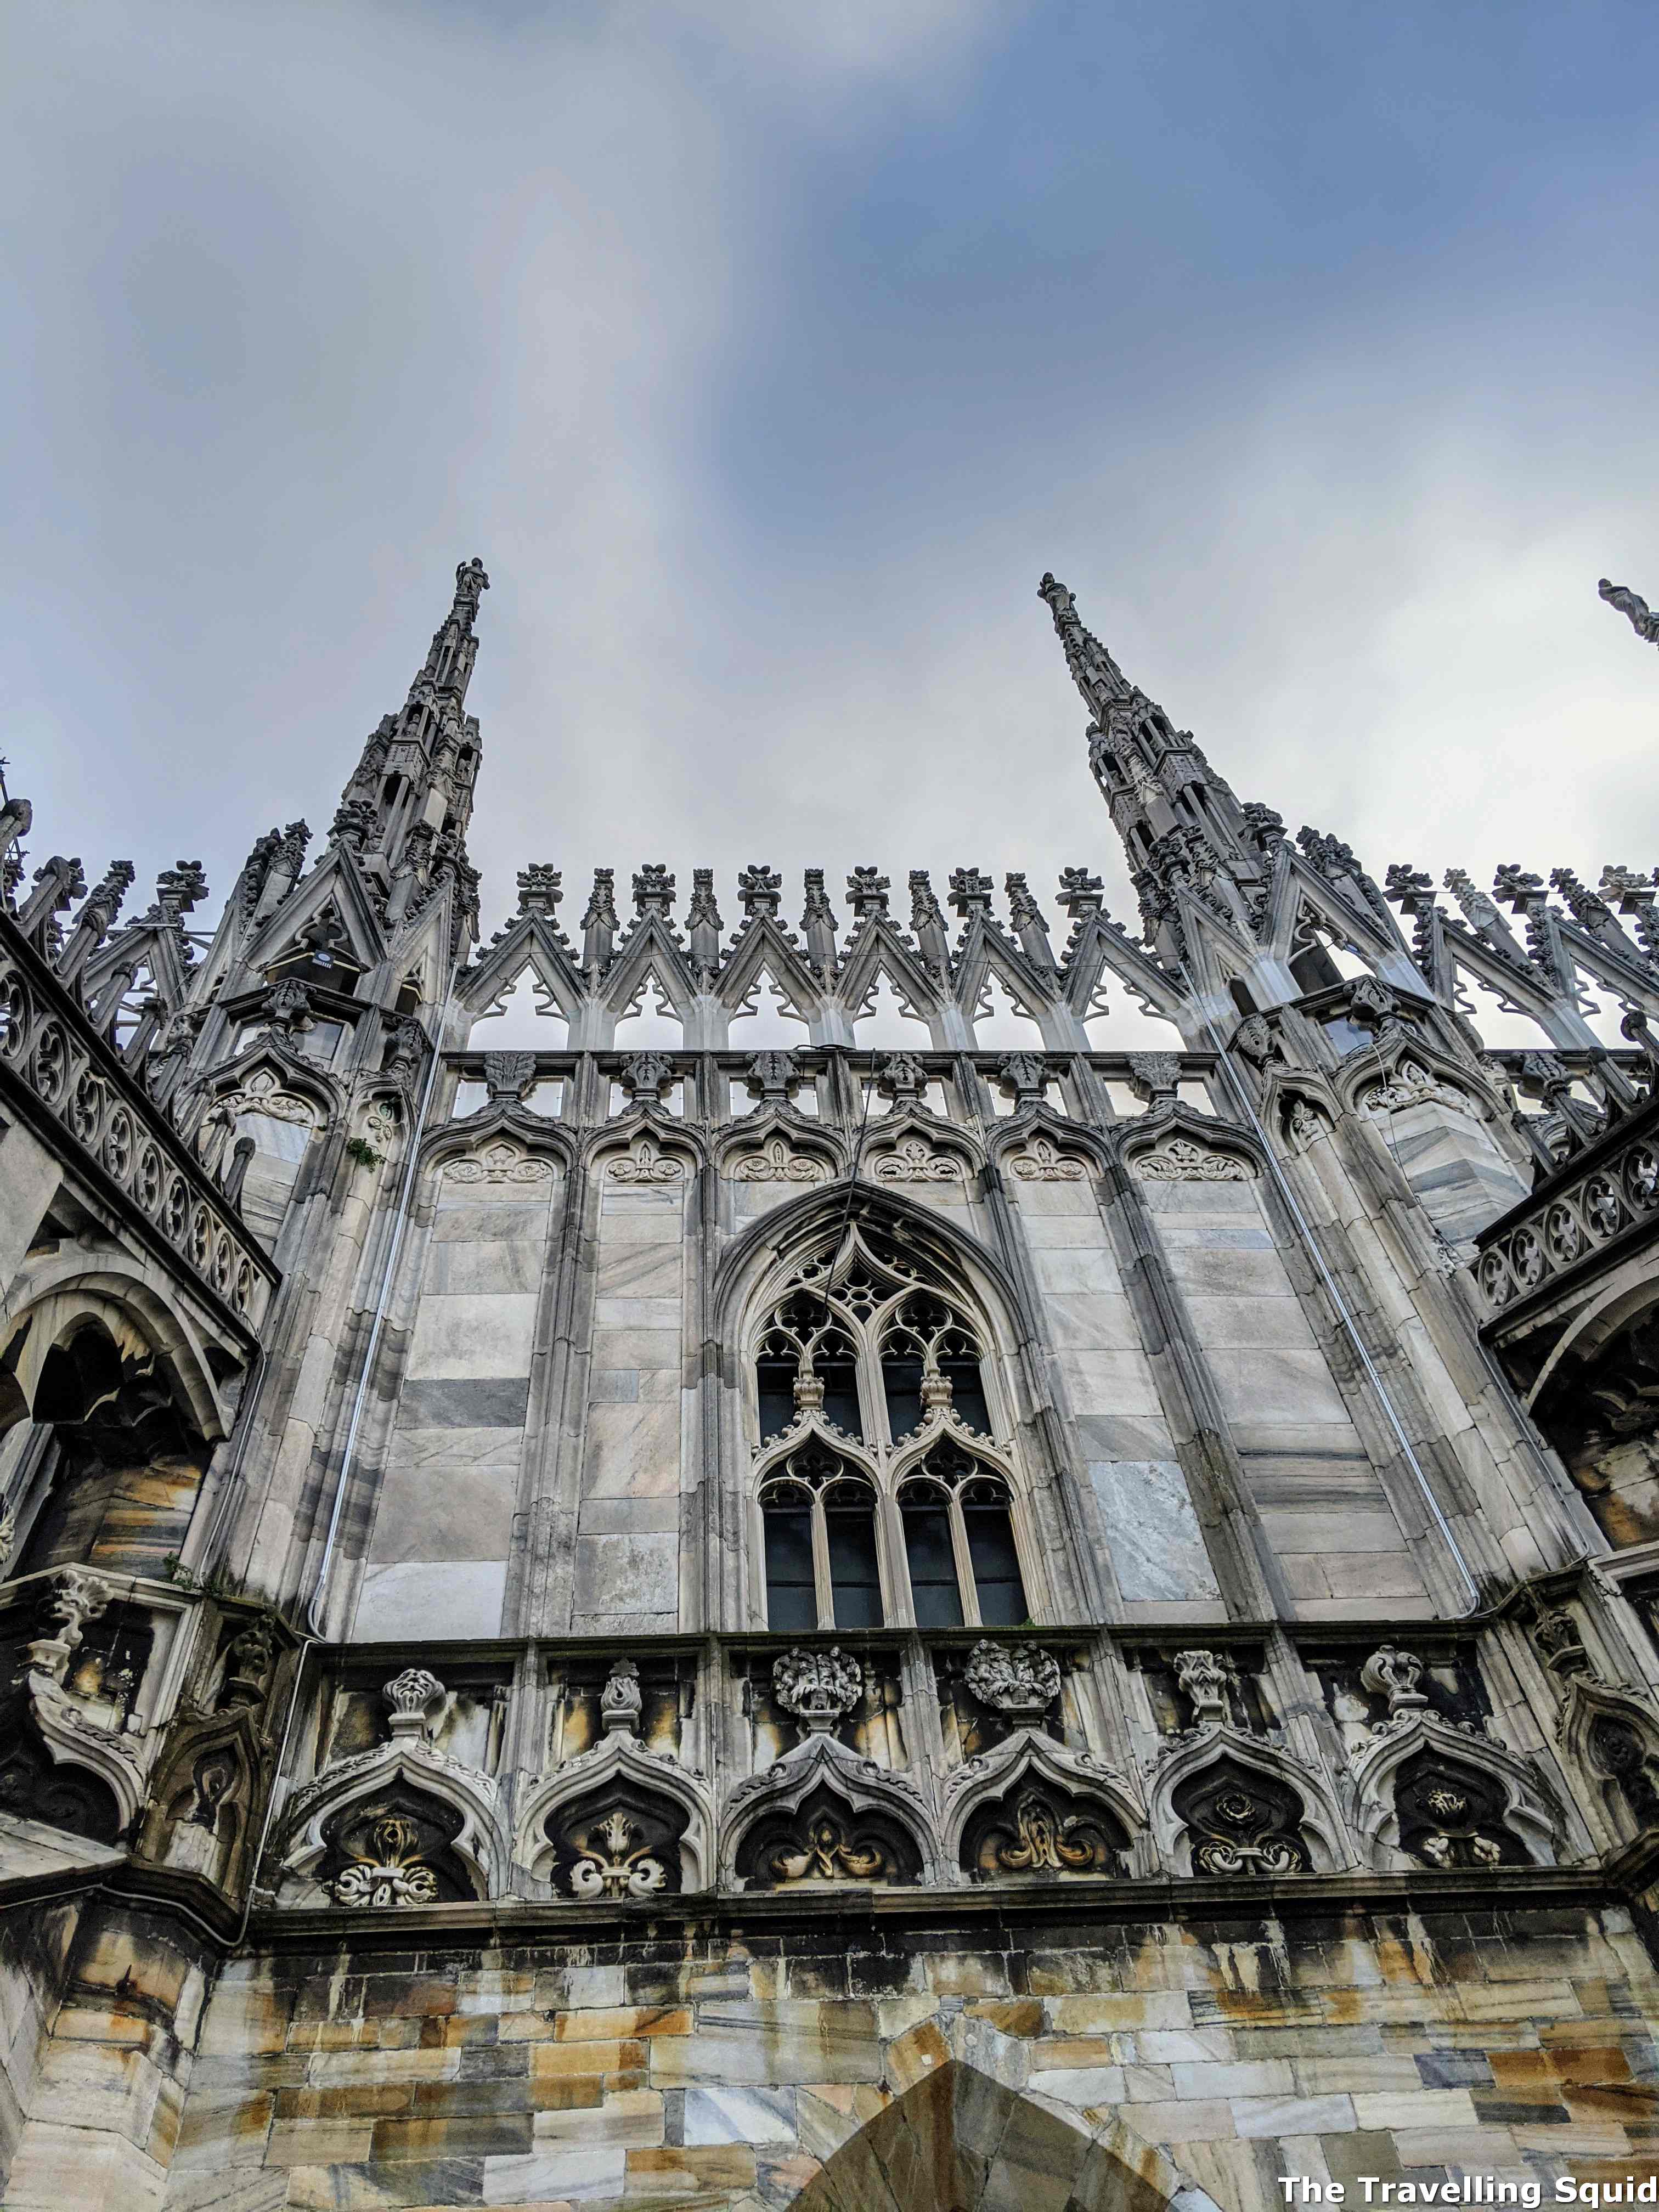
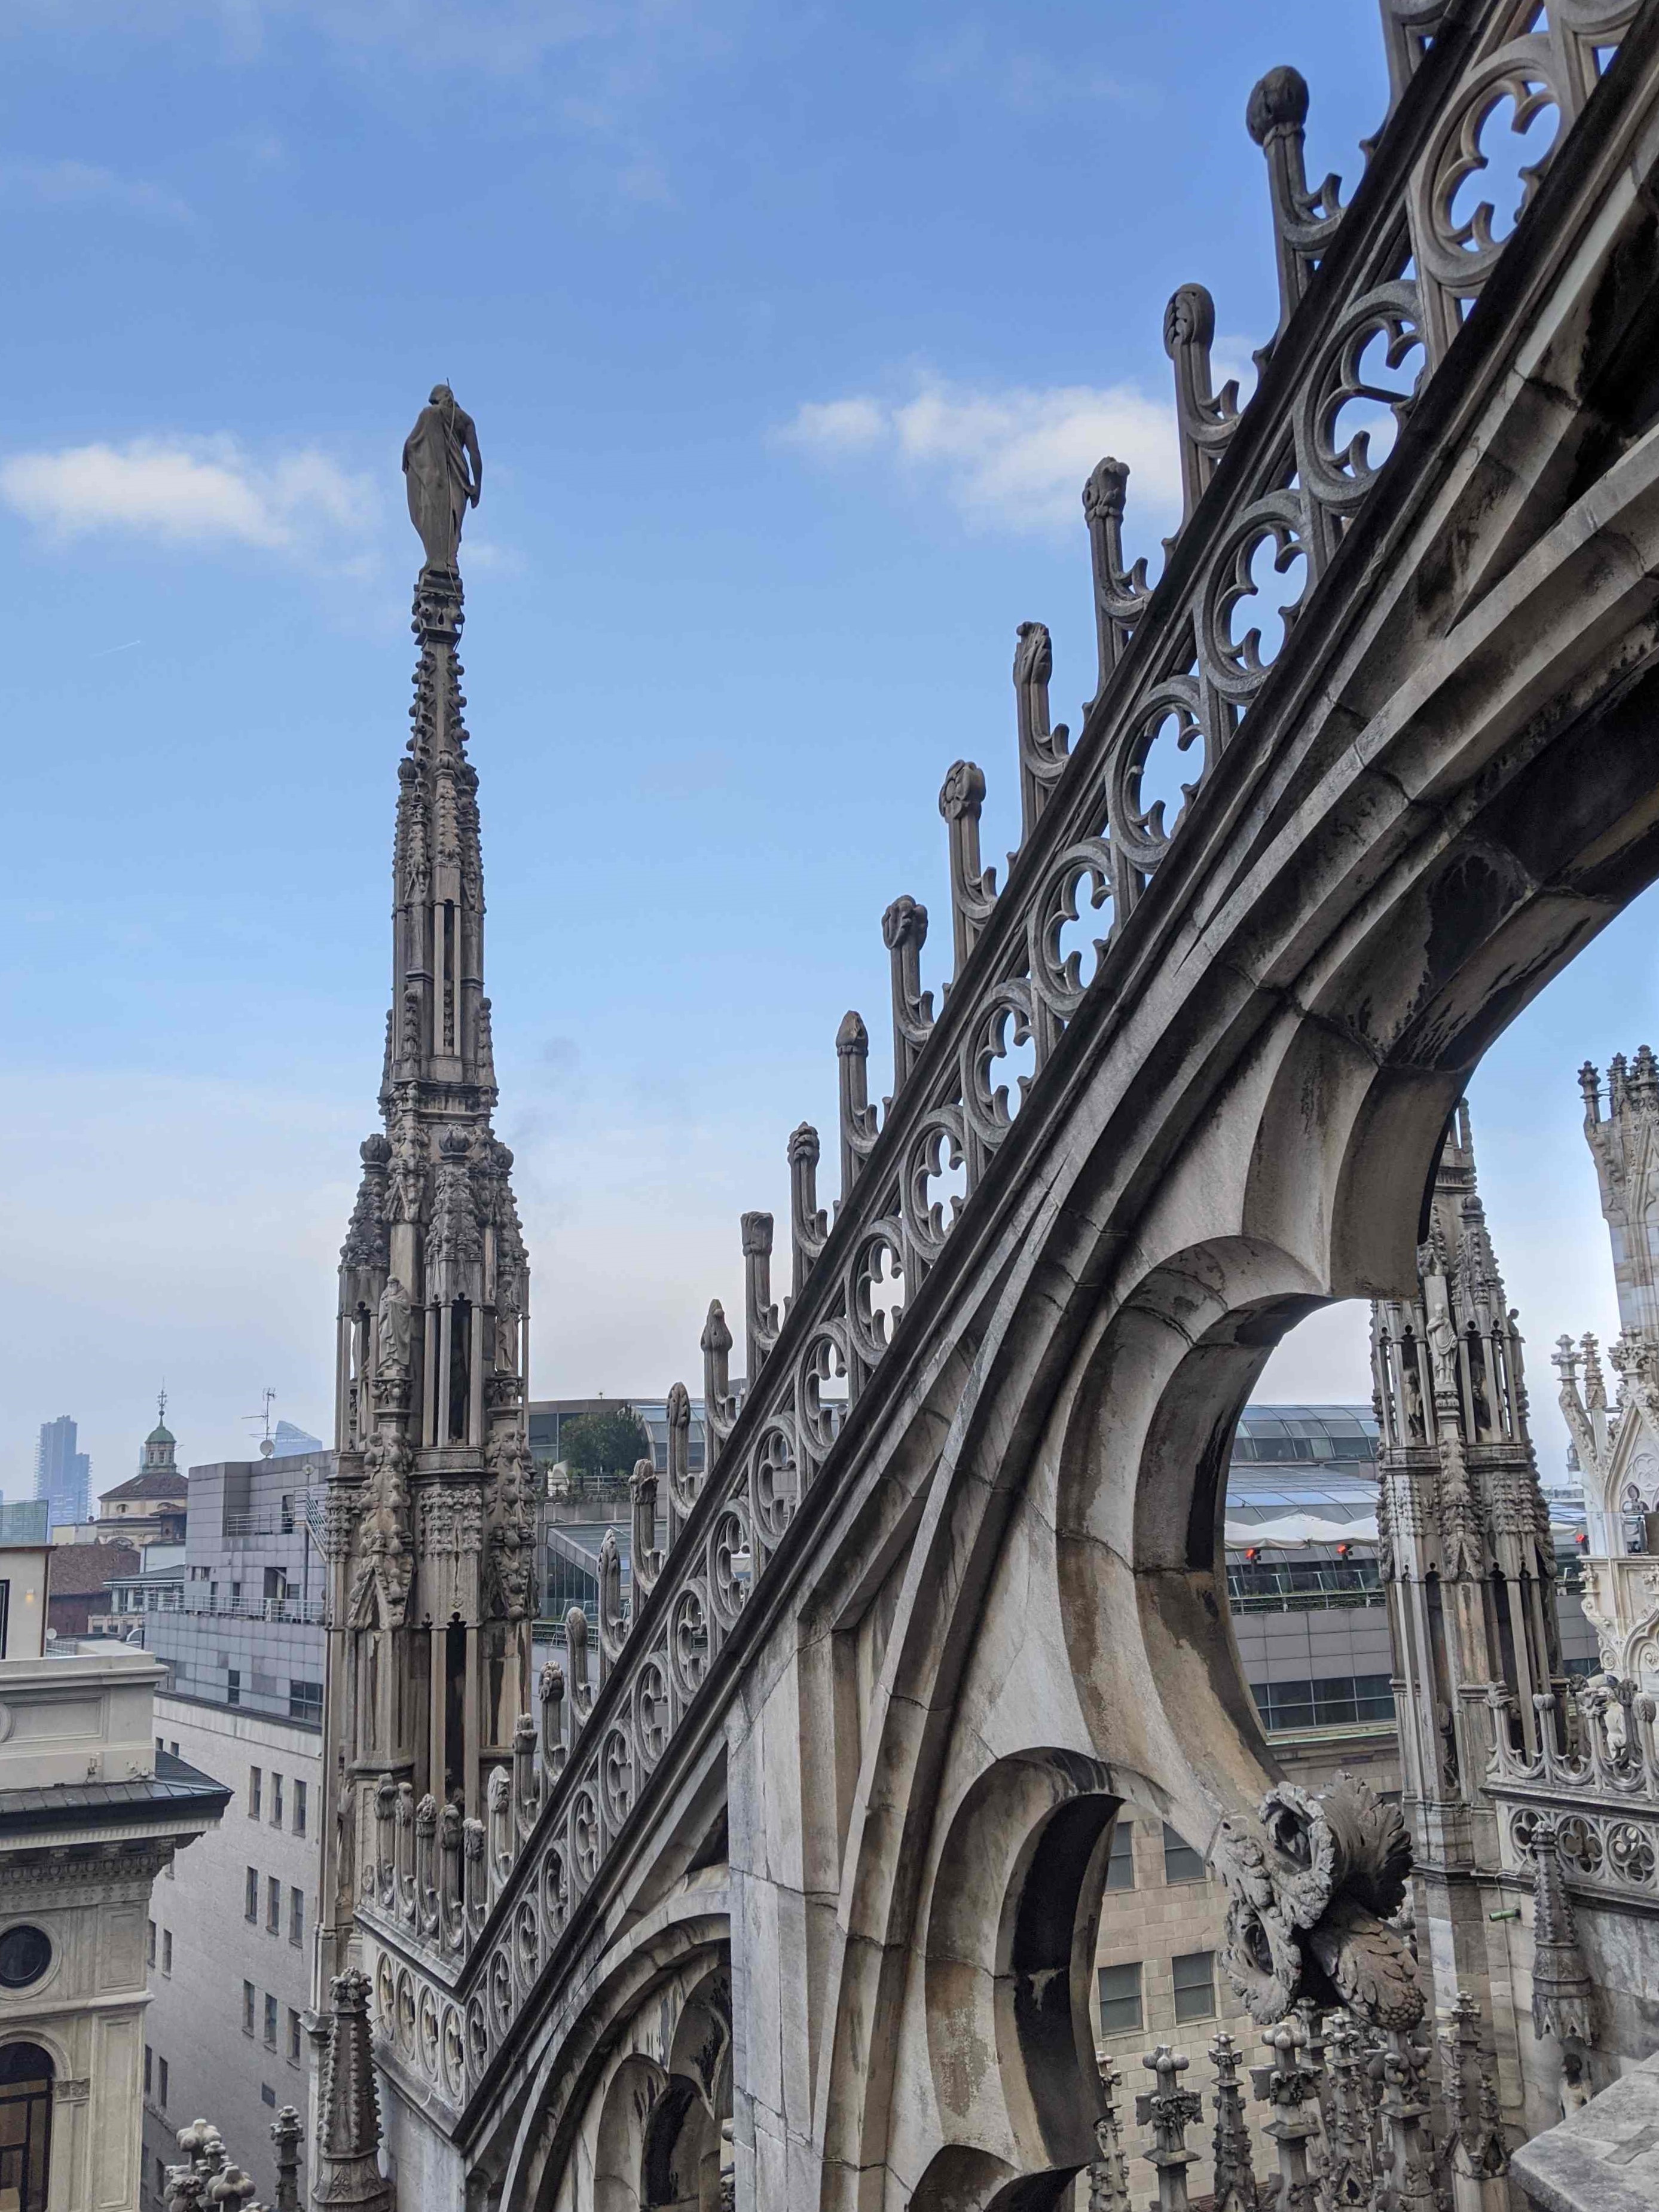
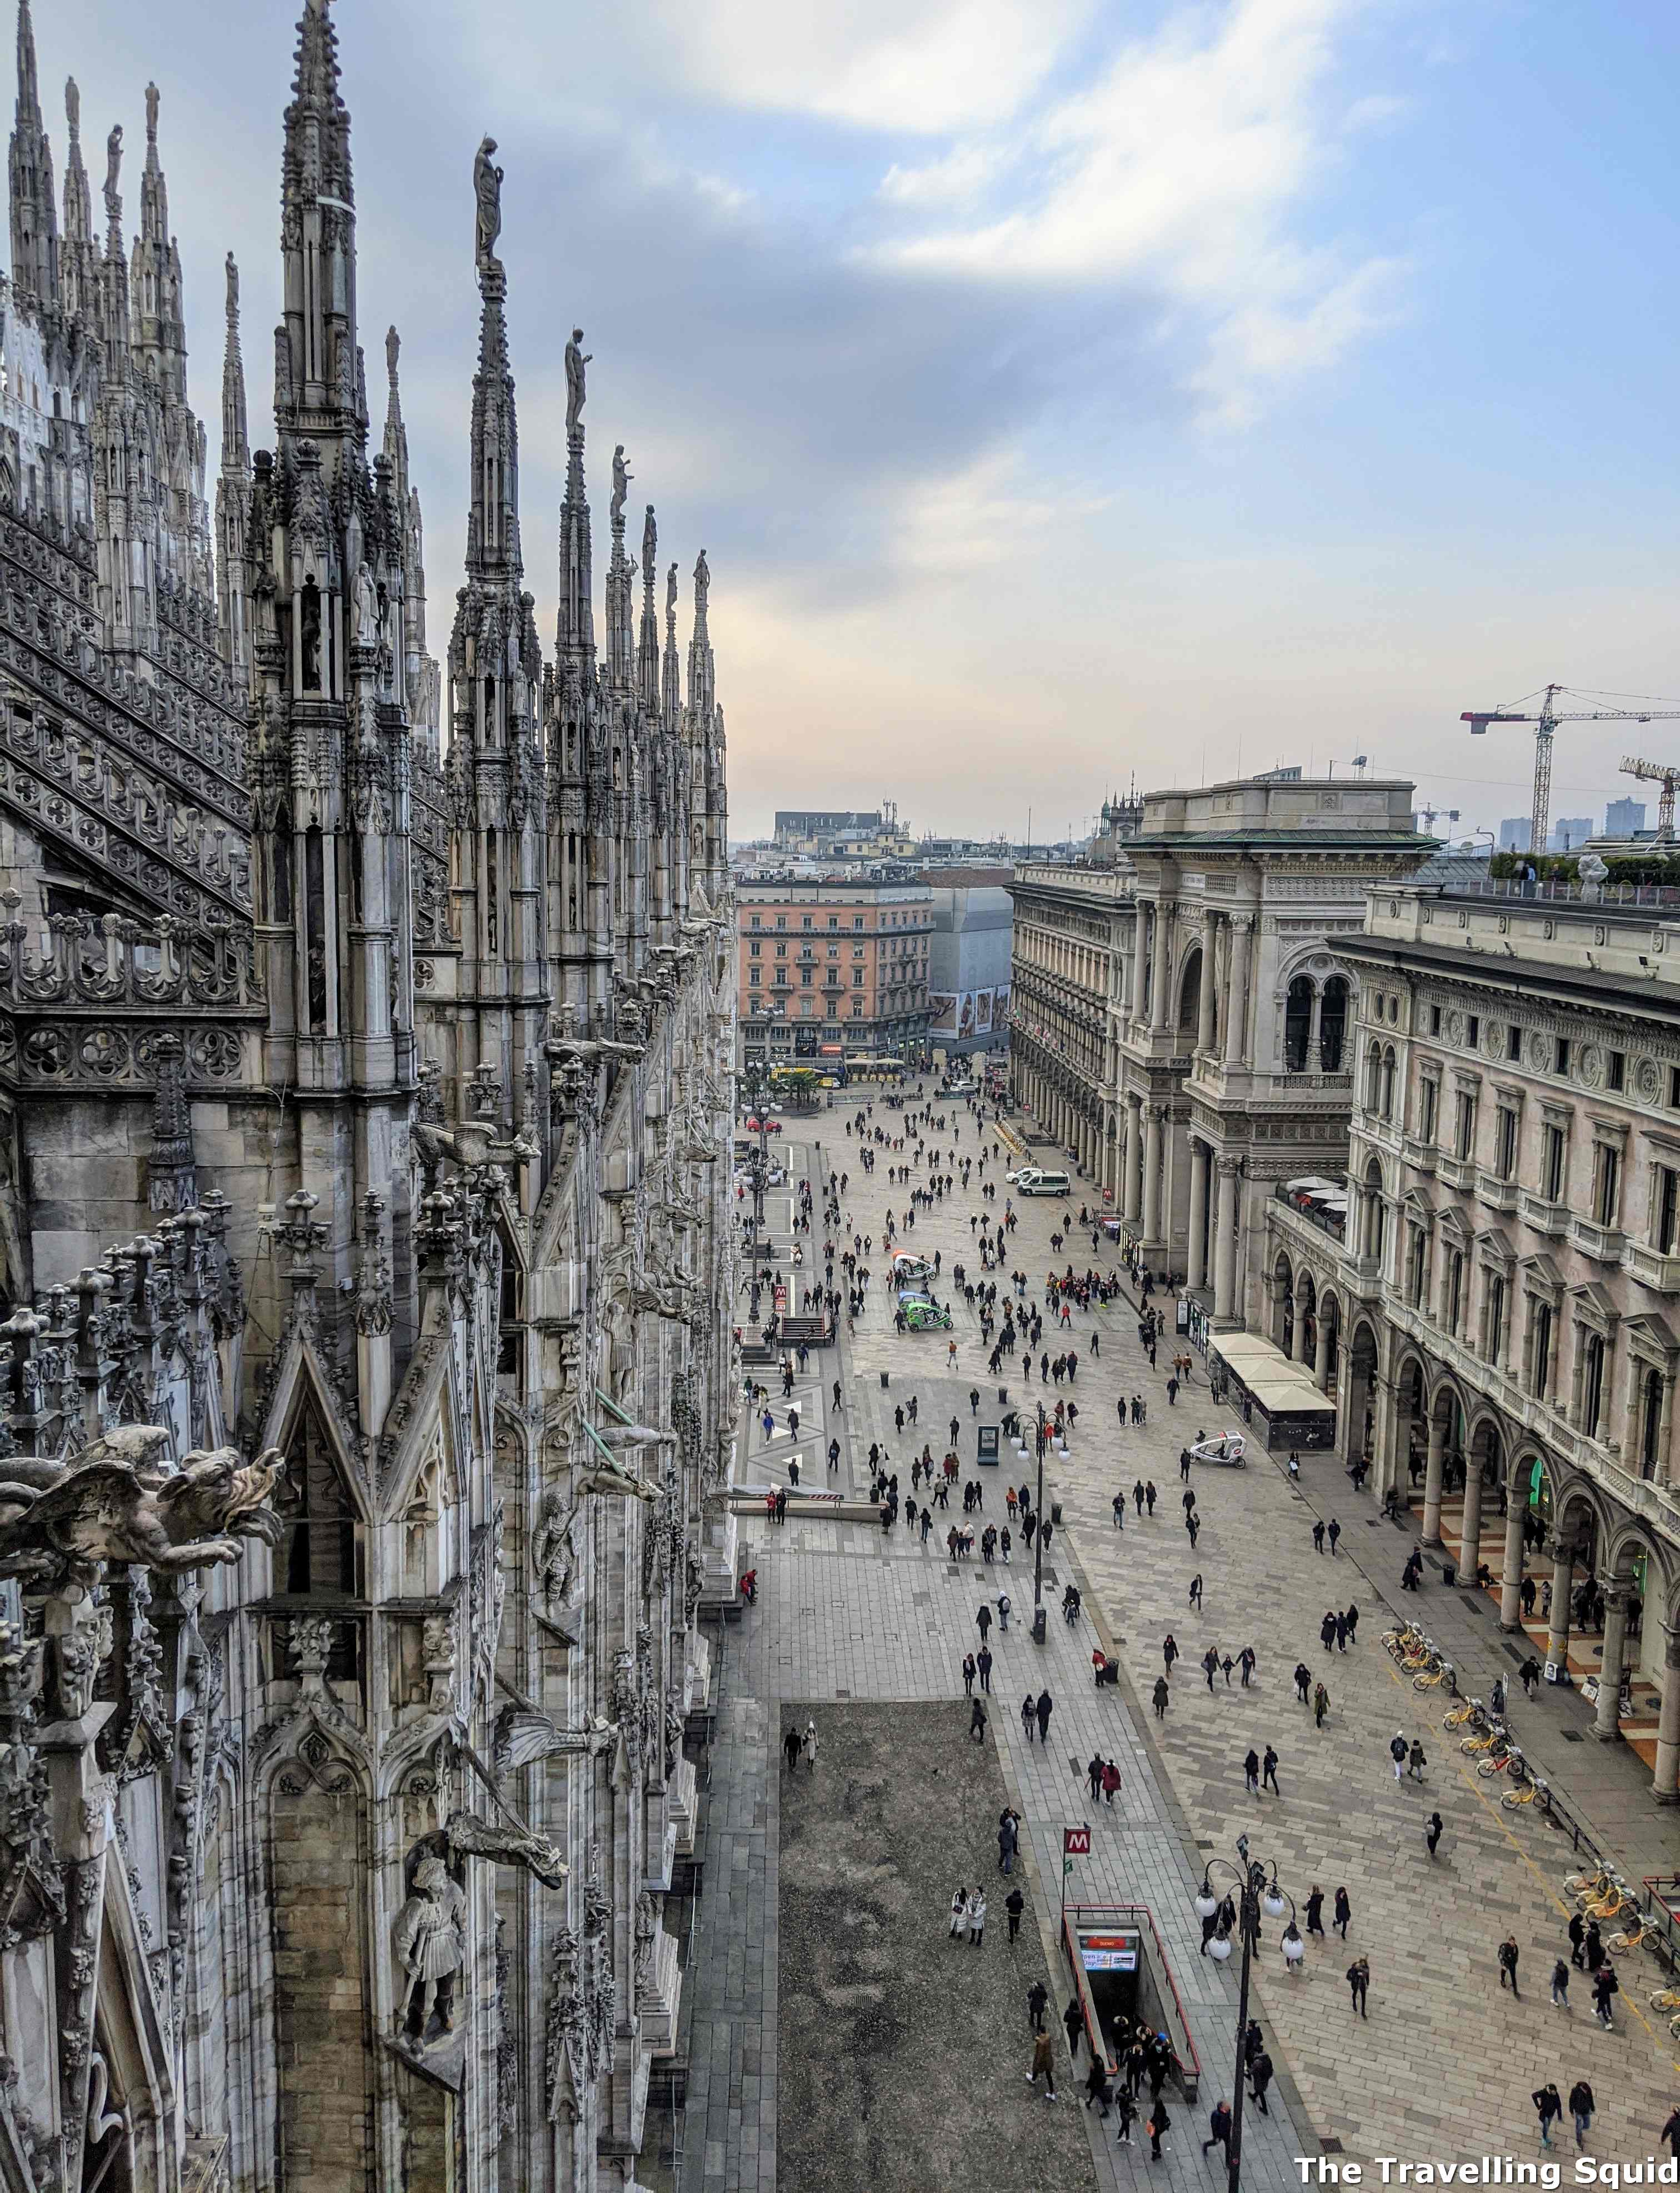
Rooftops
The rooftops overlook the square outside.
The rooftops were my favourite part of the Milan Cathedral. Not only did they give you a bird’s eye view of the square below and of Milan, the intricate sculptures were quite charming in a way that it made you feel that they were watching the city. It exuded feelings of power and might. Do take the stairs if you can. It feels rewarding and you get to save €4.
Why the rooftop of the Milan Cathedral is worth a visitIntricate carvings.As mentioned earlier, taking the stairs up can be quite rewarding.Feels like a scene from Viva la Vida.Gives one feelings of might and power.I used to rule the world Seas would rise when I gave the word Now in the morning, I sleep alone Sweep the streets I used to ownA view of the square below.
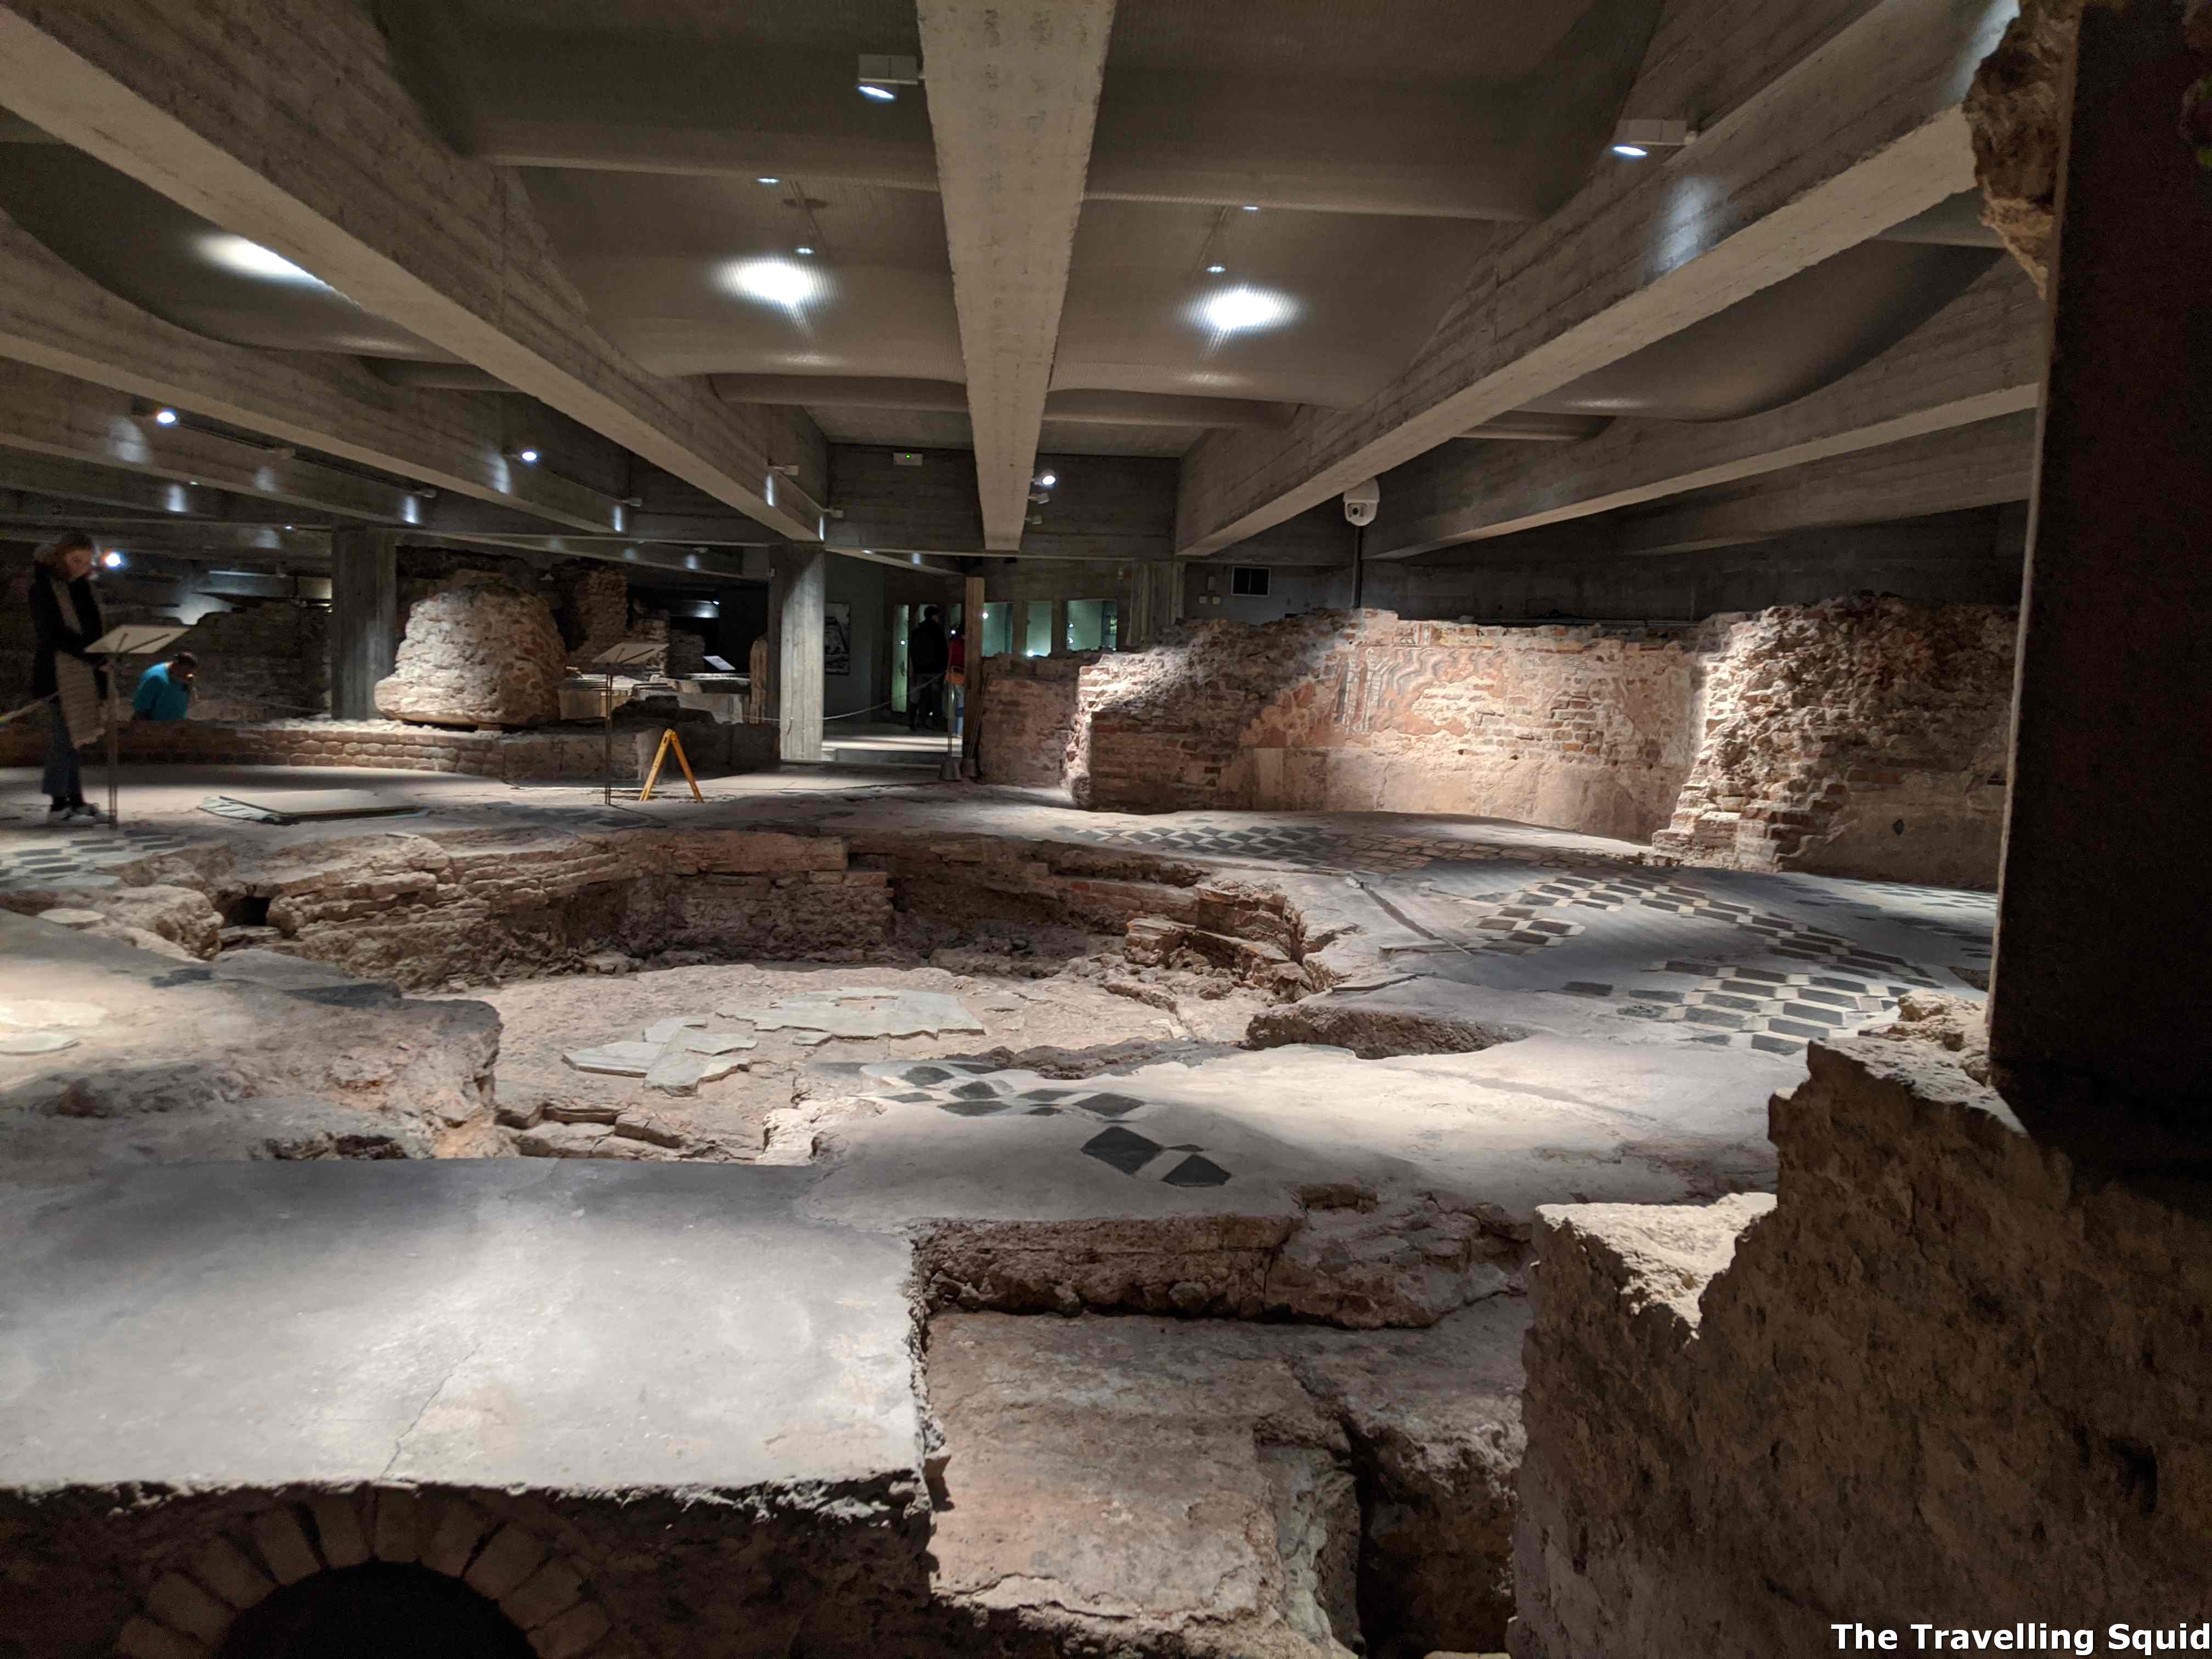
Archaeological Site
Archaeological Site of the Milan Cathedral
Unlike other churches we have visited, the Milan Cathedral had an archaeological site which showcased old artifacts found at the bottom of the cathedral. You could see some frescoes left behind, when they were first found. In fact, the plumbing and drainage of the place seems to be quite well done.
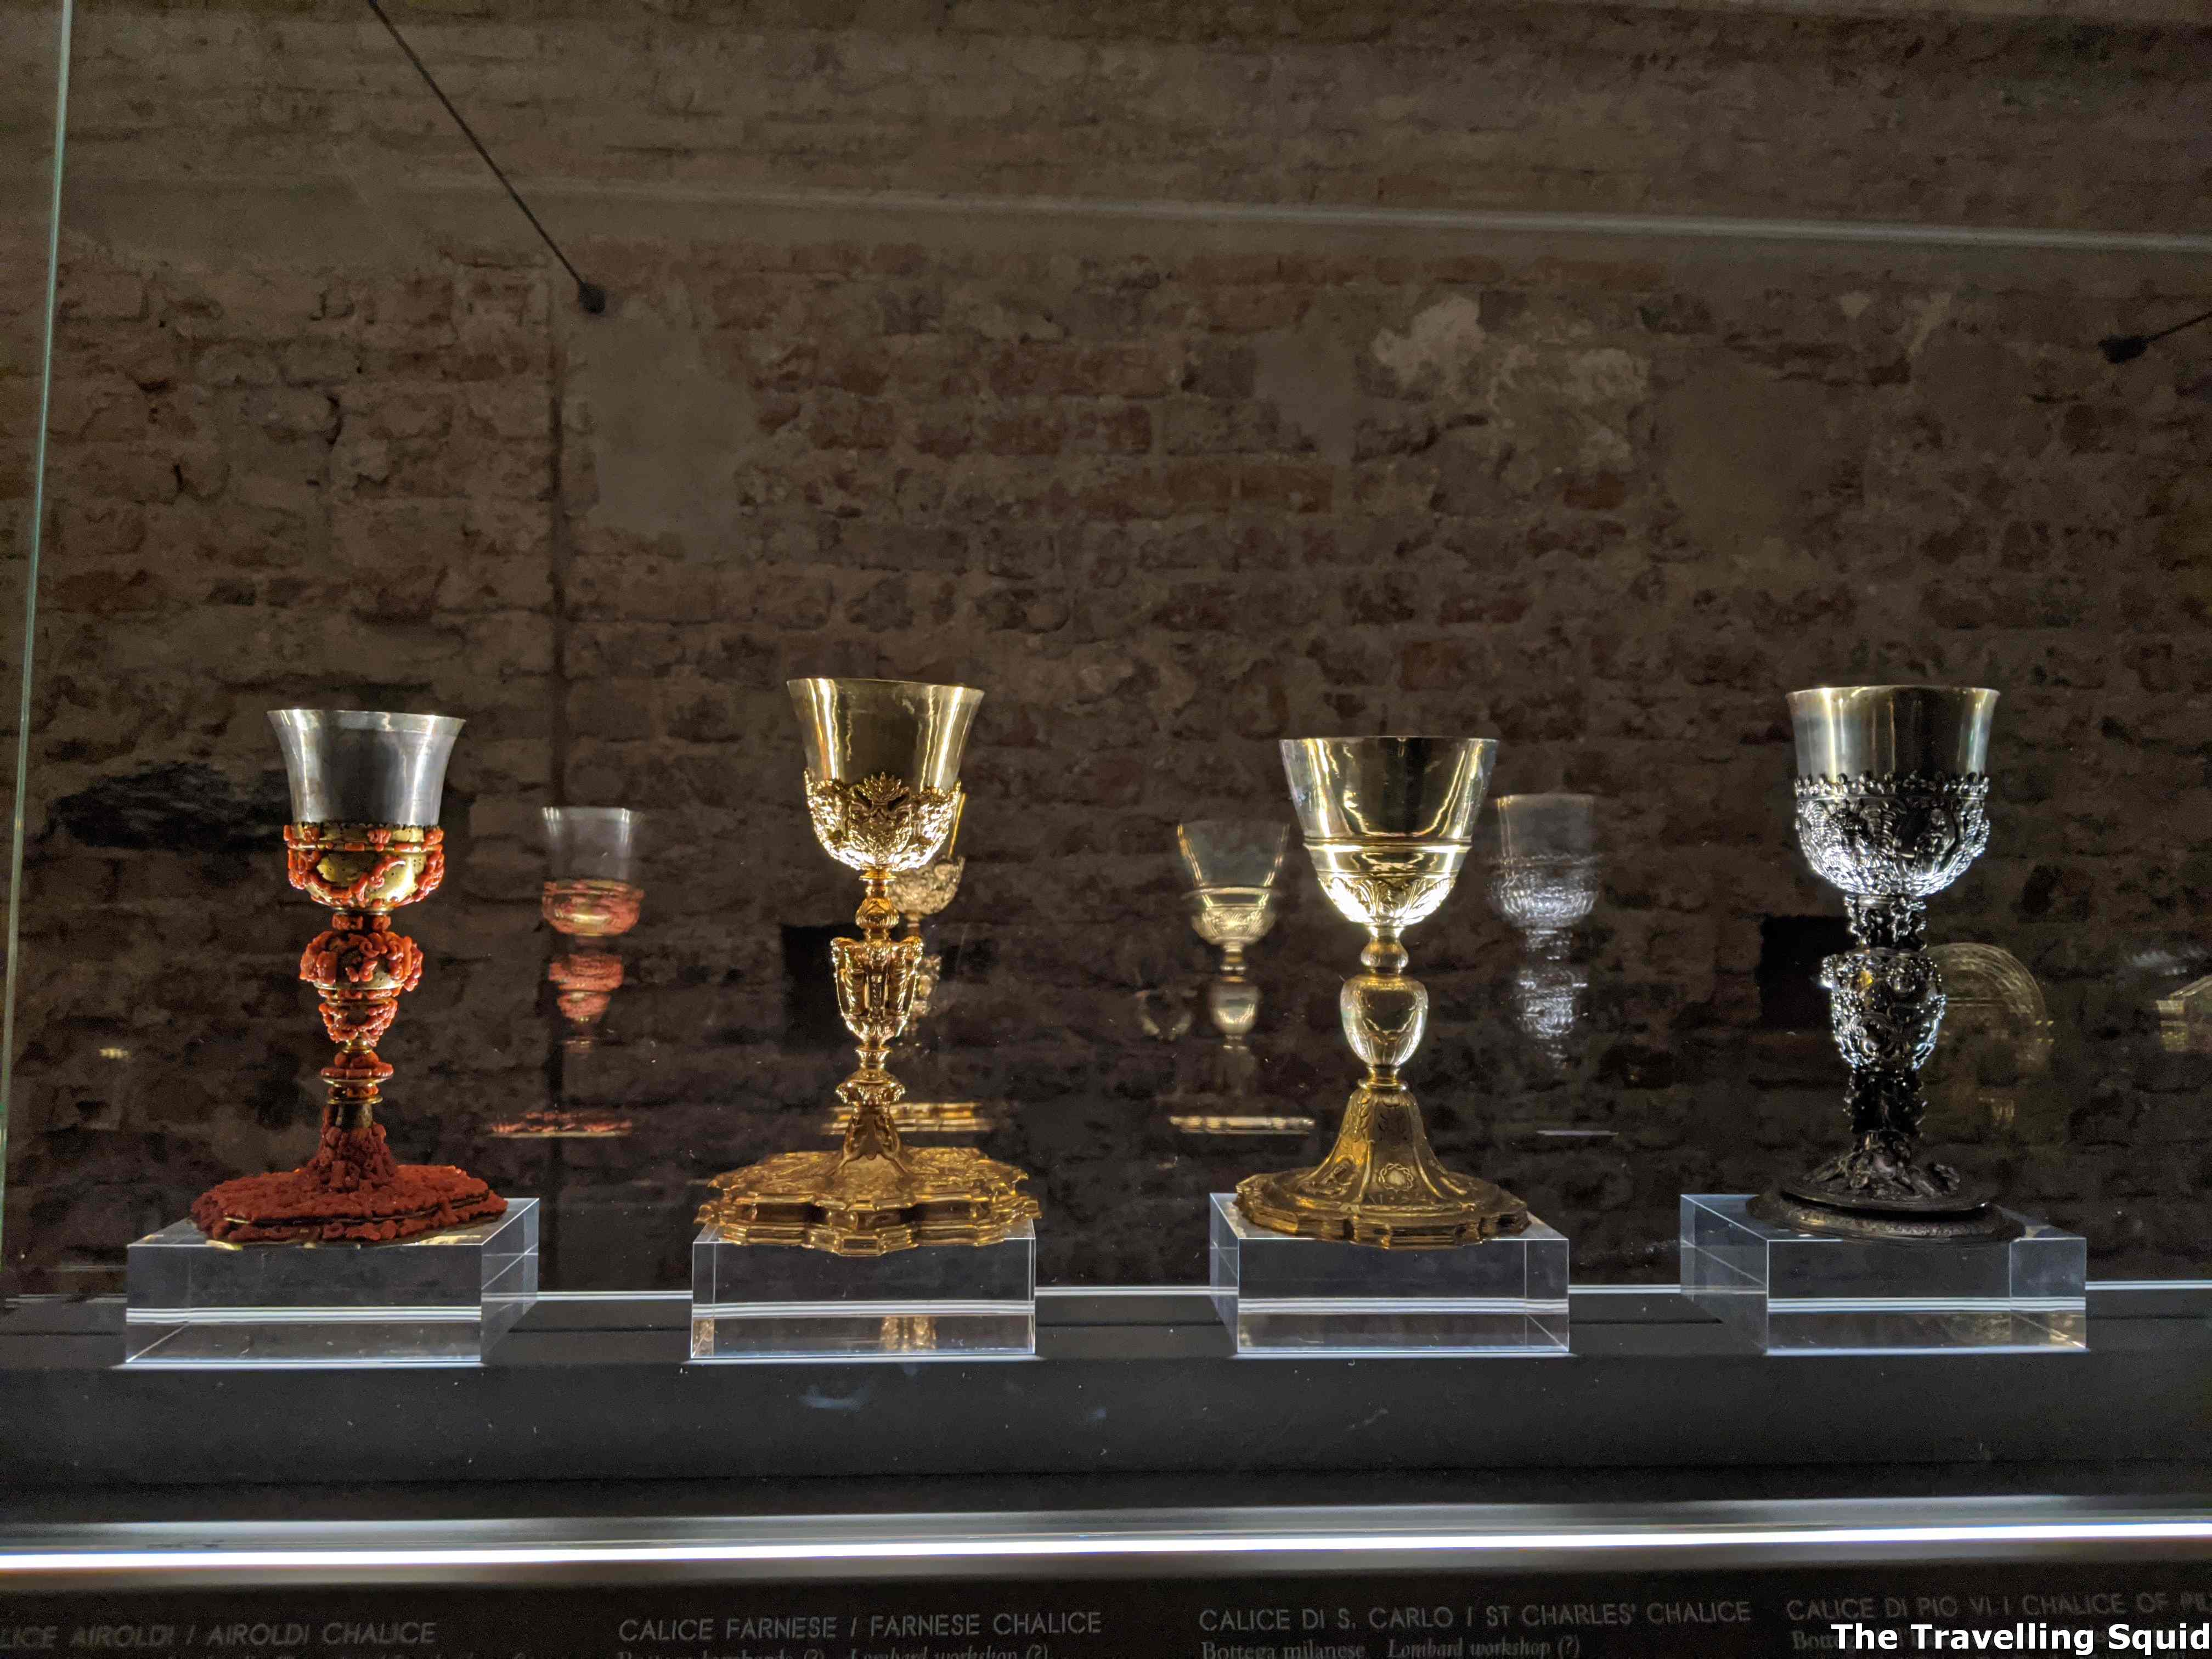
Duomo Museum
Some gold goblets, for wine?
The museum’s collection was comprehensive with plenty of sculptures of different types. The design is particularly interesting because they make visitors walk the full route before arriving at the exit. So even if the sculptures doesn’t quite interest you, you have to follow the path, past dozen sculptures of Mary, some saints, some strongmen with bulging muscles before arriving at the exit.
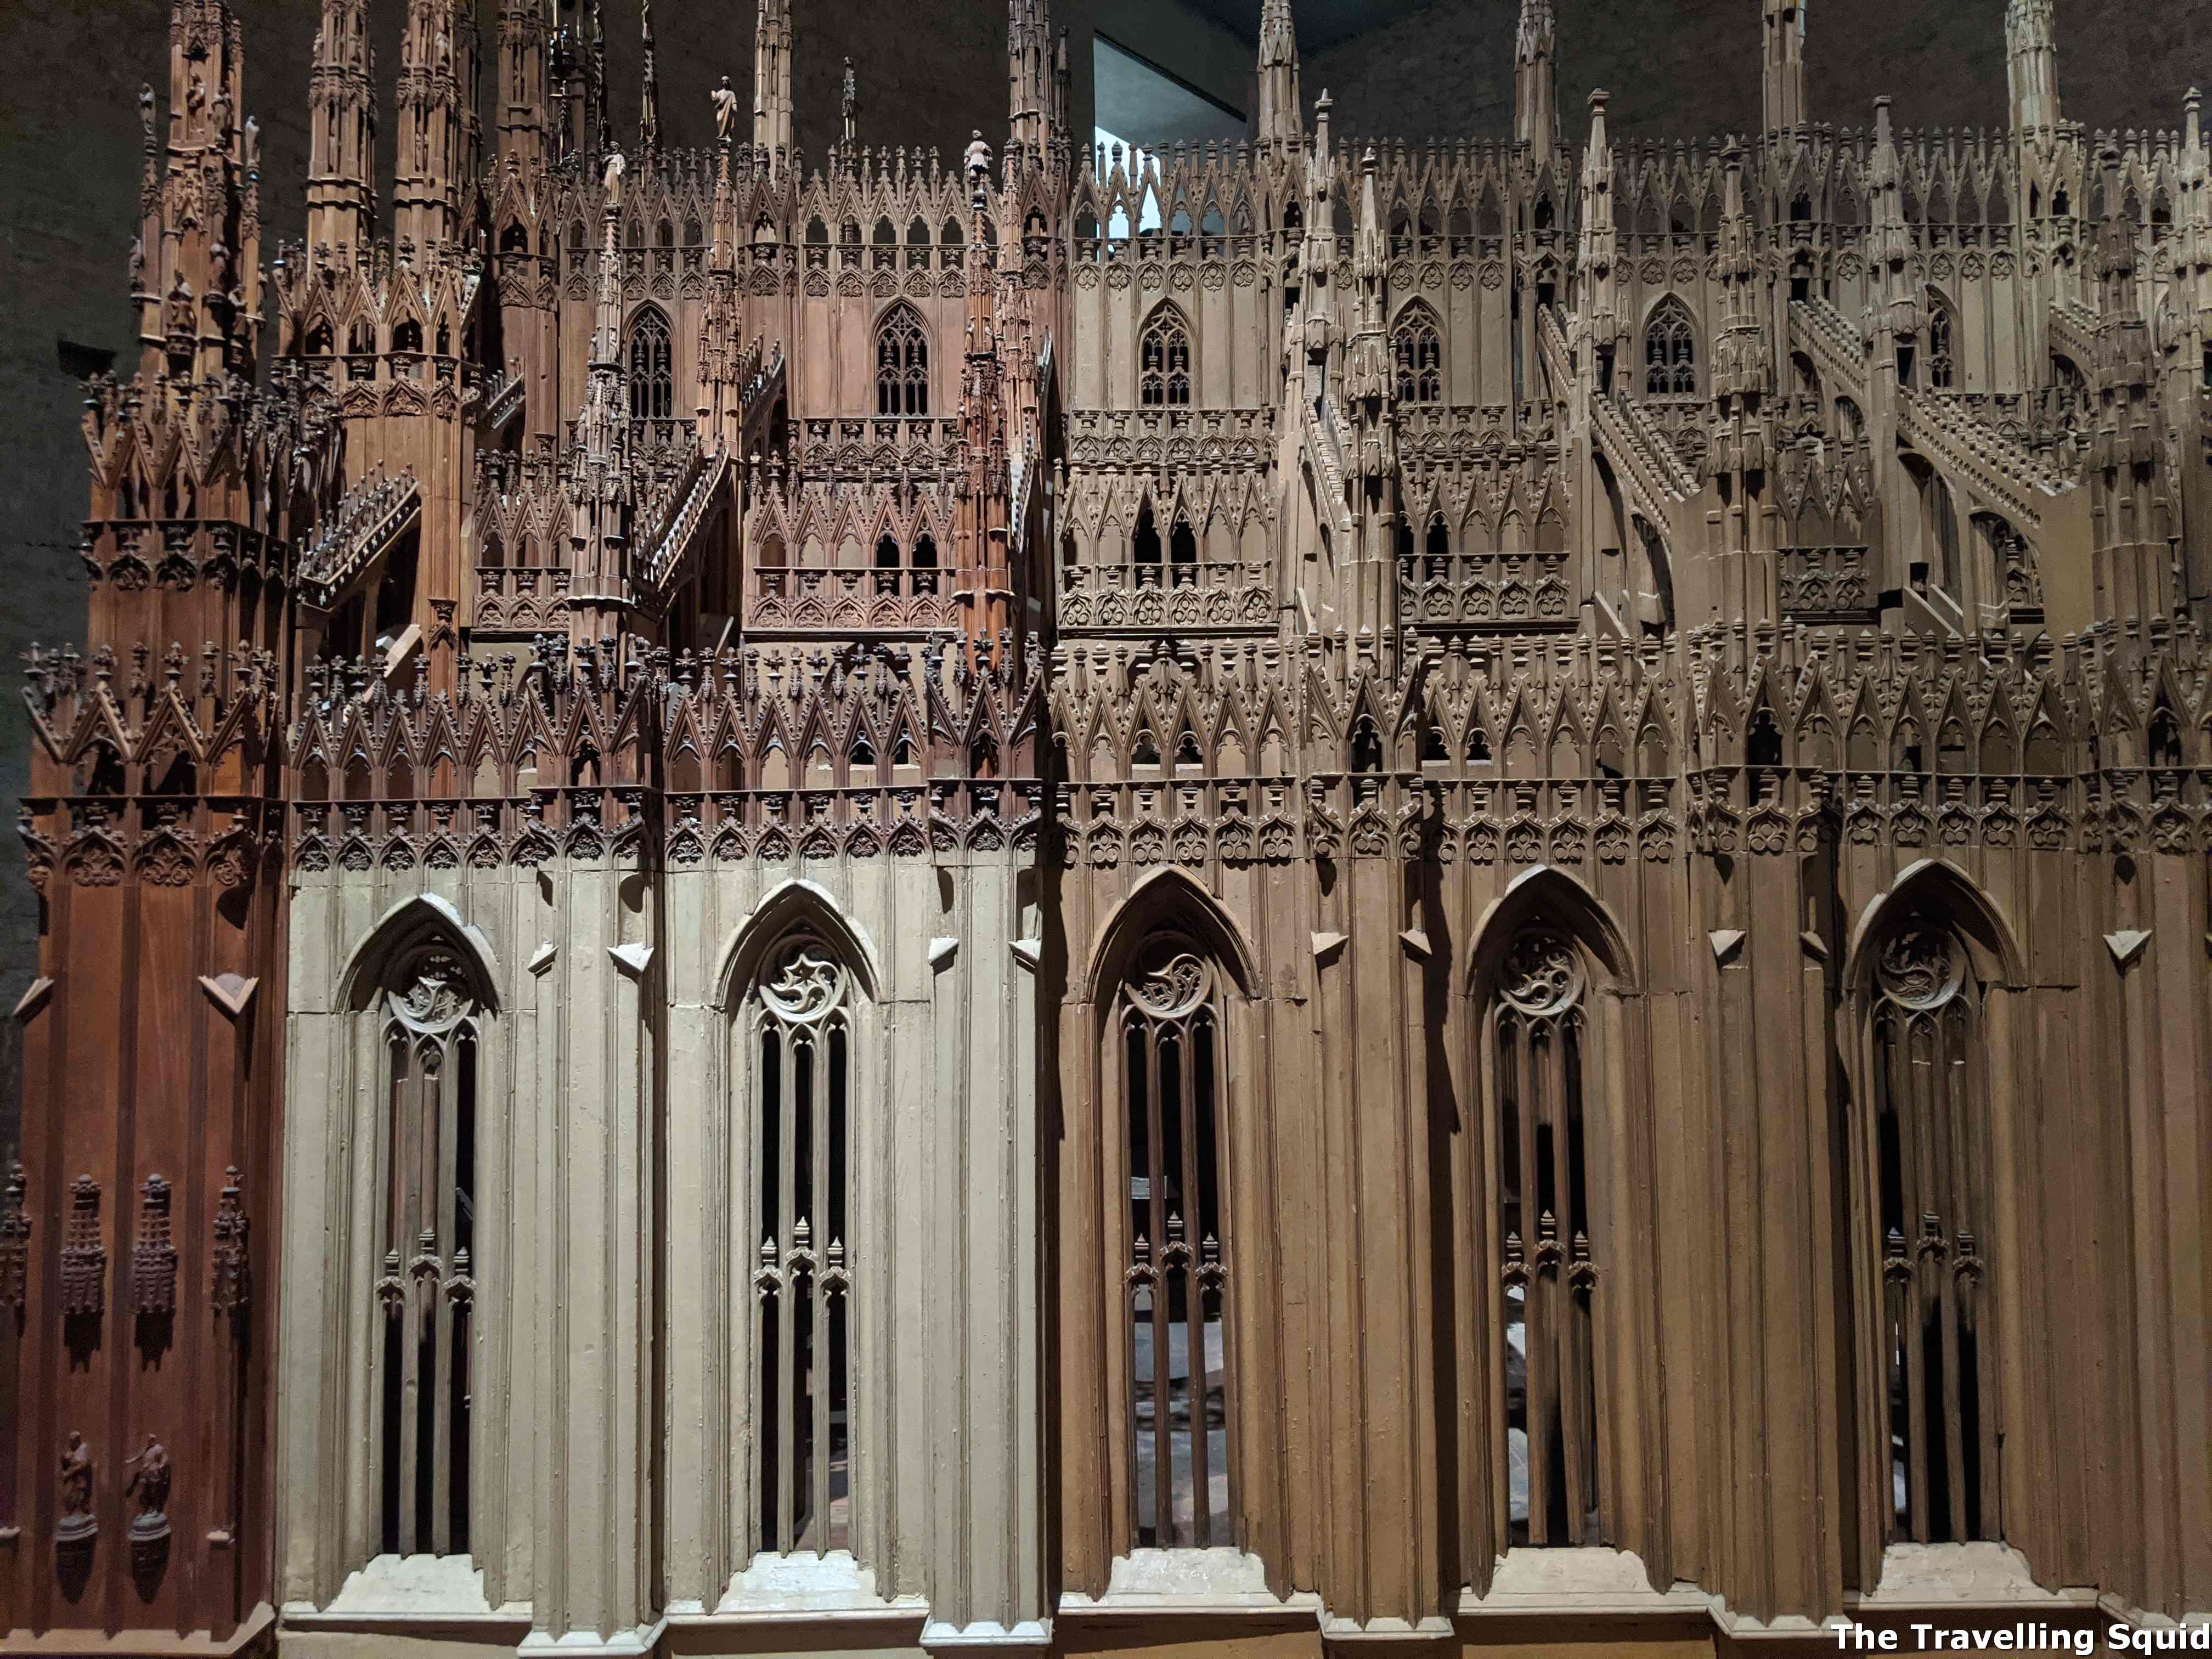
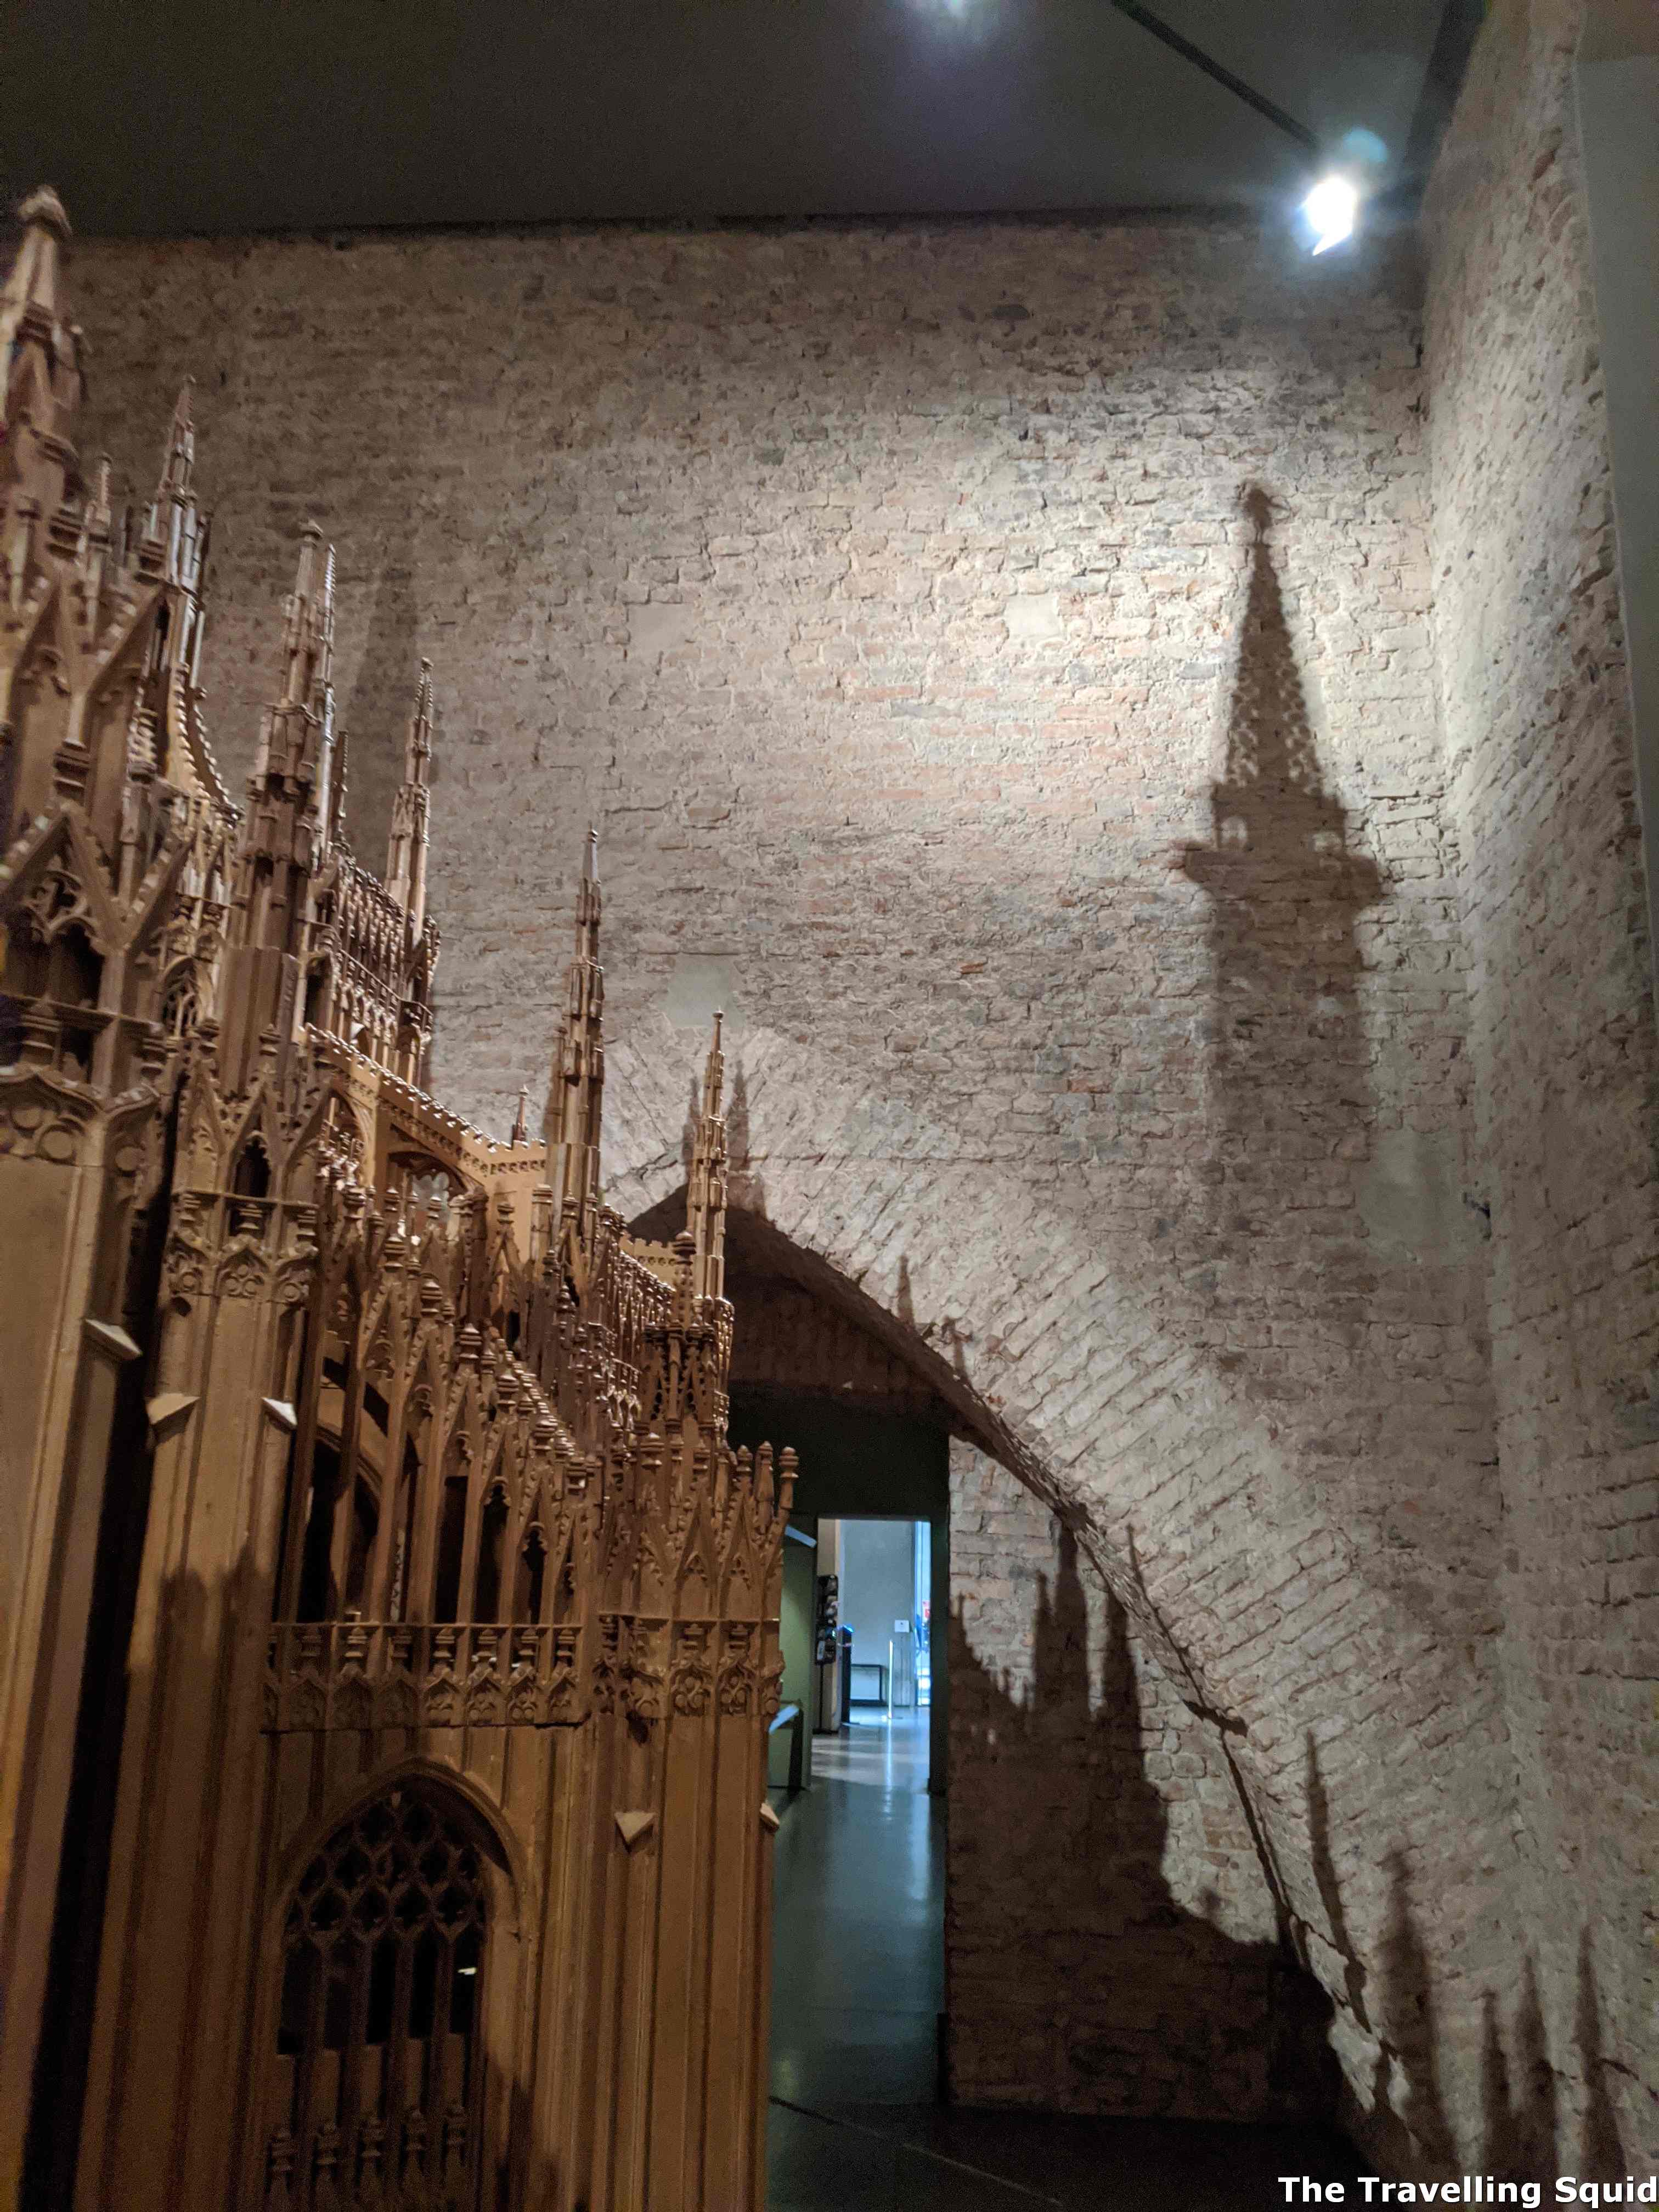
Wood model of the Duomo.
I must not forget to mention that the wood model was quite well done, and the lighting was angled such that you could see the silhouette of the building on the wall. Excellent curation I must say.
The lighting surrounding the wooden model is pretty cool – check out the silhouette it has cast on the wall.
The Travelling Squid’s Take
Is it worth entering the Milan Cathedral? I would say yes and make sure you get the pass to the rooftops. I have not seen a cathedral rooftop which evokes so much feeling. I’m guessing it’s mainly due to the sculptures perched high, over-looking the city. It’s quite beautiful. The museum is interesting but if you’re rushing for time, you might find yourself trap in the midst of multiple sculptures while trying to find your way out. I leave you with a music video of Coldplay’s Viva la Vida – thought it would be an apt soundtrack to play while on the rooftop.
A nutshell: 10 day New Zealand North and South island itinerary
If you’re planning a trip to New Zealand’s North and South island, it is possible to cover them in 10 days. We got around by driving and taking a flight from Rotorua to Blenheim, while transiting in Wellington. Our drive in New Zealand was very pleasant, possibly one of the best experiences worldwide as the other drivers were so accommodating. The highlight of our trip was visiting several vineyards in New Zealand’s South Island to purchase some bottles of Pinot Noir and Sauvignon Blanc. Here is our 10 day New Zealand North and South island itinerary in a gist.
10 day New Zealand North and South island itinerary
Day 1 – Auckland
Day 2 – Hobbiton, on the way to Rotorua
Day 3 – Rotorua (then took a flight to Blenheim on South Island)
Day 4 – Blenheim to Marlborough, Franz Josef Glacier
Day 5 – Fox Glacier
Day 6 – Fox Glacier to Queenstown (stopping by Felton Road and Chard Farm)
Day 7 – Skiing
Day 8 – Drive to Te Anau
Day 9 – Te Anau to Milford Sound and back to Queenstown
Day 10 – Queenstown and a return flight back
Day 1 – Auckland
At the pier in Auckland – they run short cruises to neighbouring islands.
We flew in to Auckland from Singapore and arrived the night before. We stayed at the Avani Metropolis and it made for a comfortable stay. It was very roomy and there was a kitchenette in addition to a large living room.
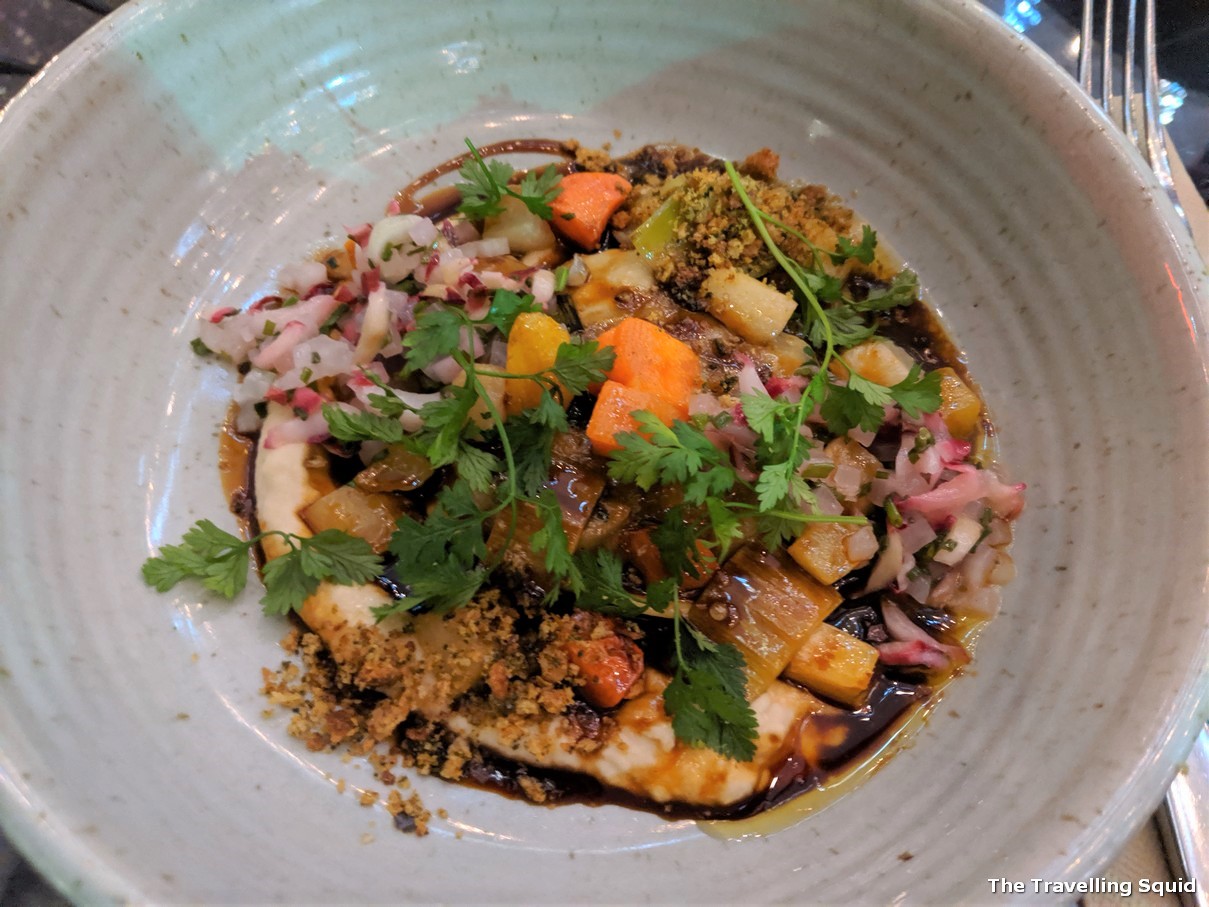
Beef short rib raviolo, swede, turnip, celeriac, carrot.
Auckland felt like a typical city – we didn’t walk around too much due to fatigue from the jet lag. I must say the restaurant which we had dinner at, Ortolana Auckland, was really good. The ingredients were really fresh and there was a good mix of flavours. The plating was excellent too.
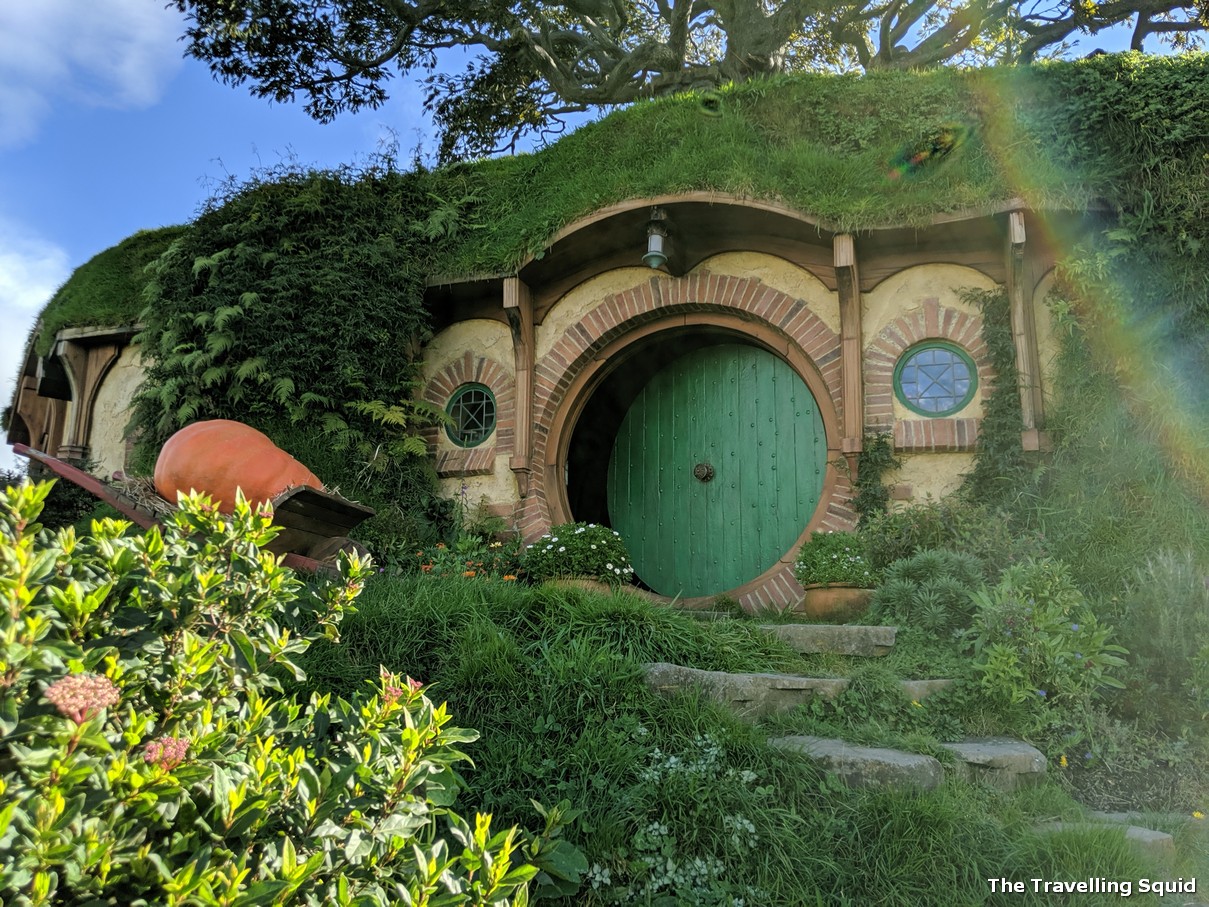
At Hobbiton – love the pine tree that stands out from the lake.
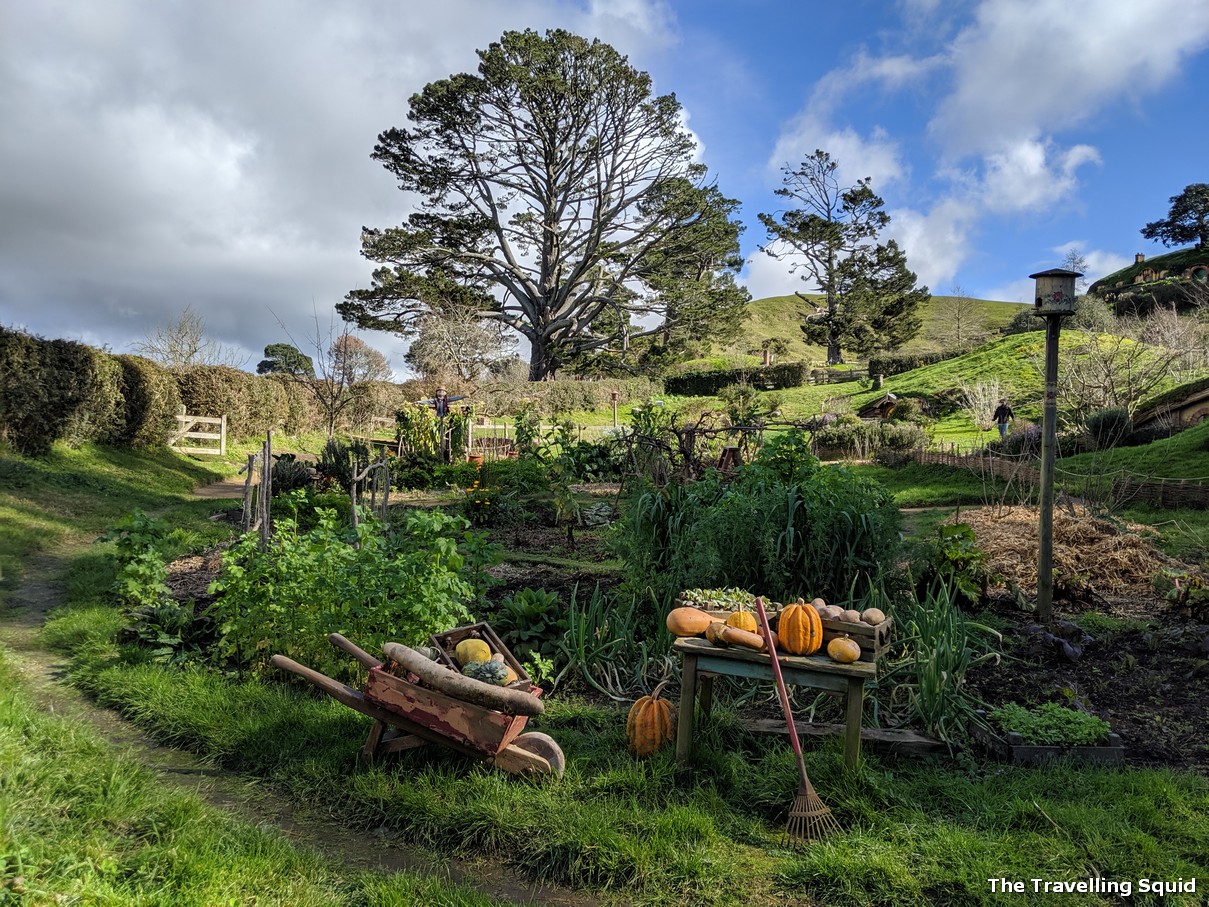
We left Auckland in the morning and drove to Hobbiton, which was in between Auckland and Rotorua. The drive took us about 2 hrs and 30 mins. When we got to Hobbiton, we realised that the tickets were quite expensive, at NZD84 for an adult. But as we had made a 30 min detour to get there, we decided to purchase the ticket as we did enjoy Lord of the Rings and the Shire was one of my favourite scenes. Hobbiton was a memorable experience though visitors are not allowed into the little hobbit houses.
The home of Bilbo Baggins.
We arrived in Rotorua late that afternoon and stayed at Karanda Bed & Breakfast. We were given a really cosy room and our hosts were super helpful in sharing with us interesting sights to visit. We later visited the Polynesian Spa and Whakarewarewa Forest in Rotorua that very evening. We bought a day and night pass so we could return to see the Redwoods the next day.
Day 3 – Rotorua, then we took a flight to Blenheim on South Island
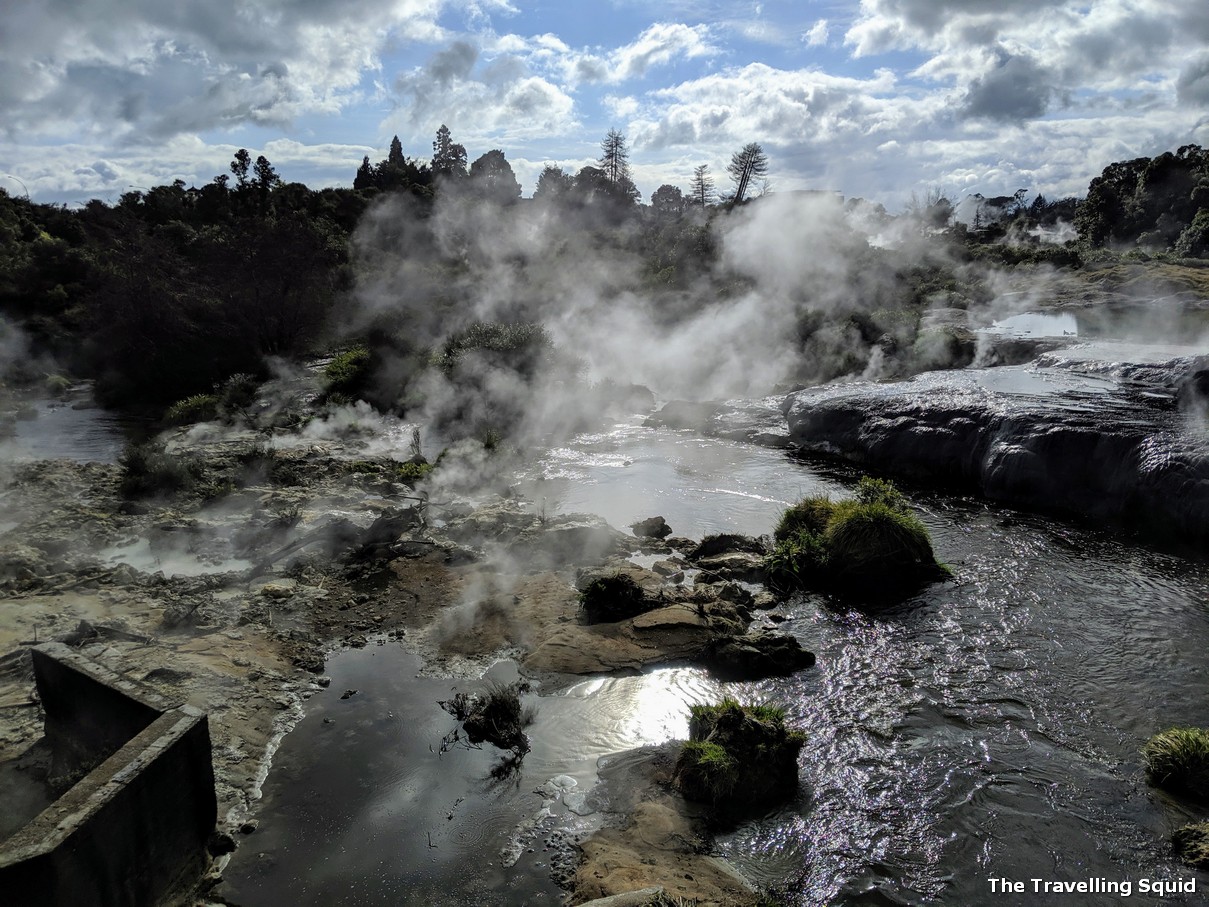
Geothermal Geysers at Te Puia
The next day, we carried on sight-seeing in Rotorua, first visiting a Maori cultural centre and geyser park, Te Puia. The geysers were a sight to behold – nothing like I have seen before. It was a good learning experience hearing about Maori culture too. After our trip to Te Puia, we headed down to the Whakarewarewa Forest to check out the Redwoods. In my view, it was much more fun seeing them during the day!
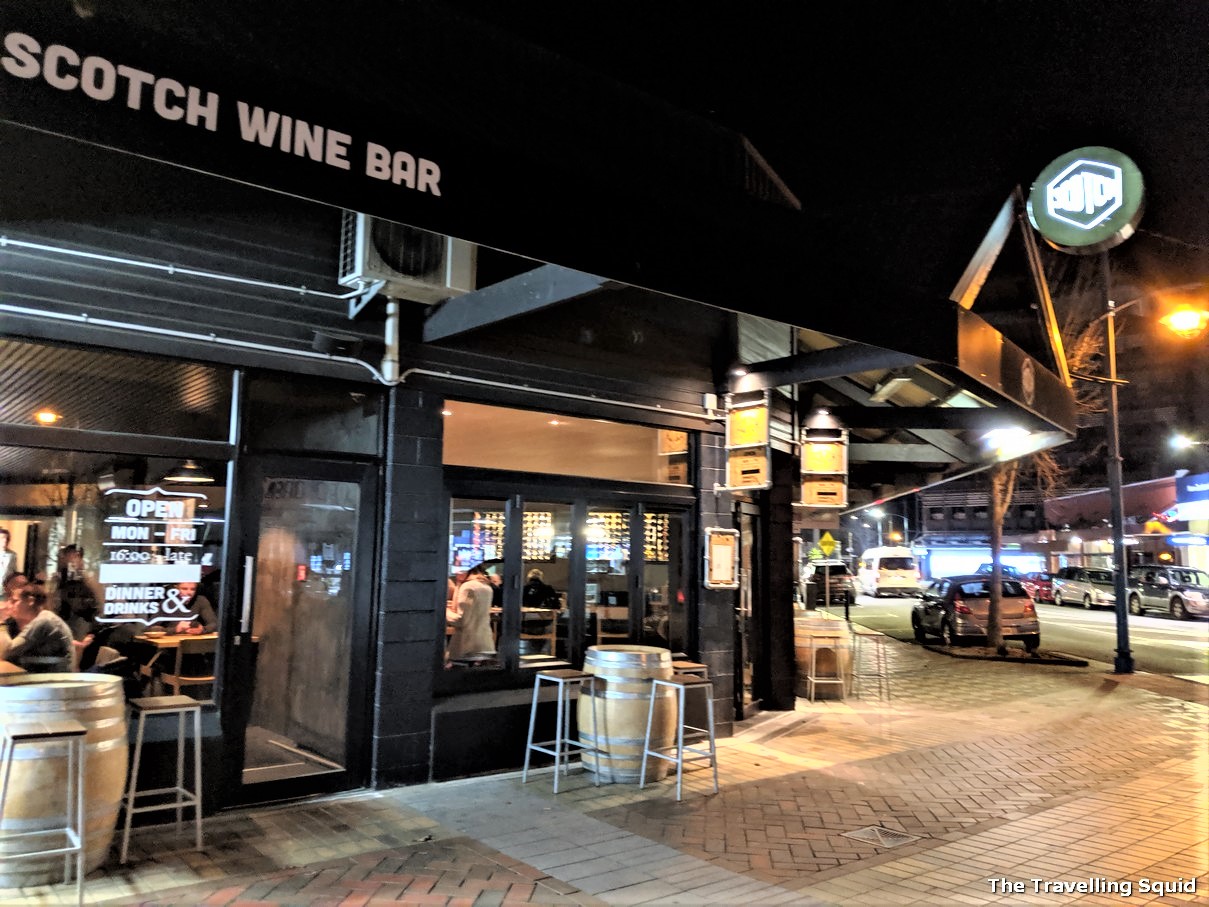
If you’re in Blenheim, the Scotch Wine Bar is a must-visit.
At Blenheim, we stayed at Chateau Marlborough, which was in a convenient location, before visiting the vineyards in Marlborough the next day. We also ate at Scotch Wine Bar in Blenheim and the food and wine was amazing. It is a short 10 min walk from Chateau Marlborough – highly recommended.
Day 4 – Blenheim to Marlborough, Franz Josef Glacier
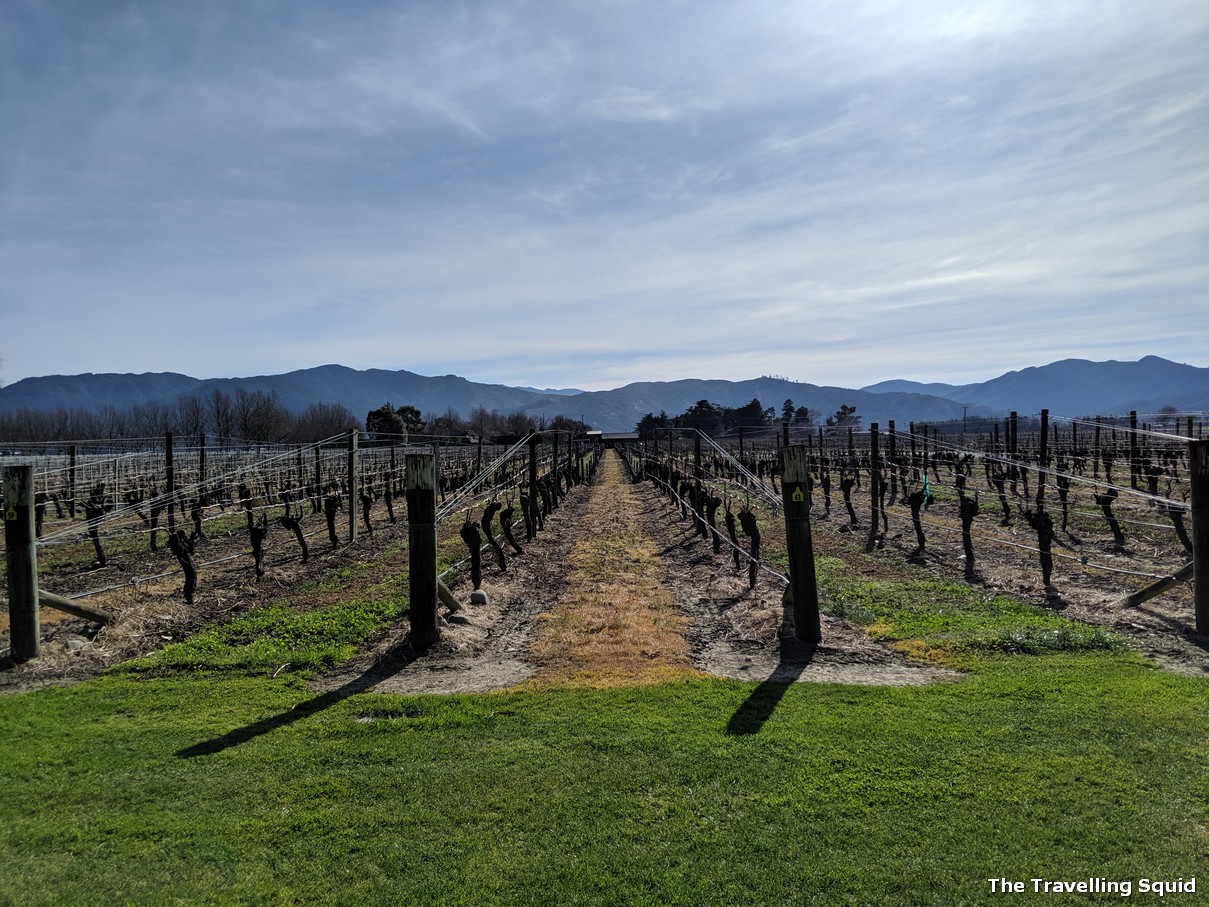
The vines were pruned real properly.
In the morning, we drove from Blenheim to the first vineyard we visited in Marlborough, Cloudy Bay. The visit to Cloudy Bay was a fruitful one – we had a chance to try many of their wines which were not sold in Asia, such as the Te Wahi, an elegant Pinot Noir. Made for a great gift too. We also visited Hans Herzog, a smaller winery which had all its wine made from one plot of land.
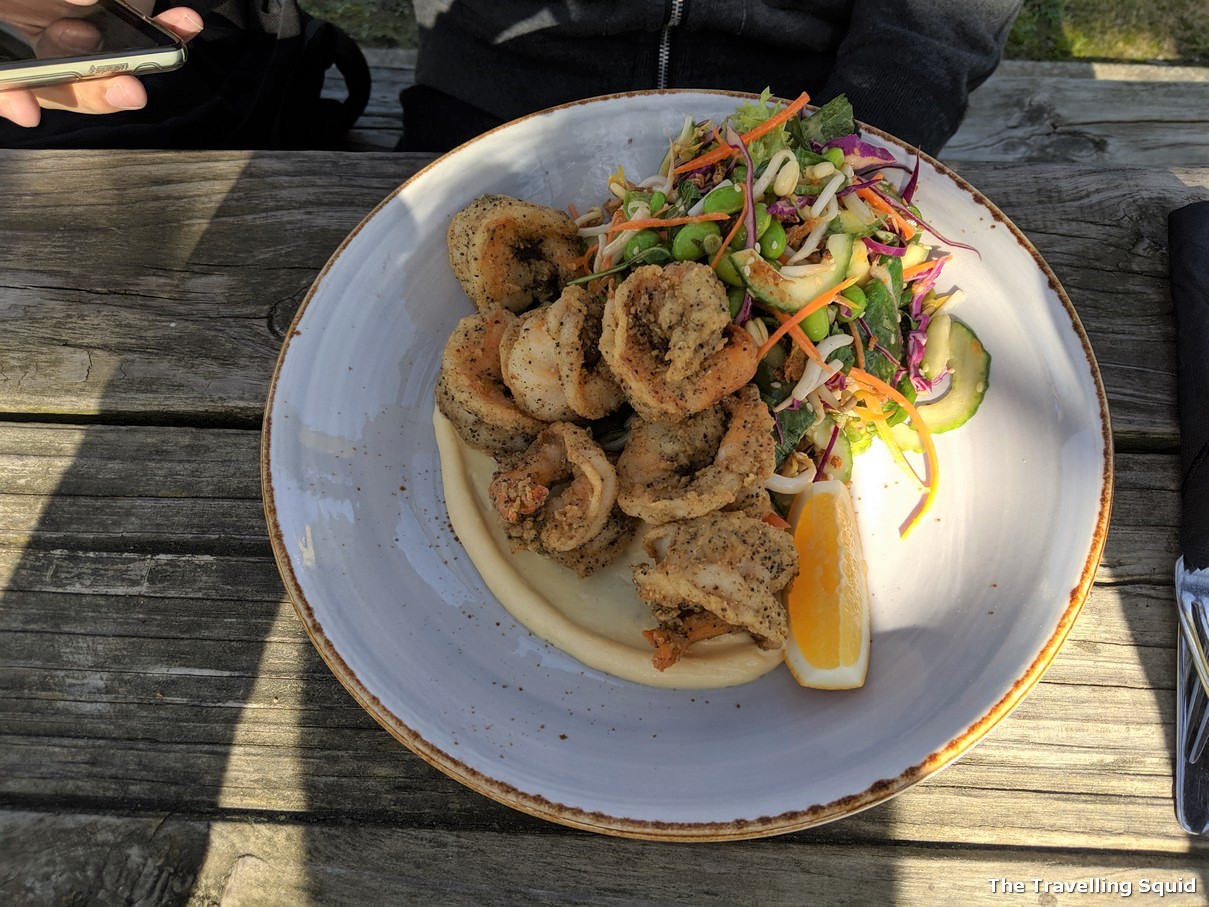
A prawn dish at Wairau River Wines
For lunch, we visited Wairau River Wines and they had a pretty good restaurant too. Each main was about NZD30 and the food was rich and flavourful. I found the wine easy to drink – it was the type one could use for hosting big groups of people.
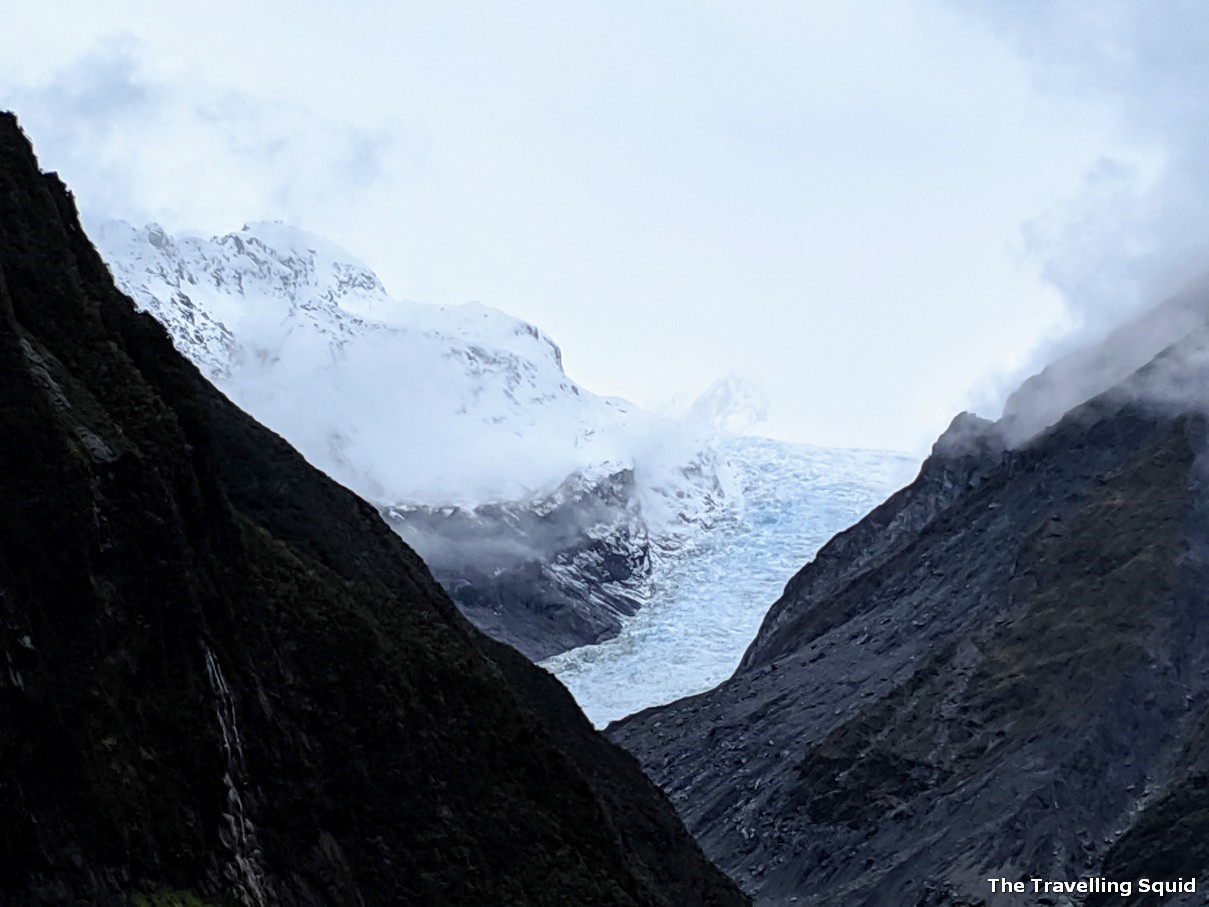
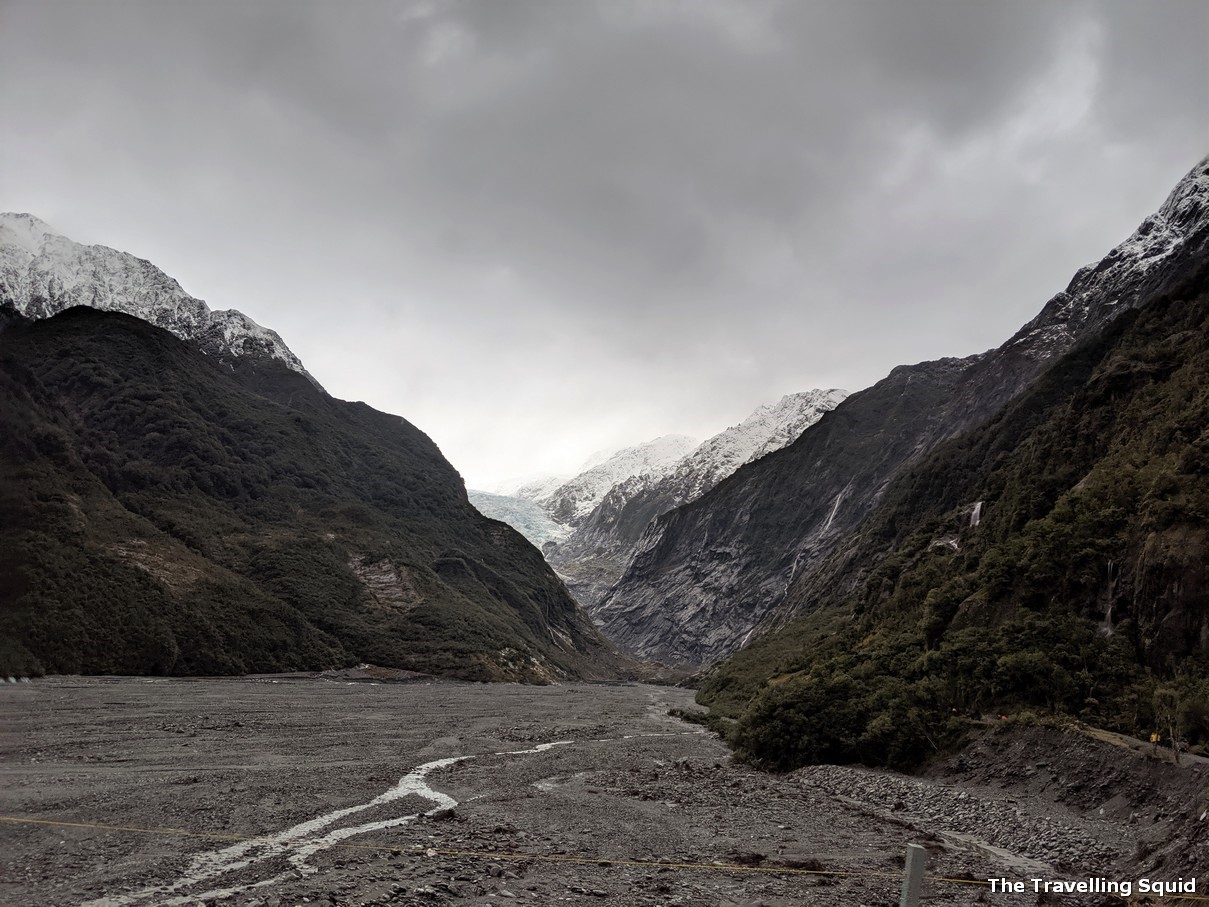
We then drove on to Franz Josef Glacier and arrived at that town slightly before lunch. We had booked a glacier walk at about 2pm in the afternoon, and it was pouring outside. Fortunately our walk did not get cancelled and we made it to the glacier and back – with much more knowledge about glaciers when we got back. It was also helpful to go on a guided tour since we were not as familiar with the terrain.
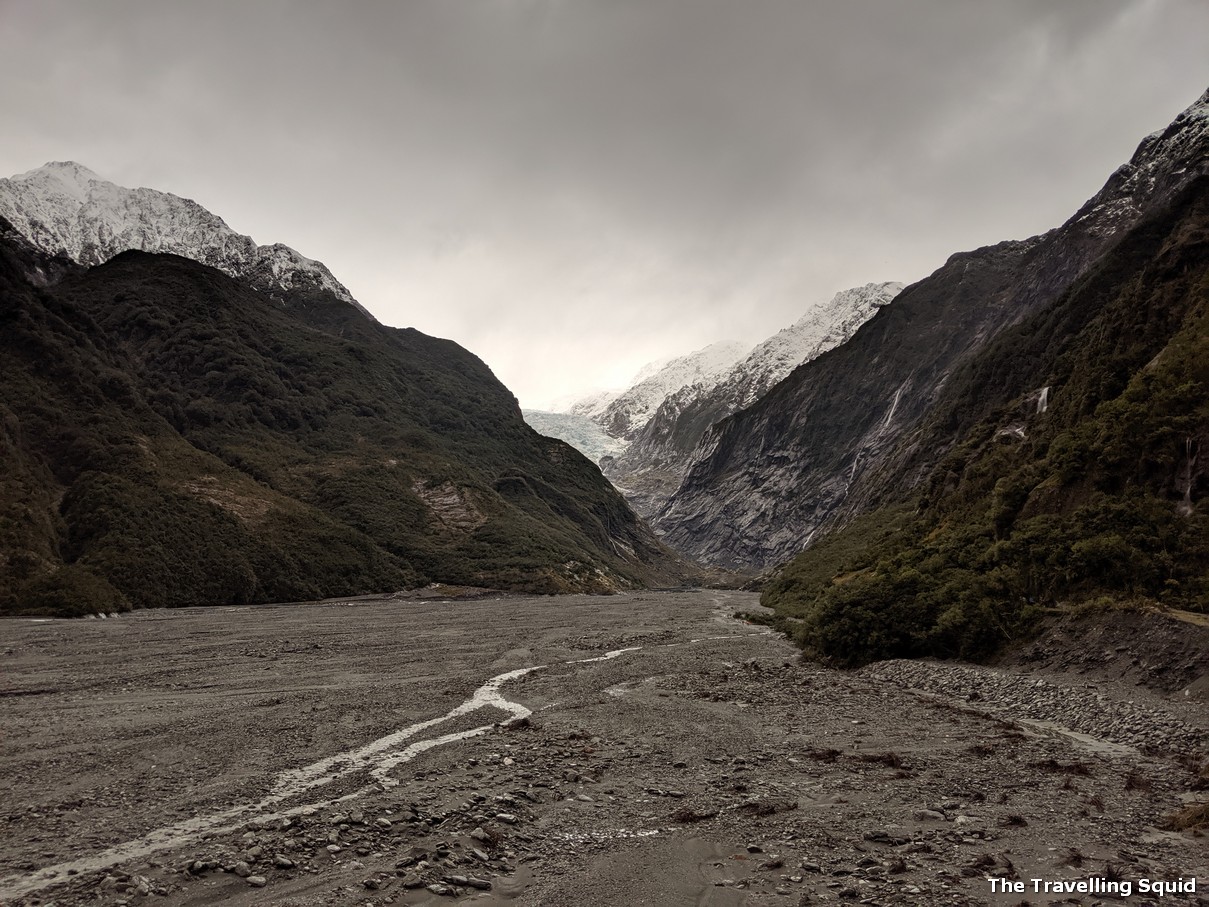
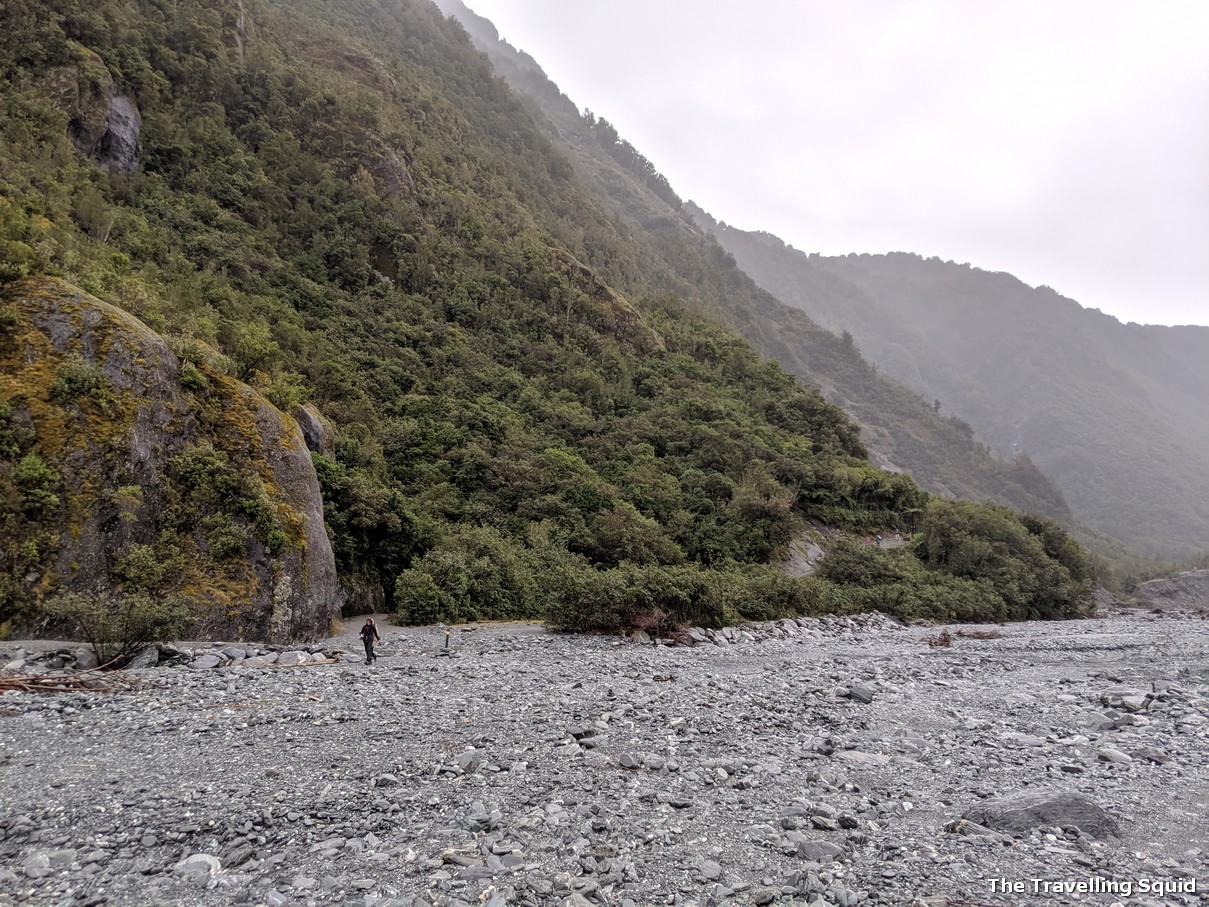
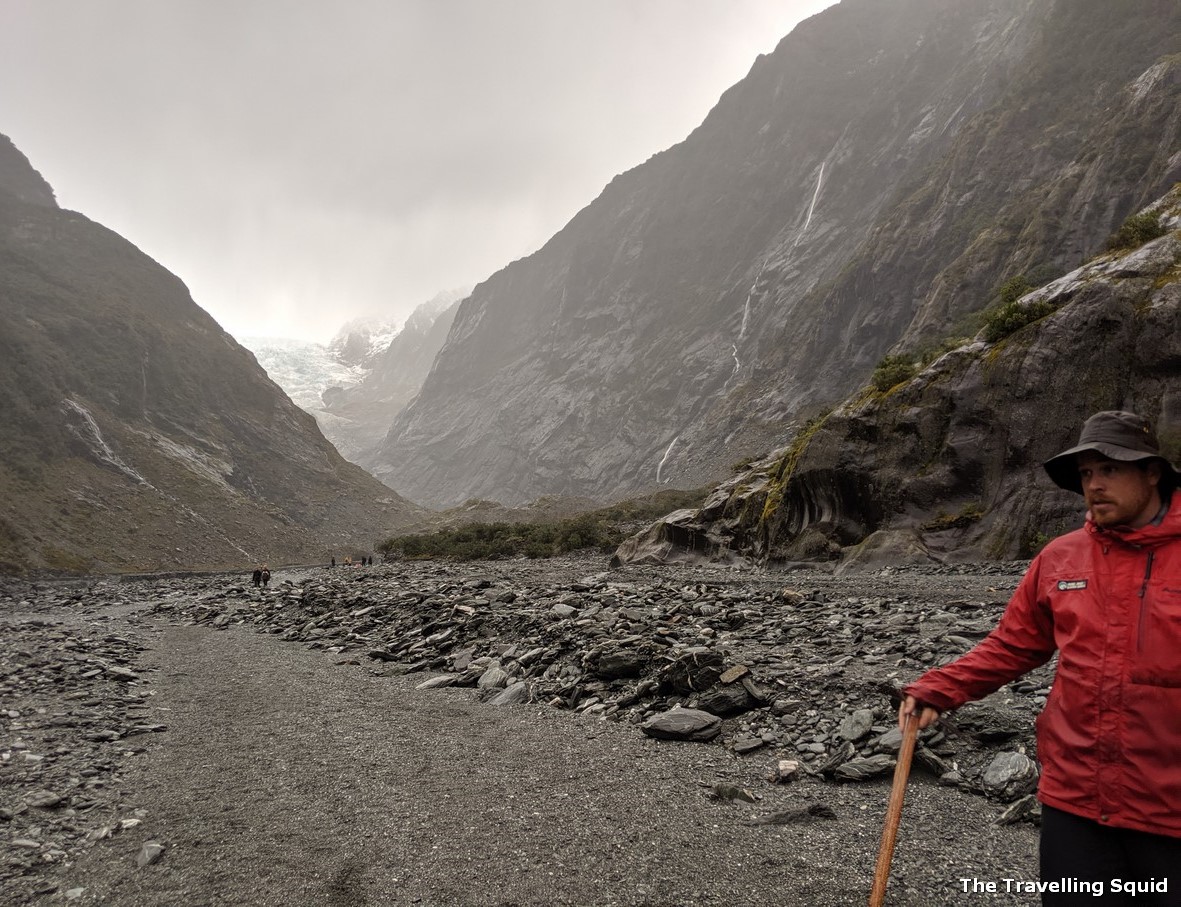
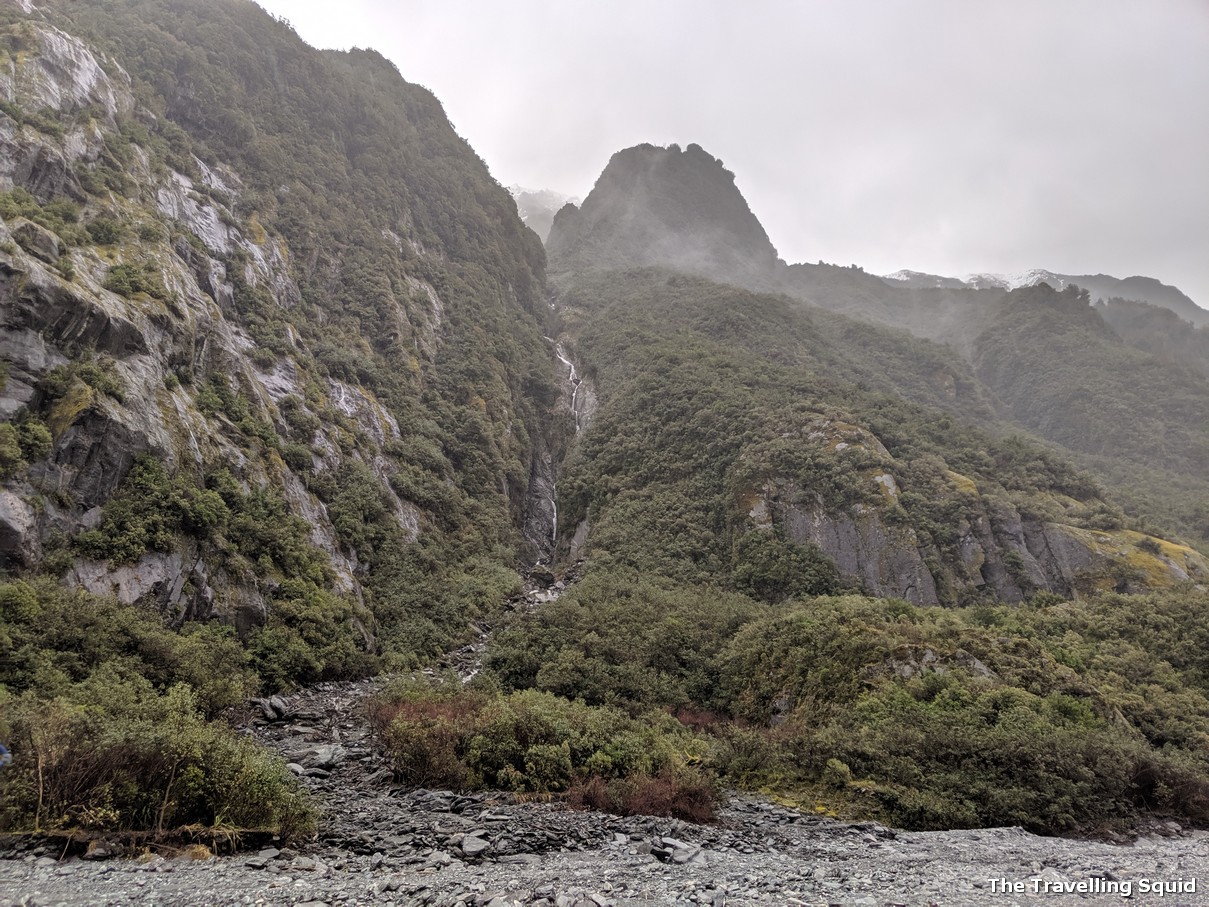
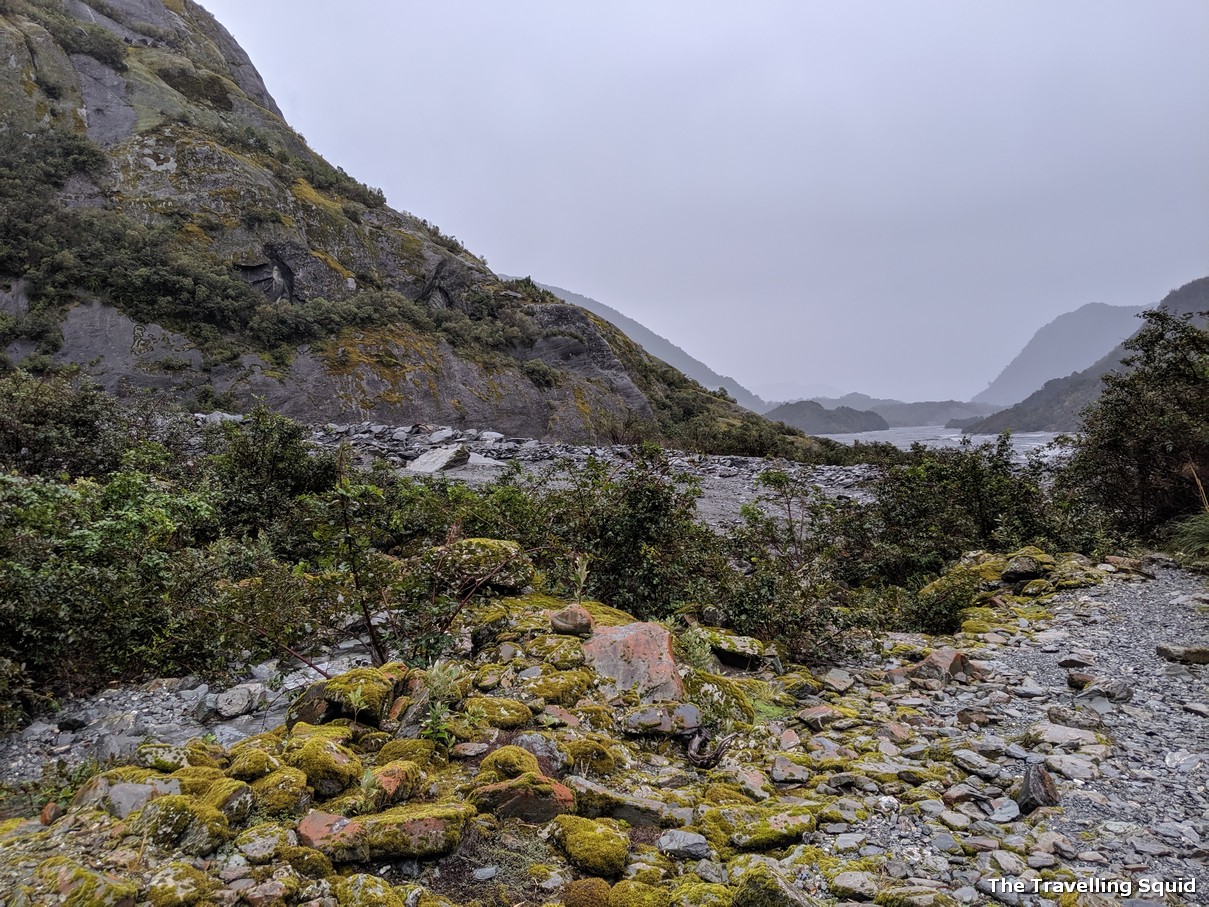
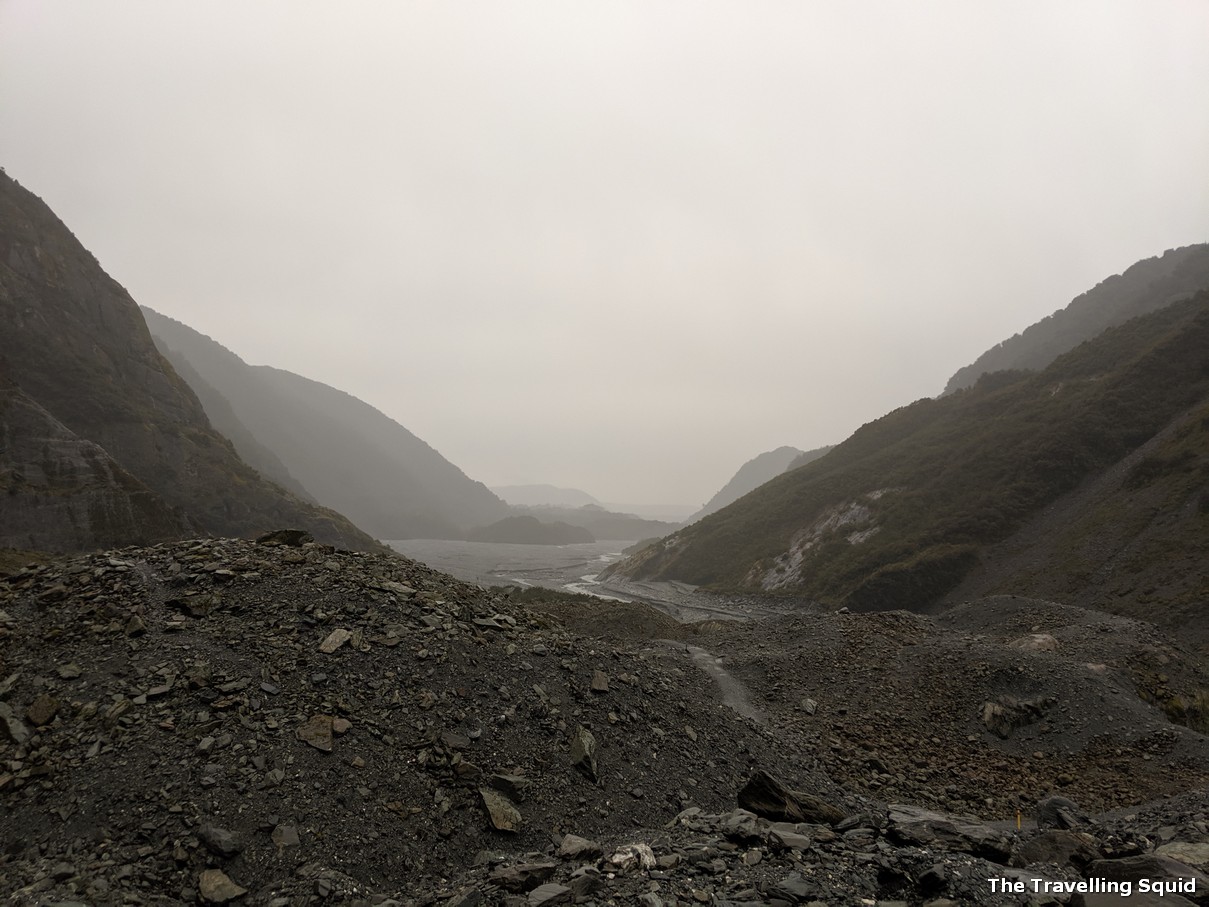
We had booked a heli-hike to the Fox Glacier the next morning, but it was cancelled unfortunately due to bad weather. The organiser gave us a full refund. We decided to trek over on our own to see the glacier face. Although some parts of the road was closed due to an avalanche in early 2019, we were still able to make it to the viewpoint to see the terminal face walk of the Fox Glacier – which was quite a rewarding experience.
Day 6 – Fox Glacier to Queenstown (while stopping by Felton Road and Chard Farm)
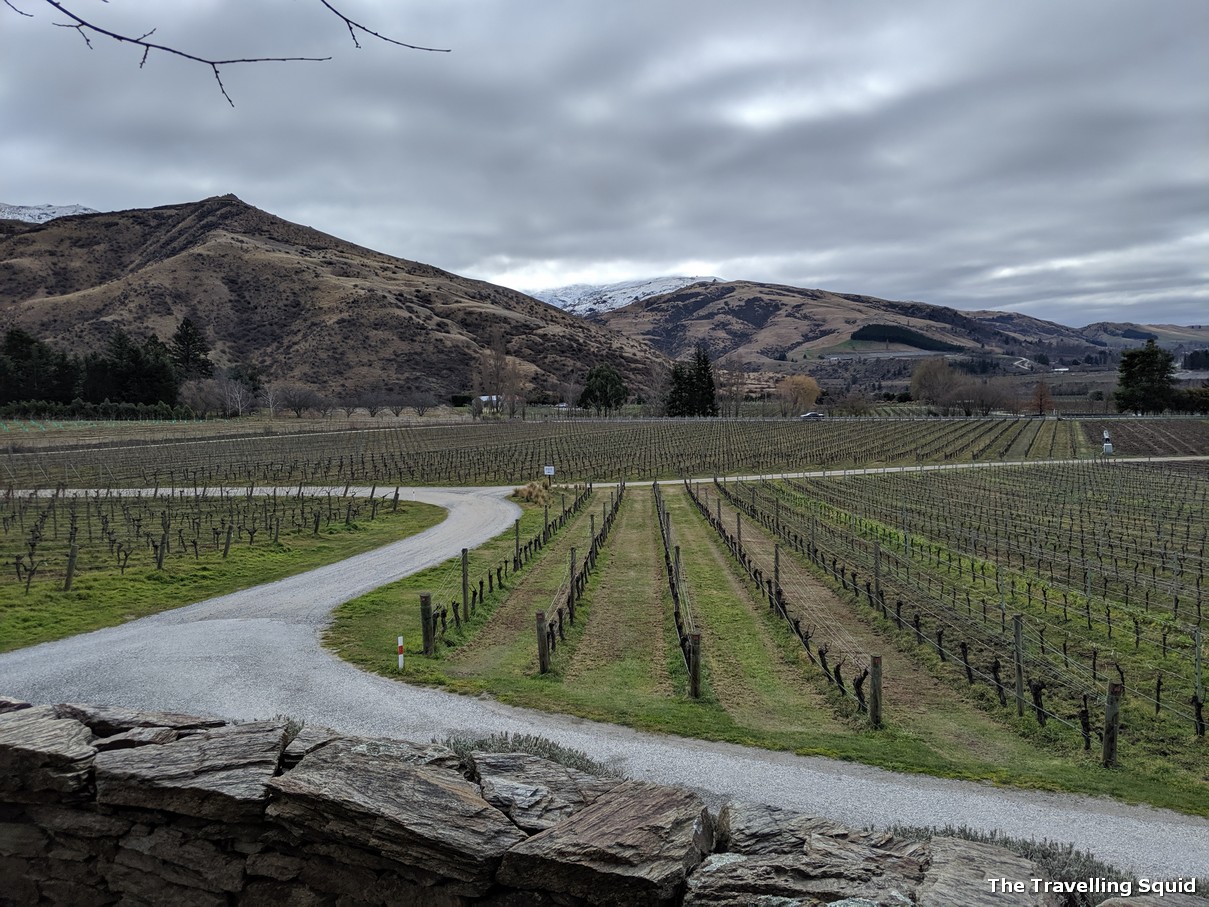
The cellar door of Felton Road in Bannockburn, in winter.
This day was spent driving from the Fox Glacier to Queenstown. We also stopped by Felton Road for a wine tour along the way, which was a great experience as their wines were very good. Apart from Felton Road, we also stopped by Chard Farm for a tasting at the recommendation of a friend, which was about 35mins away from Queenstown. It was a fruitful day given the bottles we acquired!
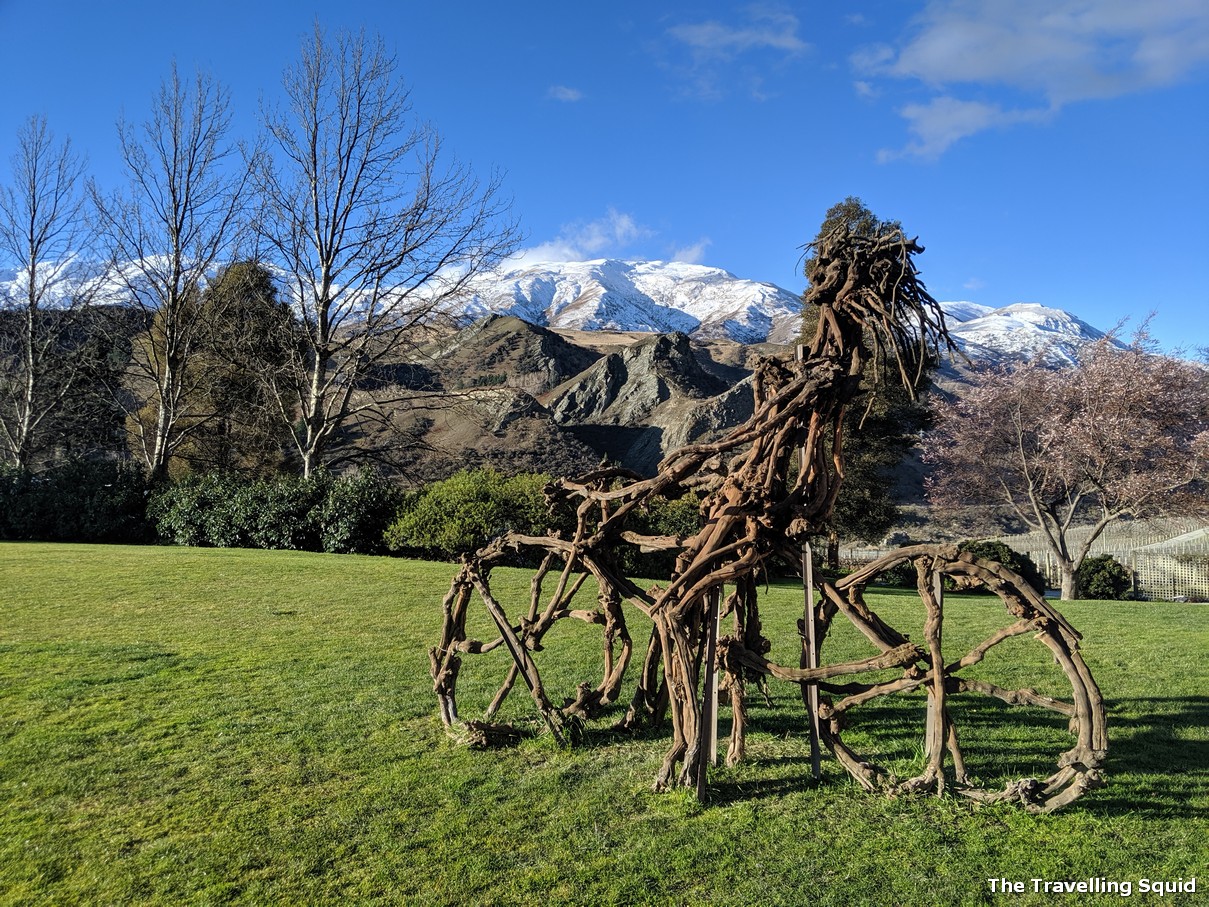
Chard Farm – scenery is beautiful as it faces snow-capped mountains.
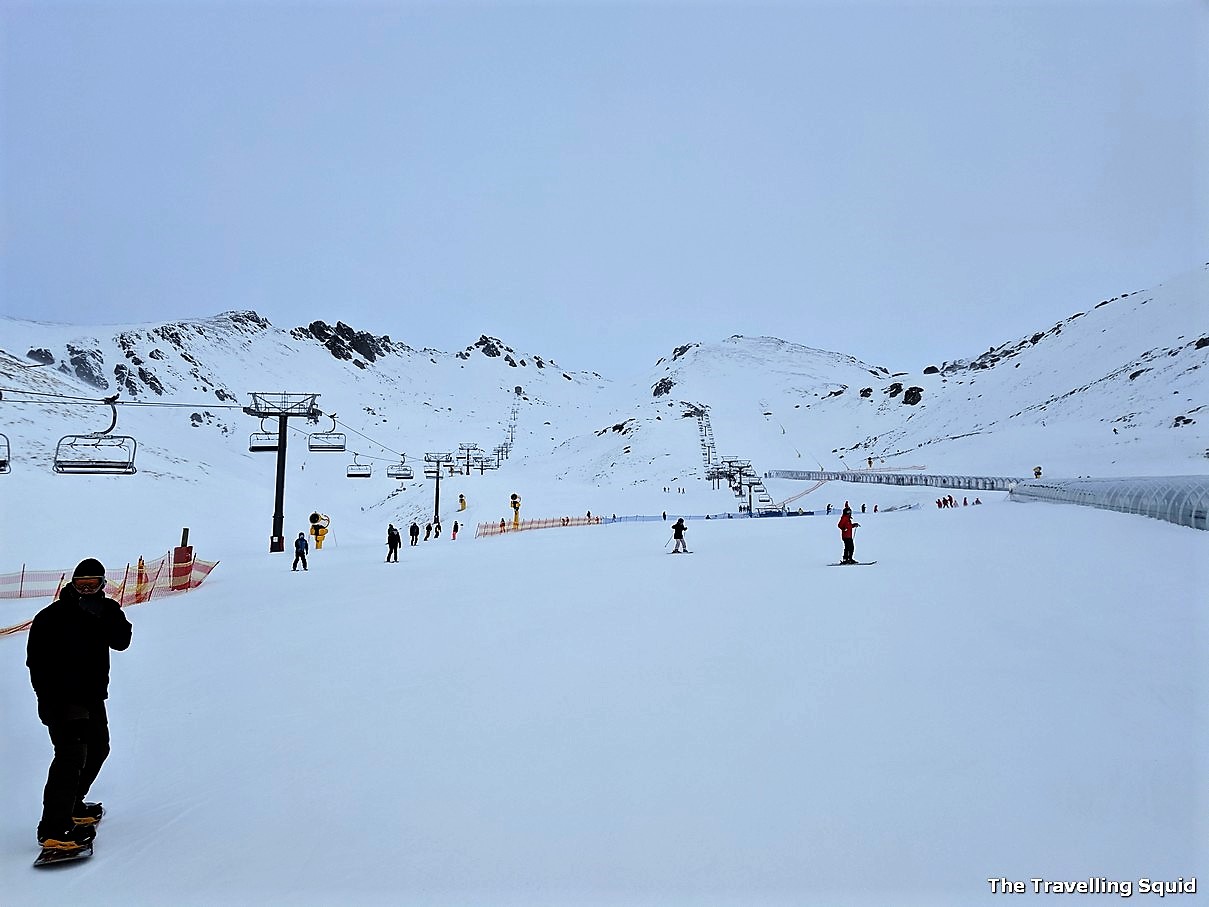
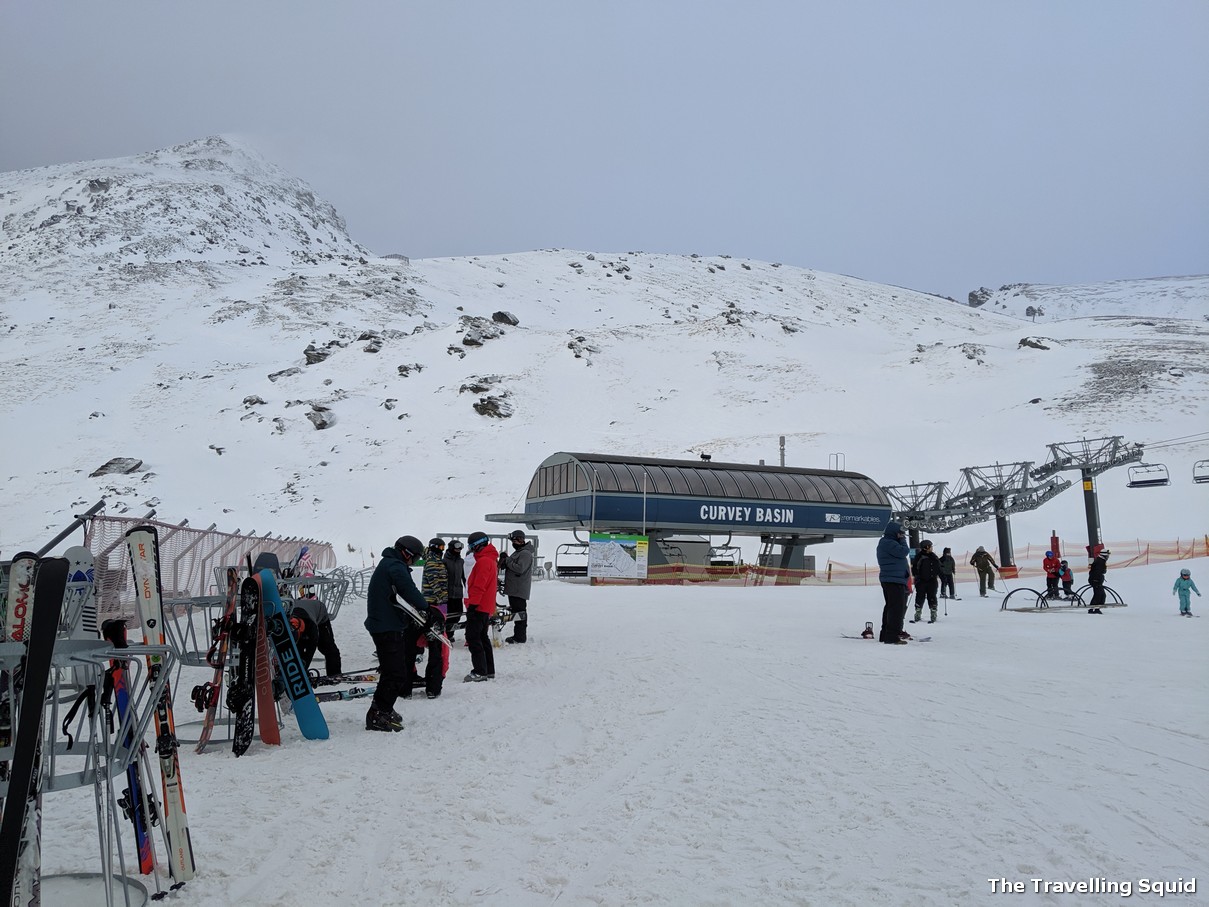
We also spent a day skiing at The Remarkables. It was my first time skiing and I took lessons. Recalled having problems stopping and knocking over several people as a result. But I will be back!
The left up to the ski slopes.
Day 8 – Drive to Te Anau
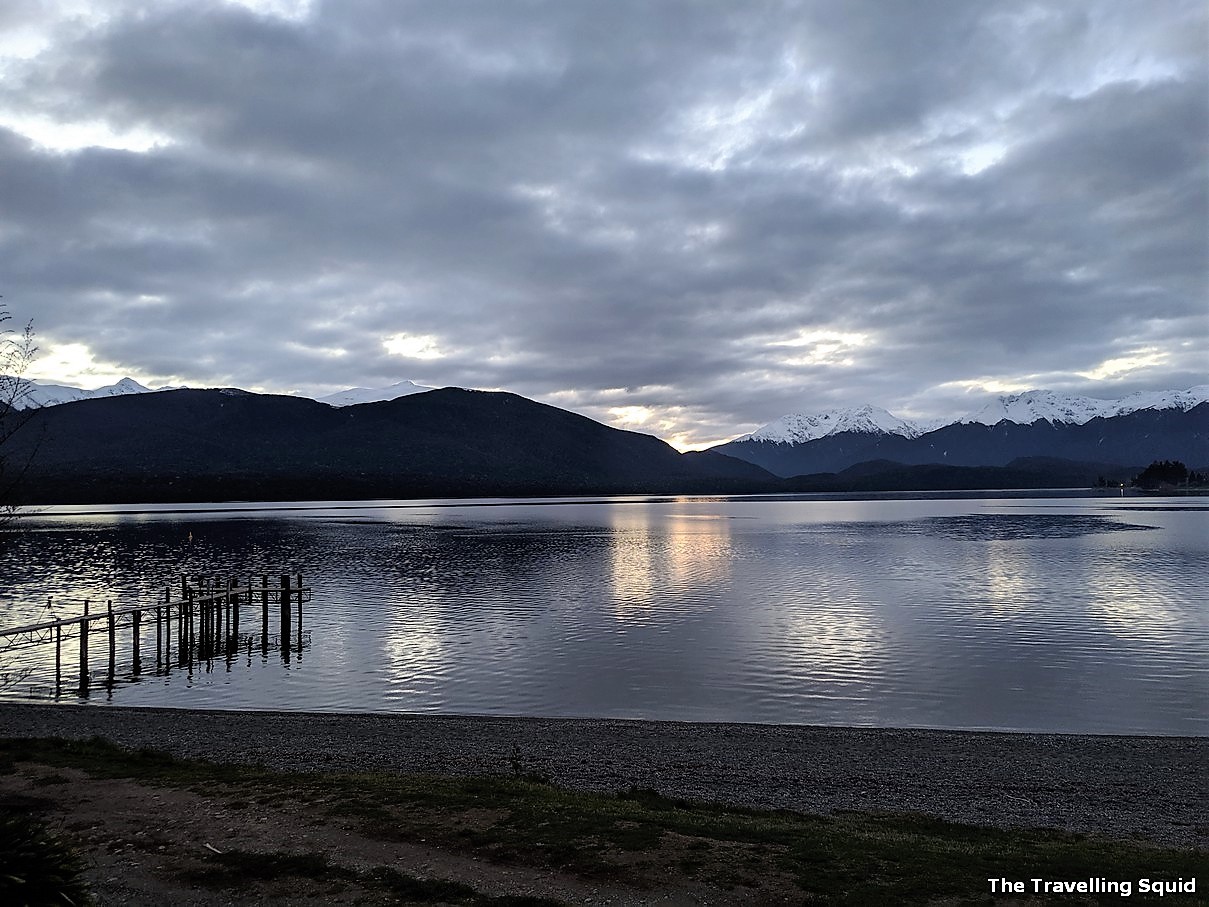
Lake Te Anau – calm, peaceful and worth a visit.
The next day, we drove to Te Anau and stayed there for a night before making our way to Milford Sound the next day. At the rare bird sanctuary at Te Anau, we got to see plenty of rare birds and take a walk along South Island’s largest freshwater lake, Lake Te Anau. It was very relaxing. You can also get great seafood and chips at a chippery Mainly Seafood located in the town of Te Anau.
Day 9 – Te Anau to Milford Sound and back to Queenstown
Like a scene from Lord of the Rings
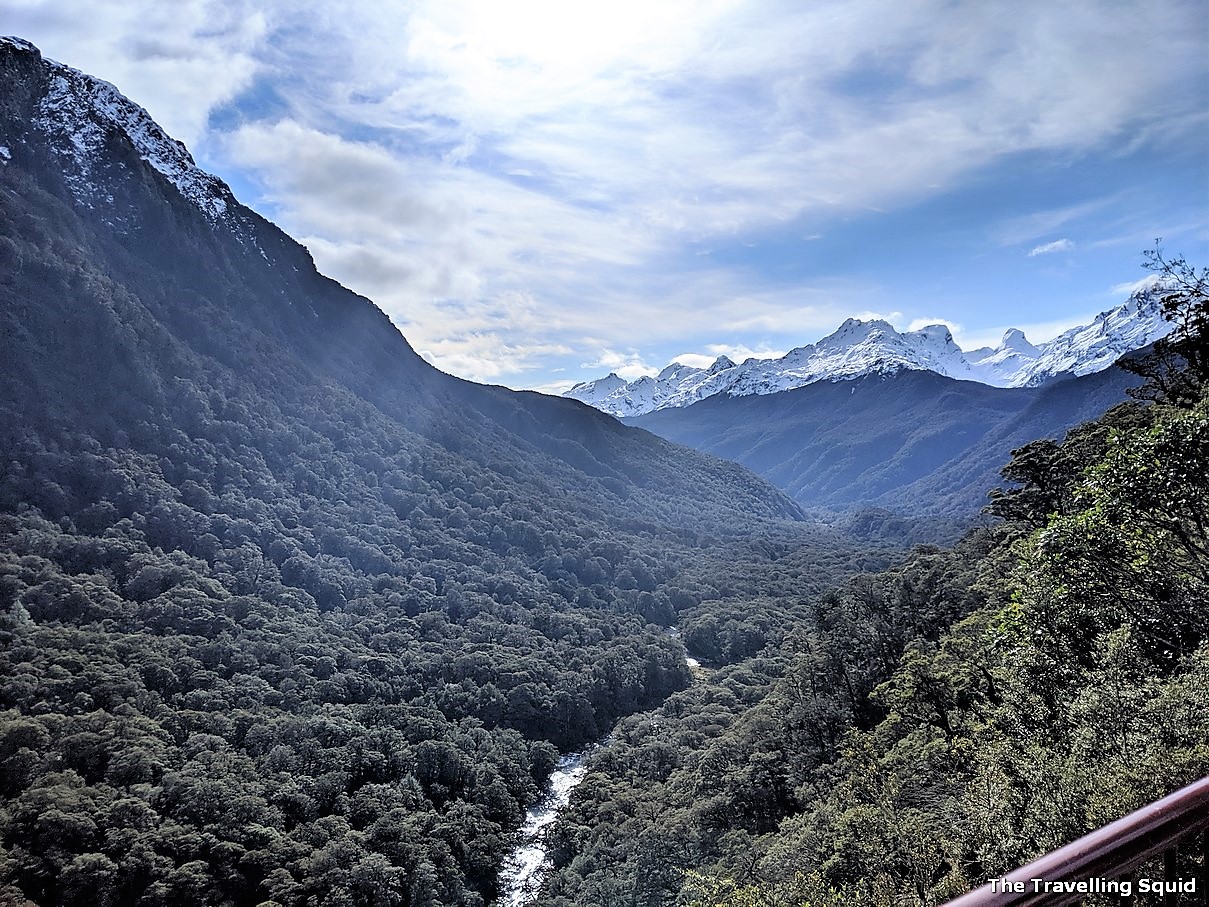
The next day, we carried on our trip to Milford Sound, where we made several stops along scenic viewpoints. They range from valleys, to fields, to mountain ranges and a mirror lake. Do check out the post below for some suggestions.
At Milford Sound, we took a cruise to experience the fjords. It is not cheap at NZD88 per adult, but I thought it was worth it as the guide was informative and humorous, and we would probably not return to Milford Sound so soon.
I remembered our last dinner in Queenstown was Fergburger, which was had really amazing burgers. We also washed it down with a bottle of wine from Chard Farm.
***
The Travelling Squid’s Take – the 10 day New Zealand North and South island itinerary
10 day New Zealand North and South island itinerary
I personally found 10 days in New Zealand’s North and South Island sufficient, though I think we could have visited more scenic places if we had more time. But it could be due to age, a 10 day trip seem sufficient, as I longed to return back to have some Asian food and get some rest. I was glad we visited both islands and was a spectator to the grand landscapes before us. Towards the end of our trip in Queenstown, we met up with two more friends and I must say it was a fun experience too, especially during the long road trip to Te Anau and Milford Sound.
Before I end this post, just wanted to say that the Lord of the Rings soundtrack on Spotify made for a great background music along the drive. And if you see great scenery along the winding roads, make a stop because you won’t regret it. The picture above was take during one of our stops. That marks the end of our posts on New Zealand. Stay tuned for more on our recent trip to Italy!
Do drop a comment in the box below if you have any recommendations.
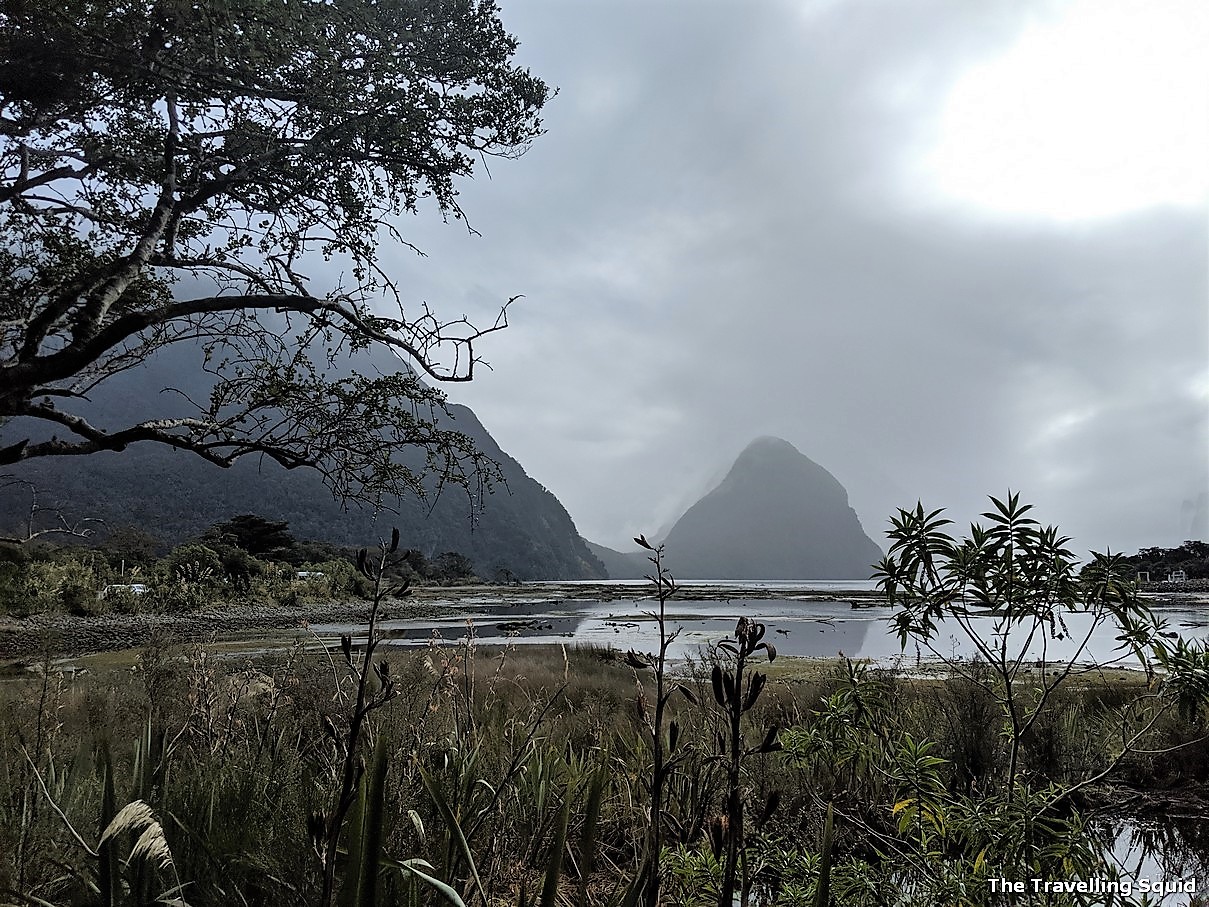
There are plenty of things to do in Milford Sound, including going on kayaking trips and taking walks. But if you’re planning on taking a relaxing journey to see New Zealand’s very own fjords, taking a cruise will allow you to come up close and personal with the high cliffs that surround the narrow inlet of water, which leads into the Tasman Sea. During our trip to Milford Sound last August, we booked a nature cruise with Real Journeys. Here is an account of our experience and an answer to “Is a Milford Sound day cruise worth it?”.
A fjord, a narrow inlet of water formed when a glacier retreats.
Before we begin, what is a fjord?
According to website Norway Today, a fjord is formed when a glacier retreats (after carving up a typical U-shape valley) and the sea fills in the resulting valley floor. This forms a narrow, steep body (sometimes deeper than 1300 metres) which is connected to the sea. In the case of Milford Sound, the fjord is connected to the Tasman Sea.
Fjords can typically be found in the Northern Hemisphere, in countries like Norway, Iceland and Canada. In the Southern Hemisphere it is less common and New Zealand is one of the few countries to have it.
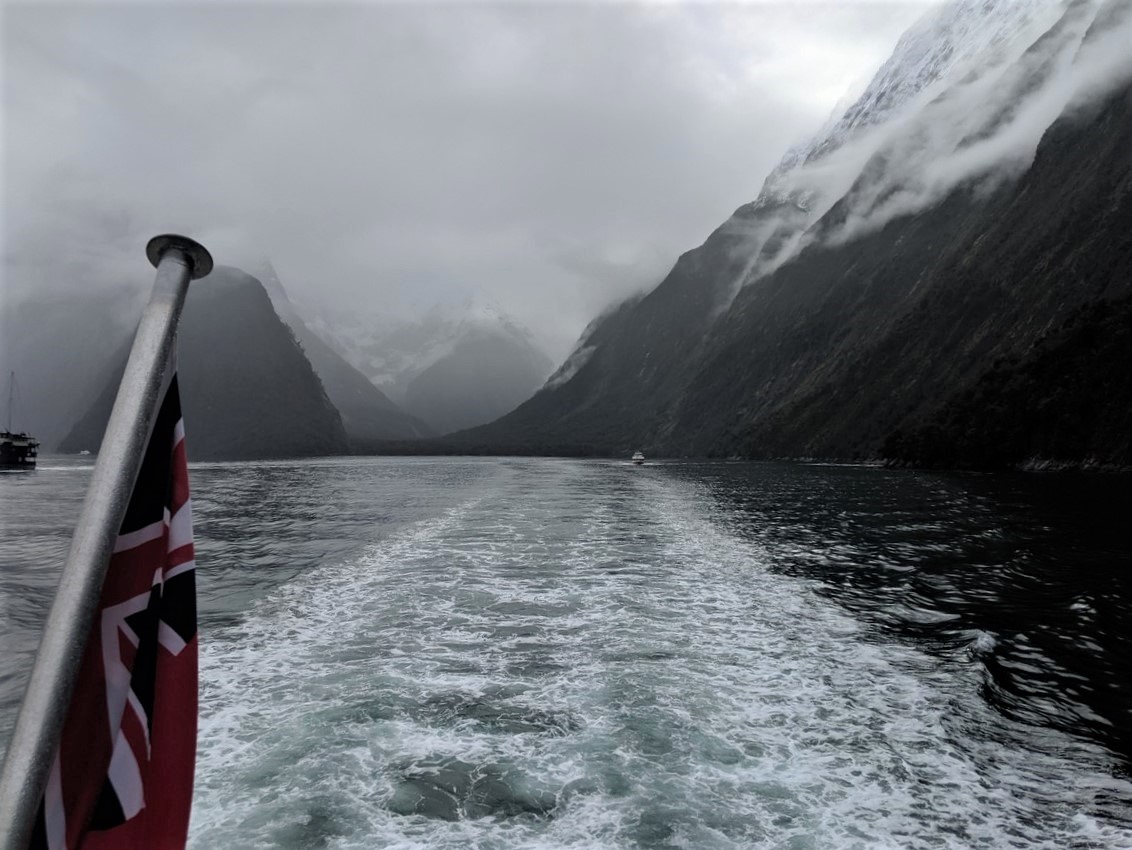
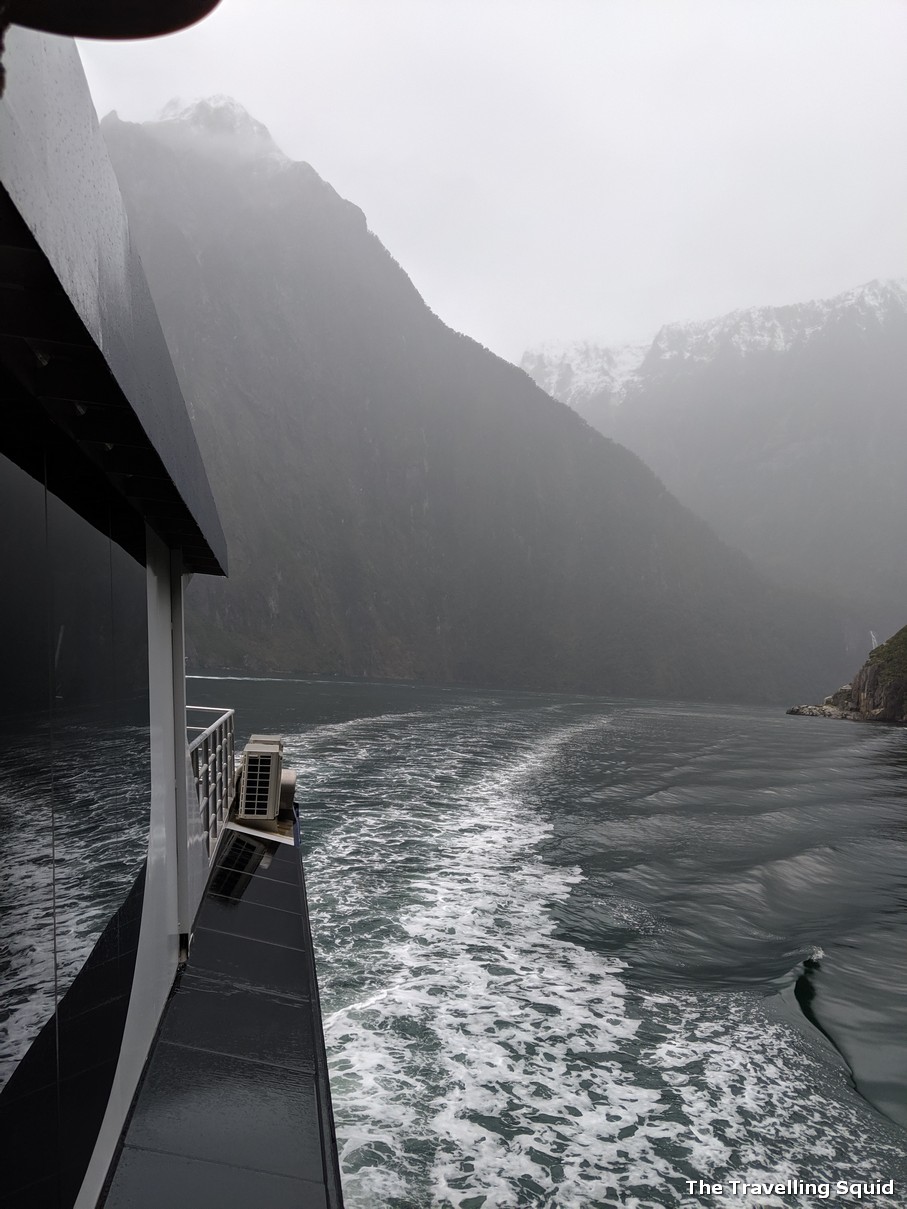
Our Milford Sound Day cruise with Real Journeys.
Is a Milford Sound day cruise worth it?
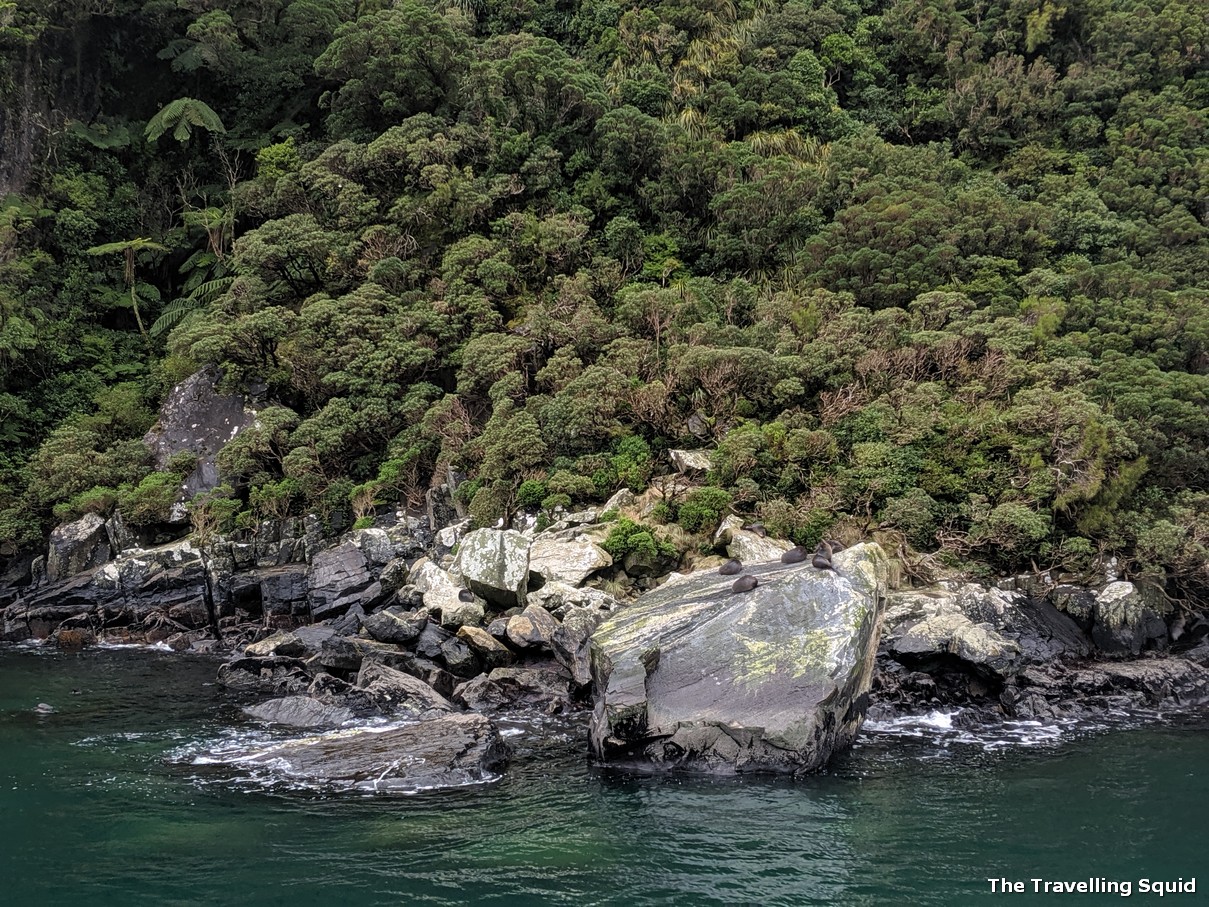
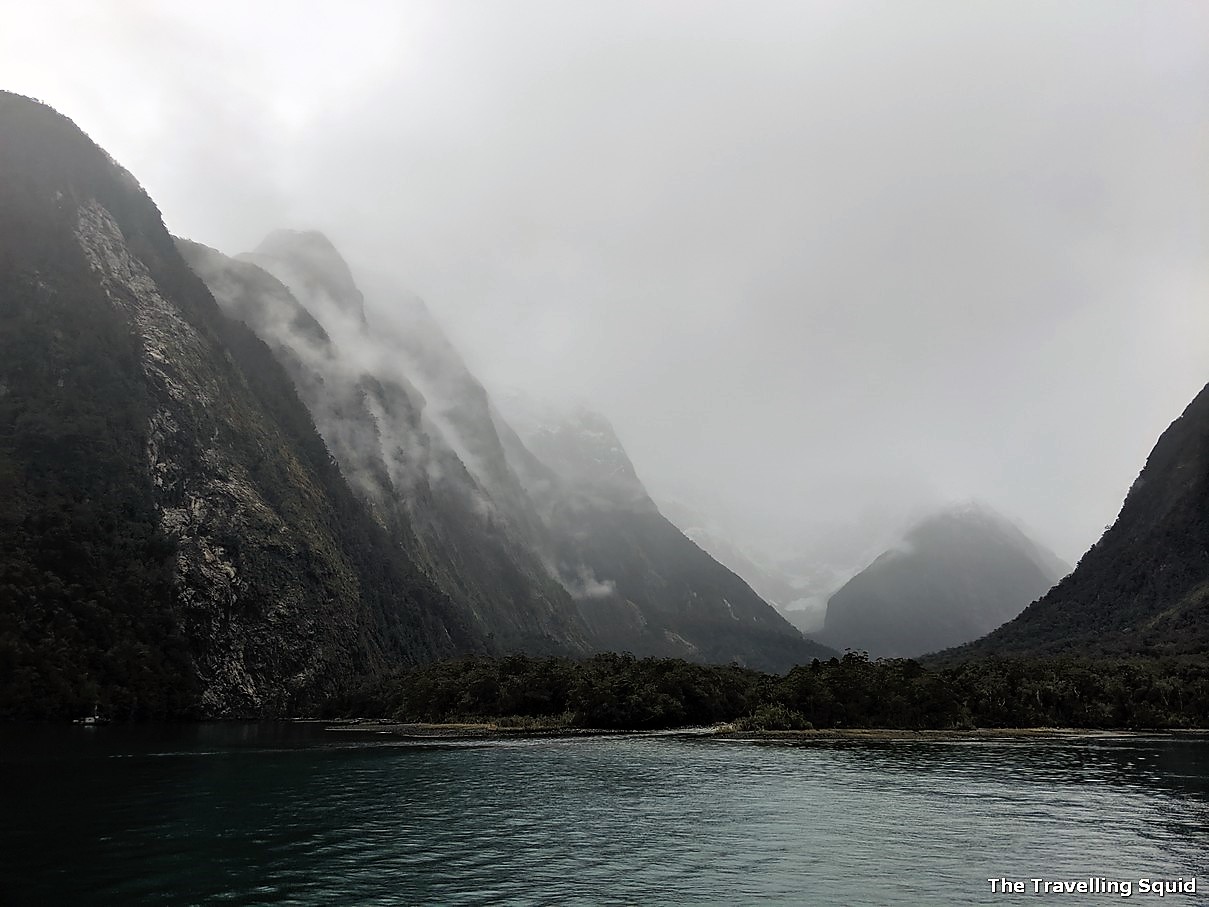
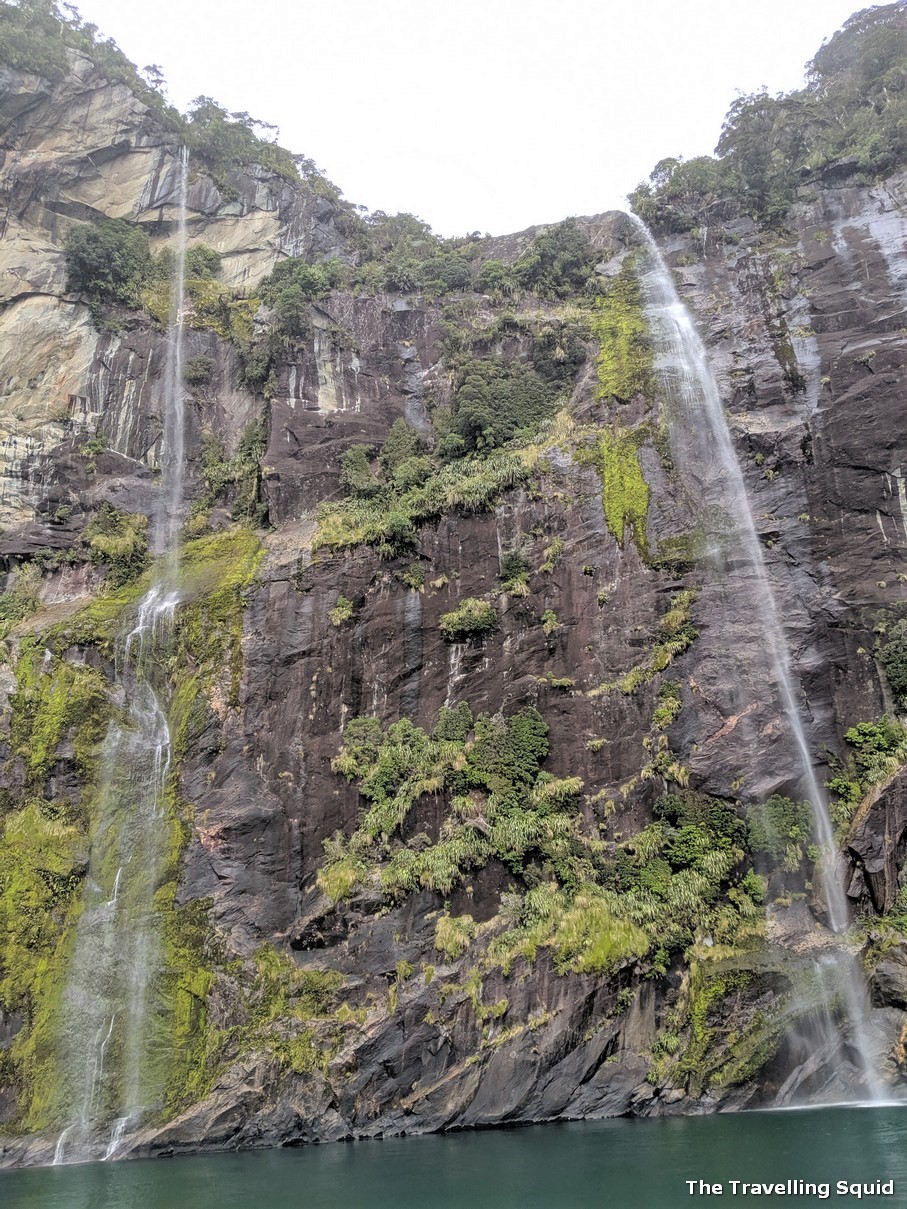
I would say yes, if you have an interest in fjords, because it would be difficult to observe the fjords with alternate transport options. The cruise takes you along the narrow stretch of water and you have the chance to observe waterfalls, some seals basking on the rocks, and interesting rocky outcrop formations. The cruise brings you all the way to the mouth of the Tasman Sea, before making a U-turn to head back.
At the front deck of the ferry.
Buying a ticket
We purchased tickets at Te Anau. The booking comes with a coach ride to Te Anau or Queenstown at an added cost. But as we had a car, we thought it might be faster if we were to travel to Milford Sound on our own as we could go faster. Also, we could stop at any scenic viewpoint we wanted.
Finally we have arrived.
Our guide and the ferry
We passed by many rocky outcrops
What I did like about the cruise was that our guide was quite humourous and informative as well. (Unfortunately it has been awhile and I have forgotten her name). The ferry comes with an open deck in the front and and the back, which gives you a chance to pop out of the warm comfort of the ferry to experience the nature outside.
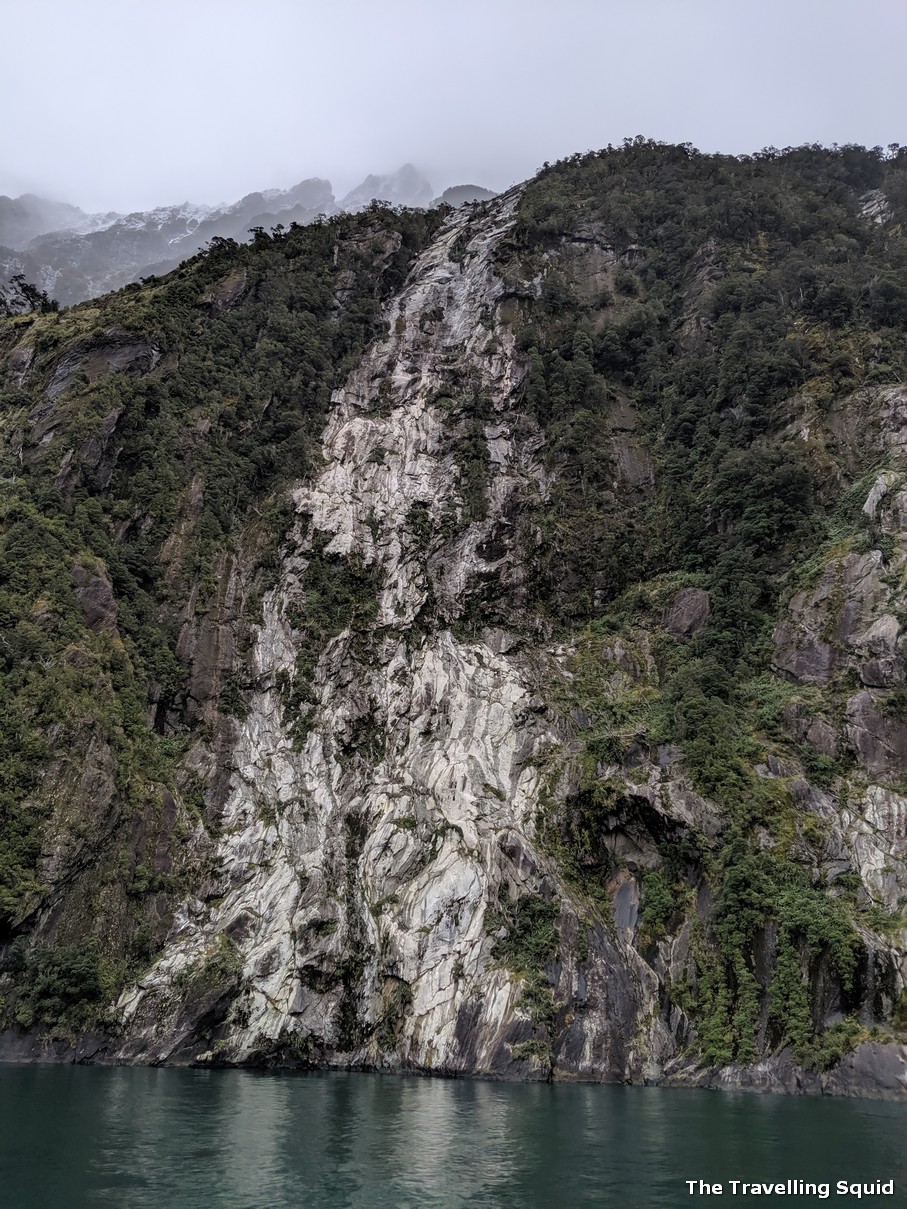
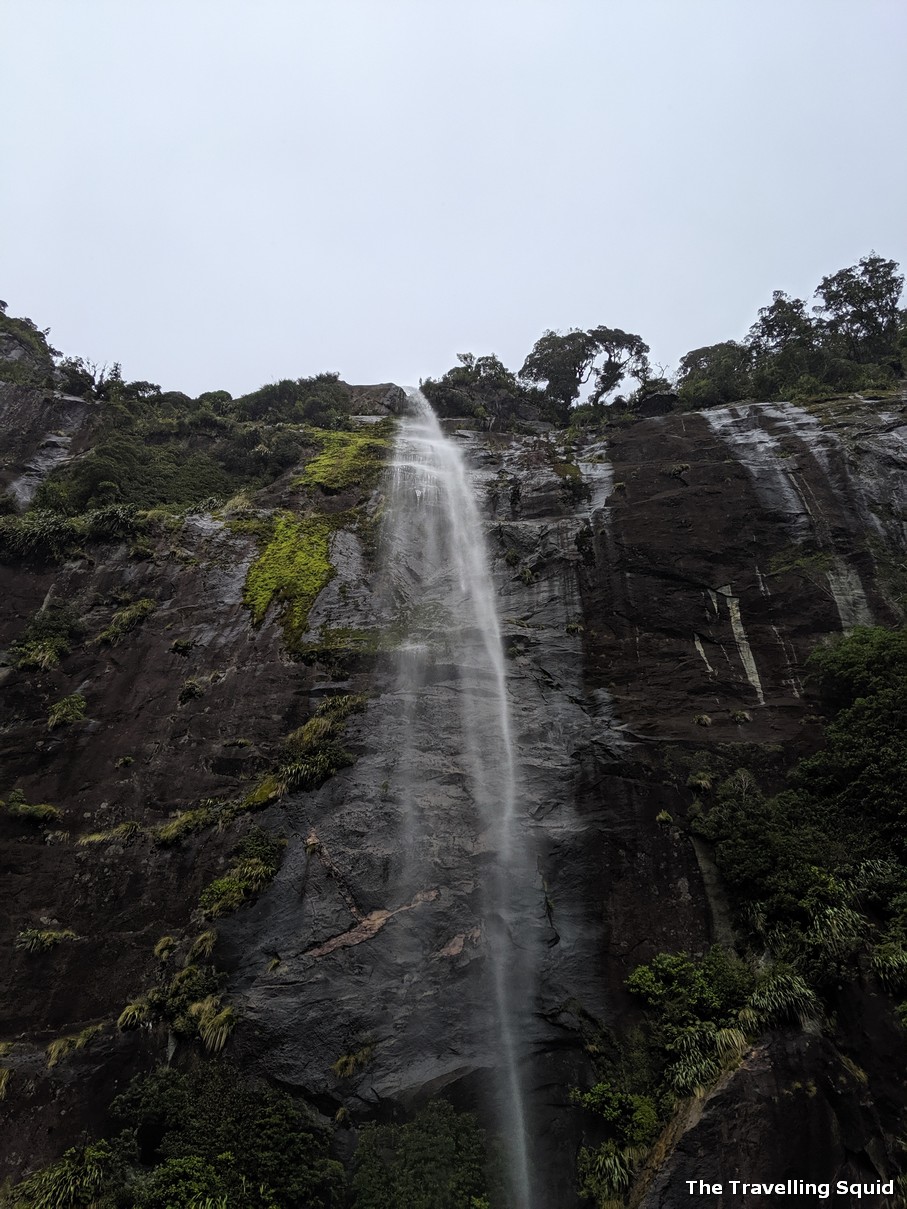
Waterfalls too. As it was rainy, the photos were quite dark.
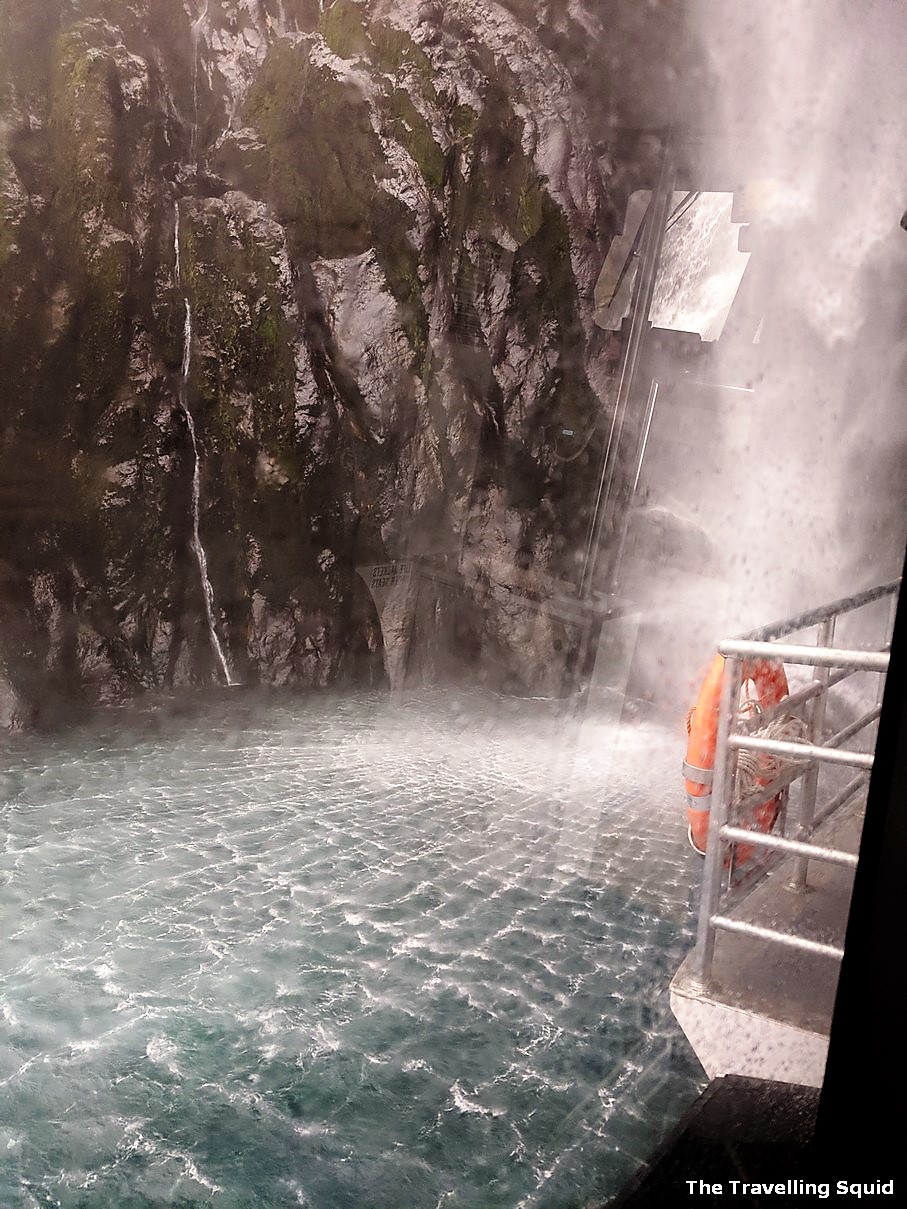
Unfortunately during our time on the ferry, it rained a fair bit and got pretty cold hence we had to duck back indoors. If you’re in for a splash, the ferry comes super close to a waterfall and you’re bound to get wet if you were to stay outside.
The ferry came really close to a waterfall. You’re bound to get wet from the spray.
If you wish to take a rest, (or might be feeling seasick), sitting indoors help as you still get to see the fjords from behind a glass pane. It almost feels as if a nature documentary is unfolding right in front of you.
Seals basking on the rocks. Apparently, there are 8 of them in this picture. See if you can spot them.
The whole cruise takes about 2 hours. We had booked the 1.35pm cruise, and it ended around 3.35pm. The timing was just nice for a 4-hour back to Queenstown.
Love how the water gently cascaded down.
The Travelling Squid’s Take
To be honest, due to the hype of what I had seen of Milford Sound, I thought the scenery would be very different from the sights that I have experienced. But it seems like any normal rocky outcrop to me with trees growing on along the rock surface. That said, I was glad to experience what passing through a fjord is and observe the steep cliffs and rock formations of the inlet. I wondered what was it like in the past during a storm when people on ships were trying to find cover – it must have been real hard to get onshore. Is a Milford Sound day cruise worth it? I would say yes especially if it’s your first time experiencing what a fjord is like.
***
Real Journey’s Milford Sound Nature Cruise
Duration: 2hrs 15mins (2hrs May – Sep)
Seasons: Open the whole year round thought it was closed in Feb 2020 due to a flood at Milford Sound. Check the web-link below for the latest updates.
In an earlier post, I wrote about driving from Queenstown to Te Anau and spending a night there before heading on to Milford Sound. I also highlighted some scenic viewpoints to stop by along the way. You may be wondering what can be done in this quiet little town. Here are three things to do in Te Anau.
Three things to do in Te Anau
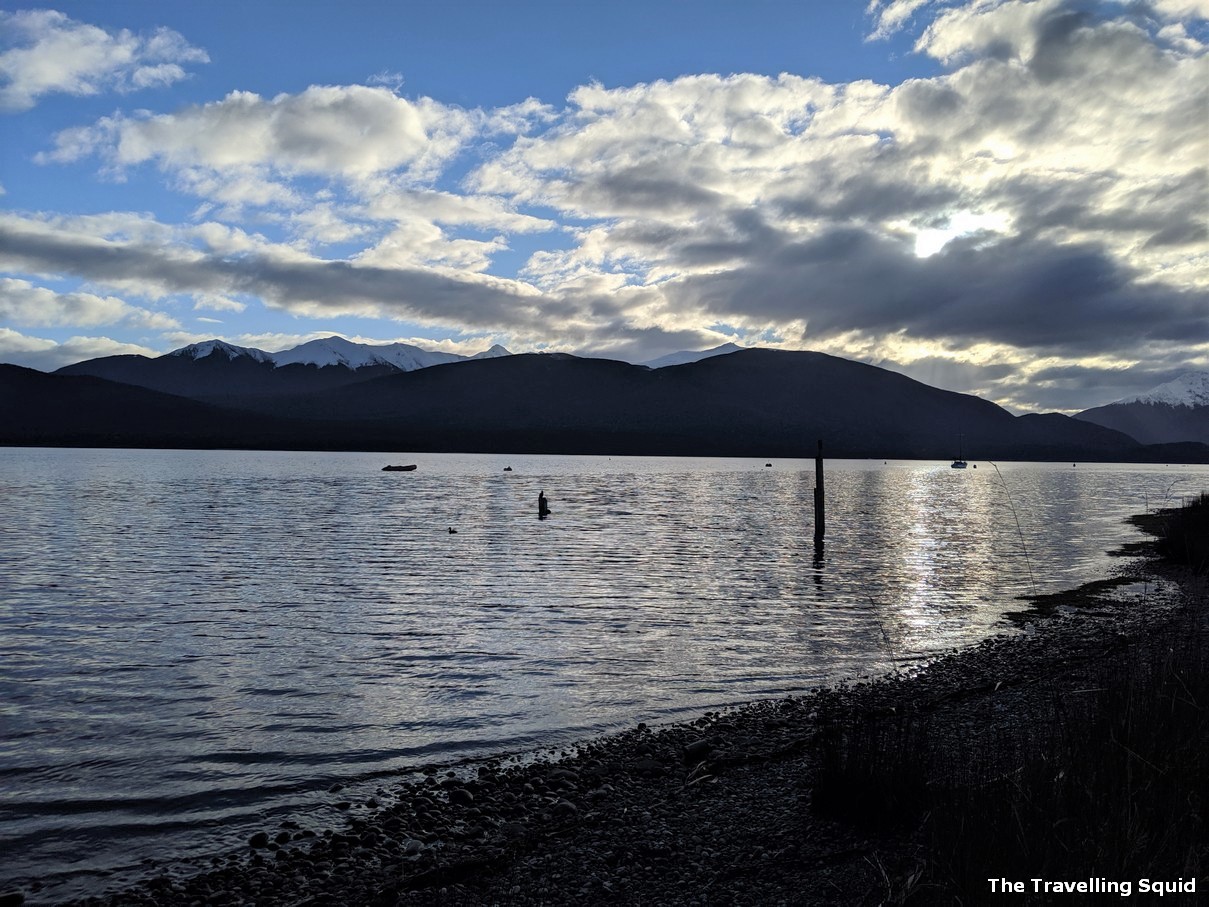
1. Take a hike around Lake Te Anau (the length of the hike is up to you)
The lake – calm, peaceful and worth a visit.The lake with snow-capped mountains in the background.
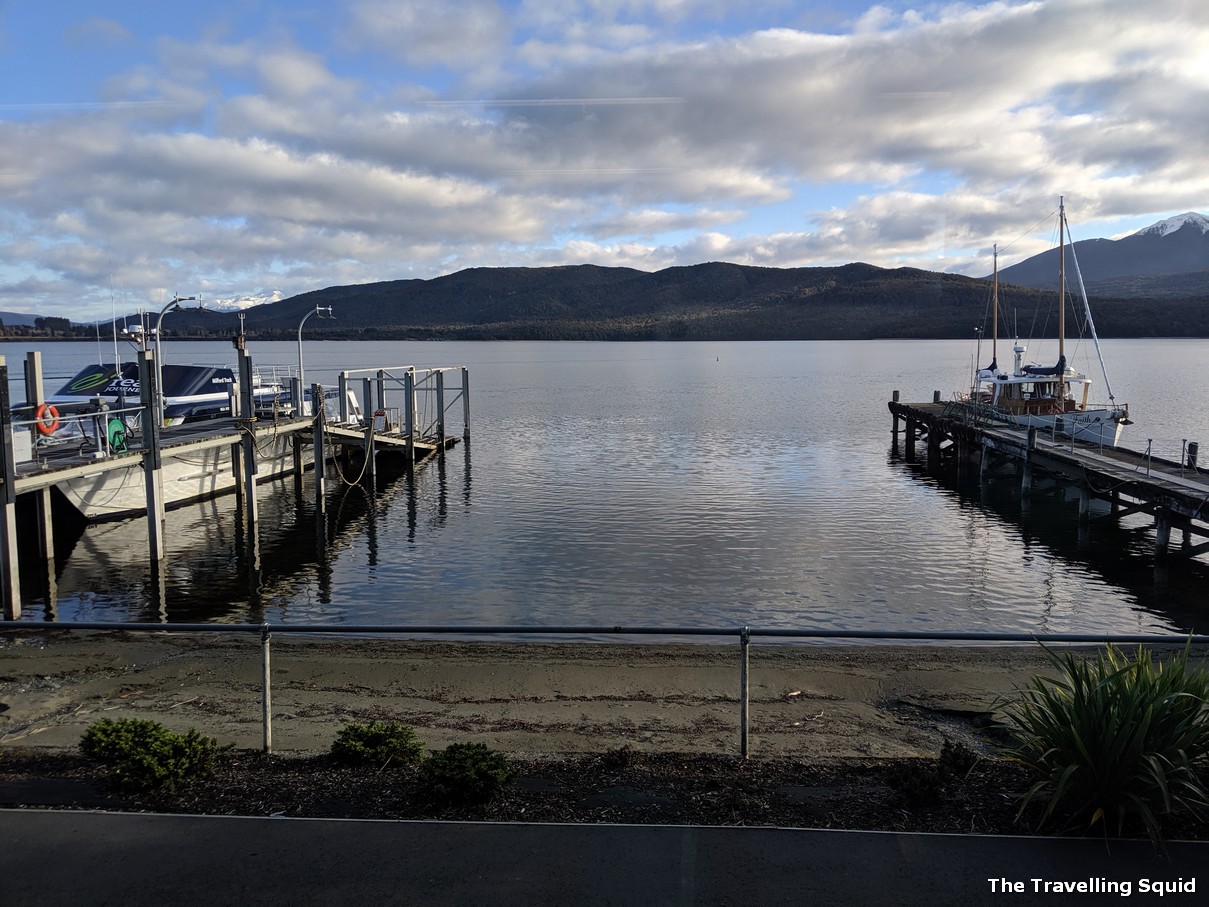
There are several sights around Te Anau like glowworm caves but they were closed when we got there. Hence, we decided to take a walk around Lake Te Anau and were rewarded by the scenery especially when the sun was setting. There was a little pier which extended into the lake, which made for a great photo spot. But it was taken up by avid photographers and vacationers when we were there.
Where the boats were docked.A little forest by the side of the lake.Cycling through.
Lake Te Anau is said to be there largest lake in New Zealand’s South Island and the second largest lake in New Zealand, after Lake Taupo. According to Wikipedia, most of the lake is within Fiordland National Park. The great thing about this hike is that you can decide how long you want it to be. There is no fix route, though it is on the way to the rare bird sanctuary (see below) from the carpark.
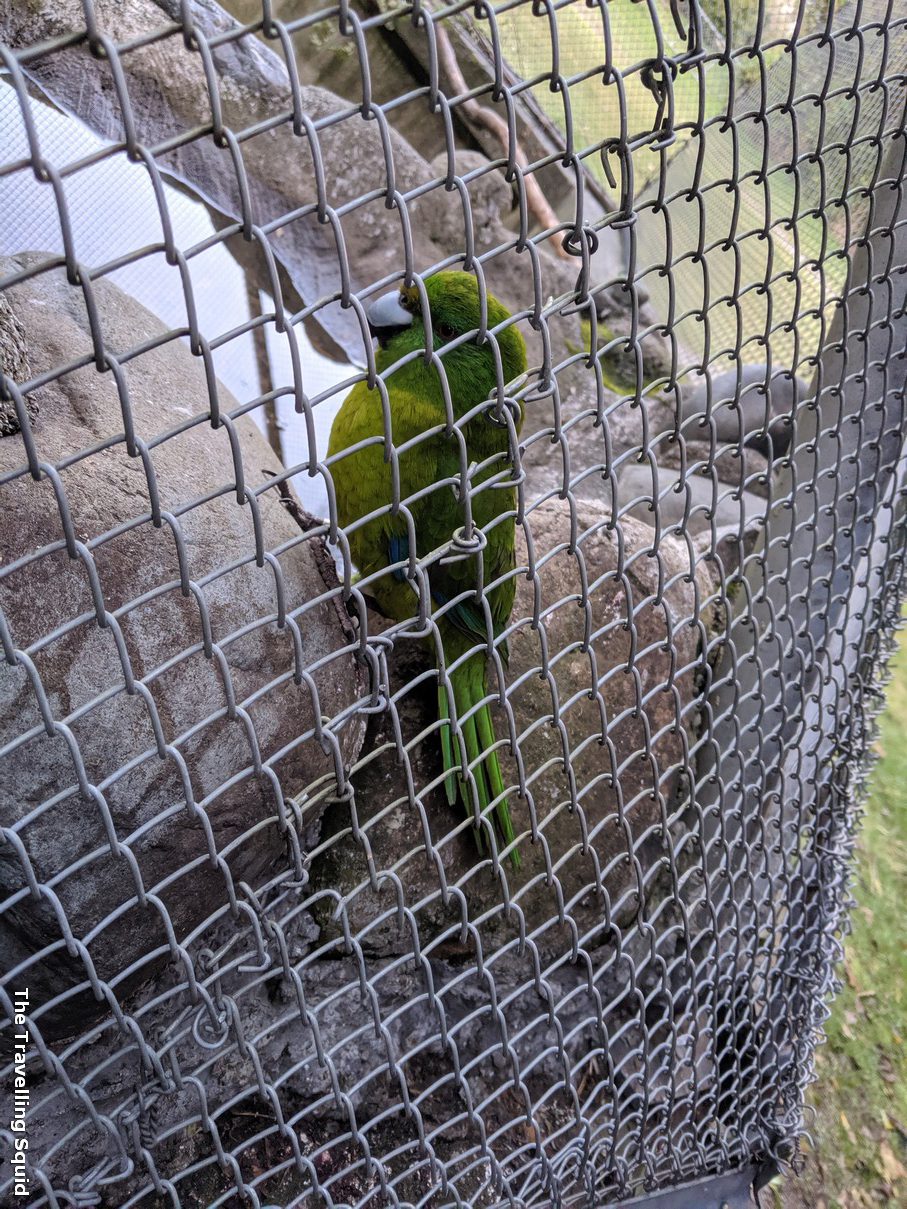
2. See some rare birds at the Te Anau bird sanctuary
A parakeet at the rare bird sanctuary at Te Anau.
The Te Anau bird sanctuary, which houses native birds such as the rare, flightless takahē and the kākā is definitely worth a visit. The great thing about its location is that you get to walk along Lake Te Anau on the way there, so it’s akin to killing two birds with one stone. (OK, maybe I should avoid using such idioms when talking about a bird sanctuary.) The Te Anau bird sanctuary is open 24 hours a day and admission is free. An interesting aspect of these birds is their bright colours and sharp beaks. I can imagine these birds ruling the deserted South Island before their predators (cats, rats and possums) were introduced by migrants here.
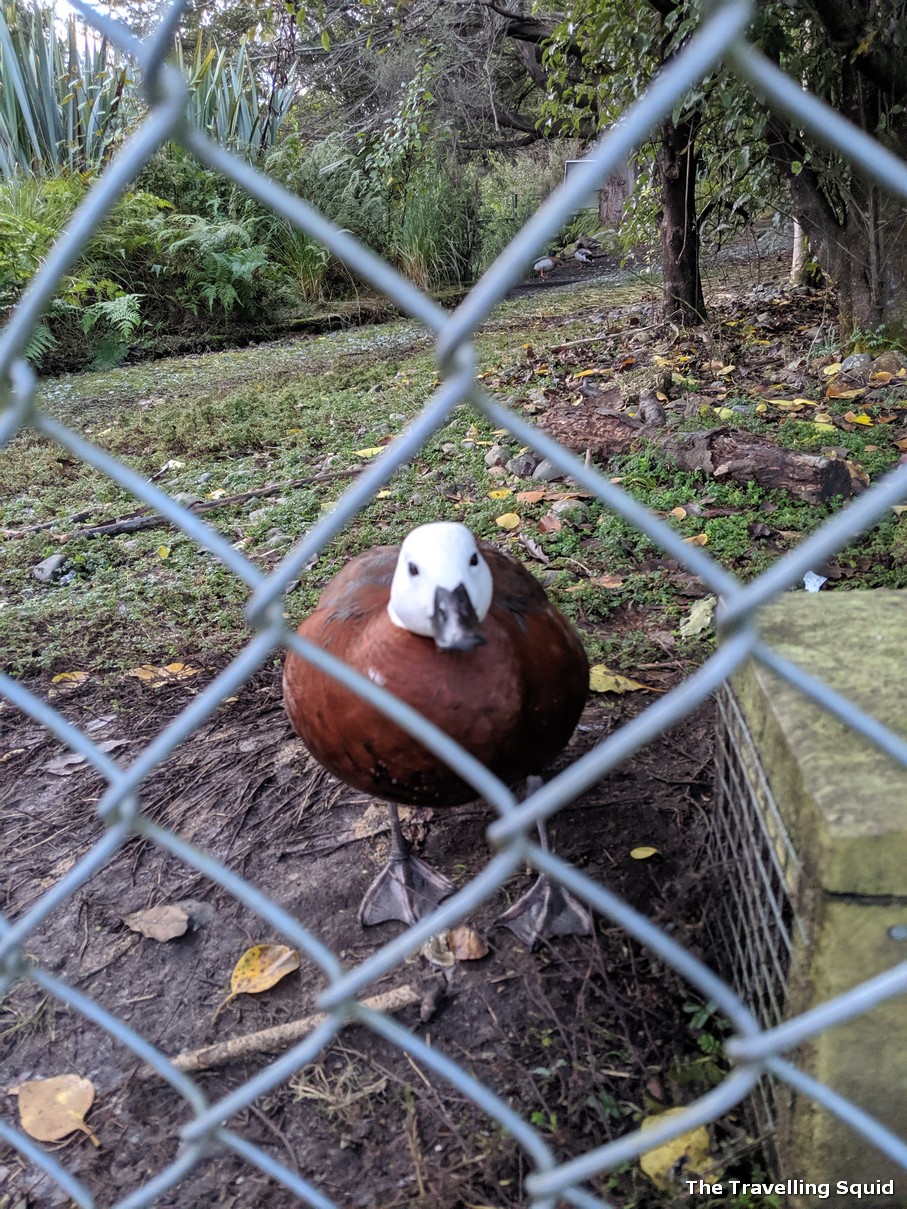
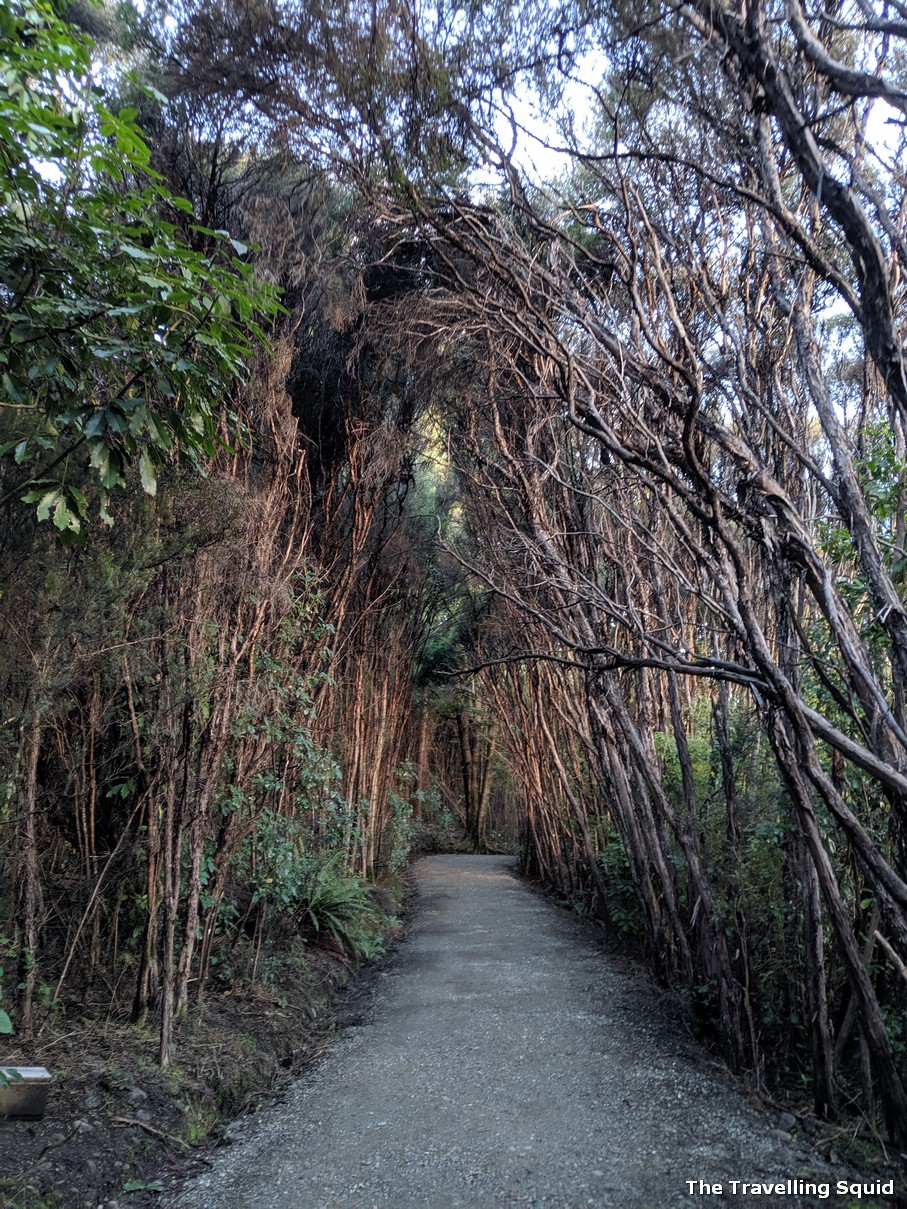
A rare bird which we saw at the bird sanctuary – unfortunately I have forgotten its name.Passing through a shaded tree path along the way to the bird sanctuary.
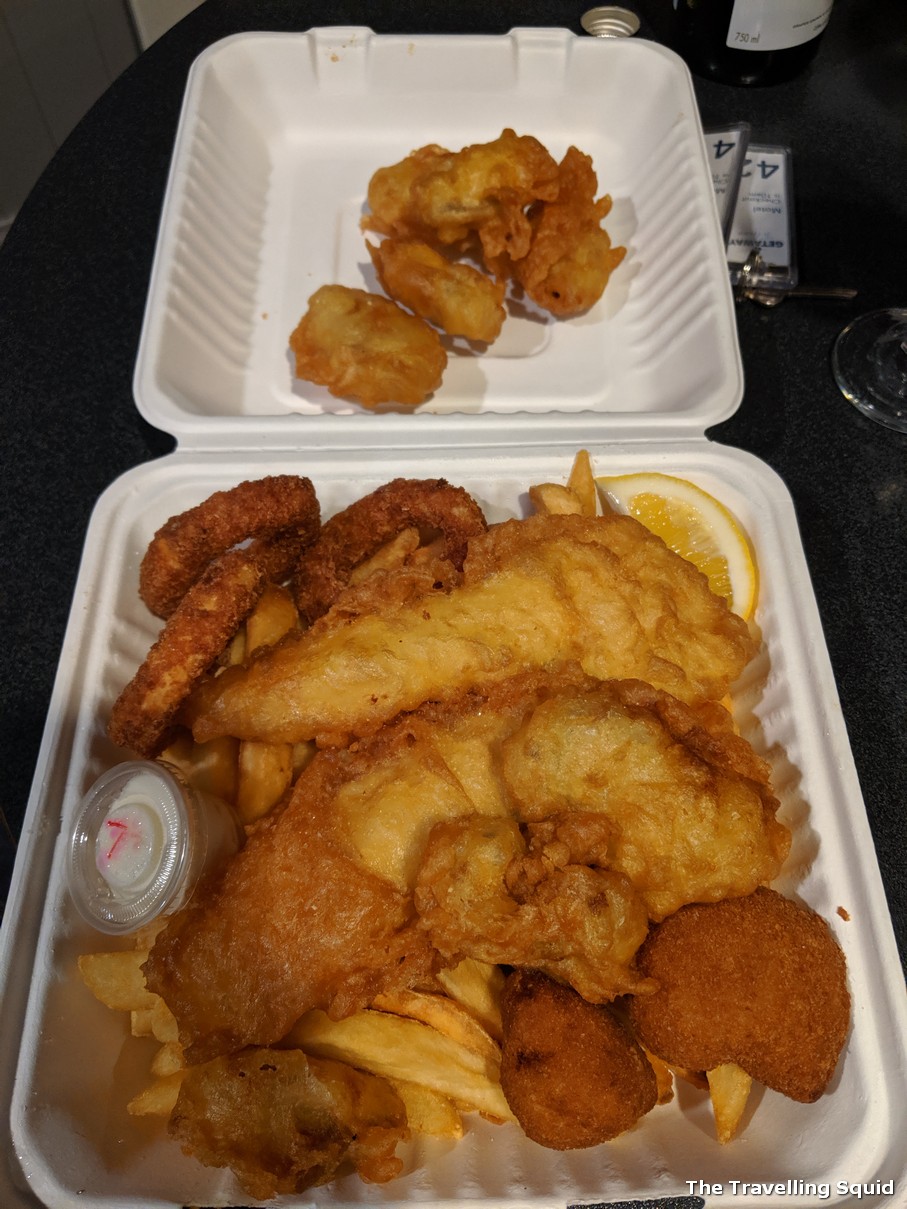
3. Have a big portion of fish and chips
Seafood platter for two from Mainly Seafood at Te Anau
Now I would have recommended visiting the glowworm caves but the attraction was not open while we were there. After walking around the lake and visiting the bird sanctuary, we got a little hungry and ordered some fish and chips from a chippery Mainly Seafood. A seafood platter for two was NZD39 and the portions were huge – it was very worth it. Mainly Seafood’s Tripadvisor ratings are pretty legit too. We had fish and chips with a bottle of wine we had purchased from Felton Road and it was a good night.
The Travelling Squid’s Take
A stopover in the town of TeAnau is definitely recommended especially if you’re thinking of driving to Milford Sound. It’s a quiet little town with a nice lake, rare birds to see and an excellent chippery. It’s also a great place to rest before driving on to Milford Sound the next day.
After exploring the wineries in New Zealand’s South Island, we planned a road-trip to Milford Sound from Queenstown. Based on our experience, a self-drive to Milford Sound is highly recommended, given the scenery along the way. It is also more economical than taking a helicopter in, which according to online sites could cost about NZD470 for a one way trip. During our drive from Te Anau to Milford Sound, we managed to stop by several viewpoints and still made it there in 2 hours. Here are three scenic viewpoints along the drive to Milford Sound.
Our itinerary
Our itinerary comprised taking a 2-hour drive from Queenstown to Te Anau. We also stayed at Te Anau for a night. The next day, we continued driving for 2 more hours to Milford Sound and then took a 2-hour cruise. Thereafter, we took a 4 hour drive back to Queenstown, which was fine because two of us took turns to drive. Before heading off from Te Anau, make sure that you have sufficient fuel as there are no petrol stations between Te Anau and Milford Sound.
3 scenic viewpoints along the drive to Milford Sound
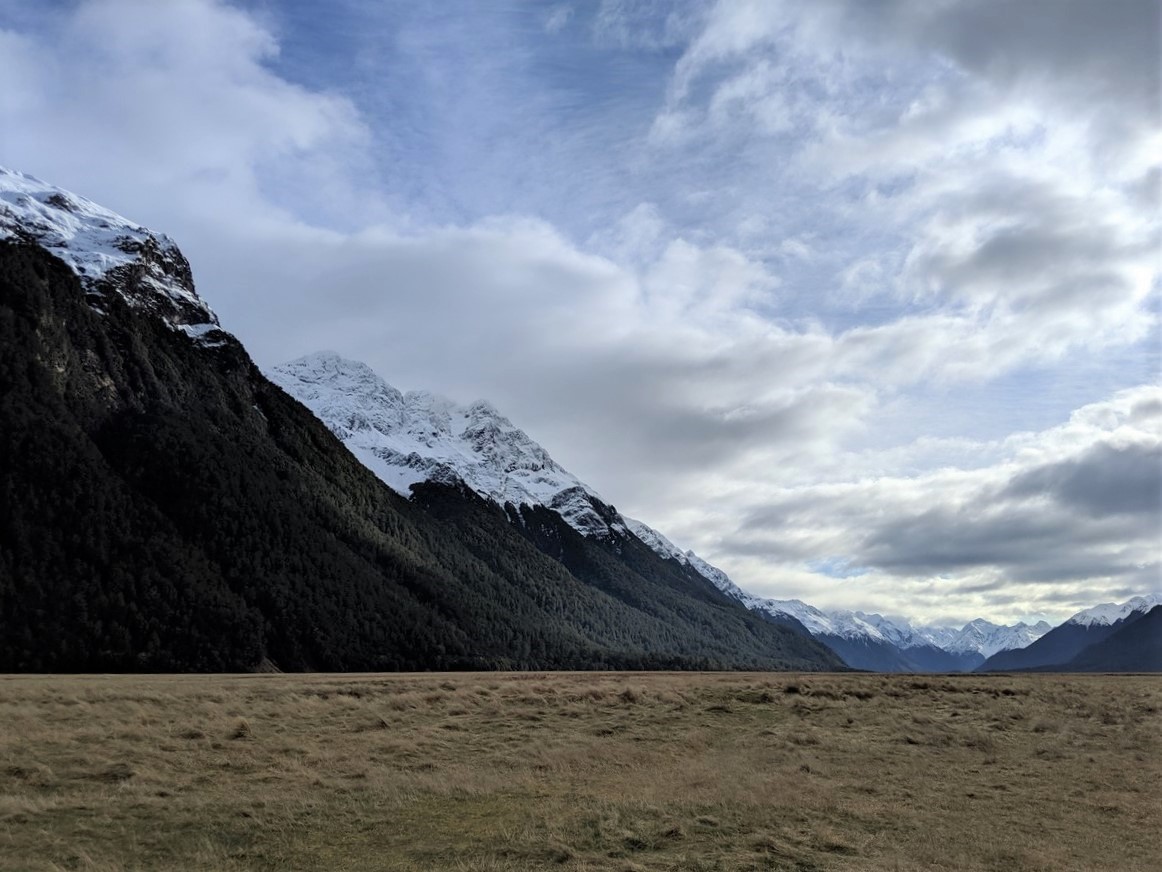
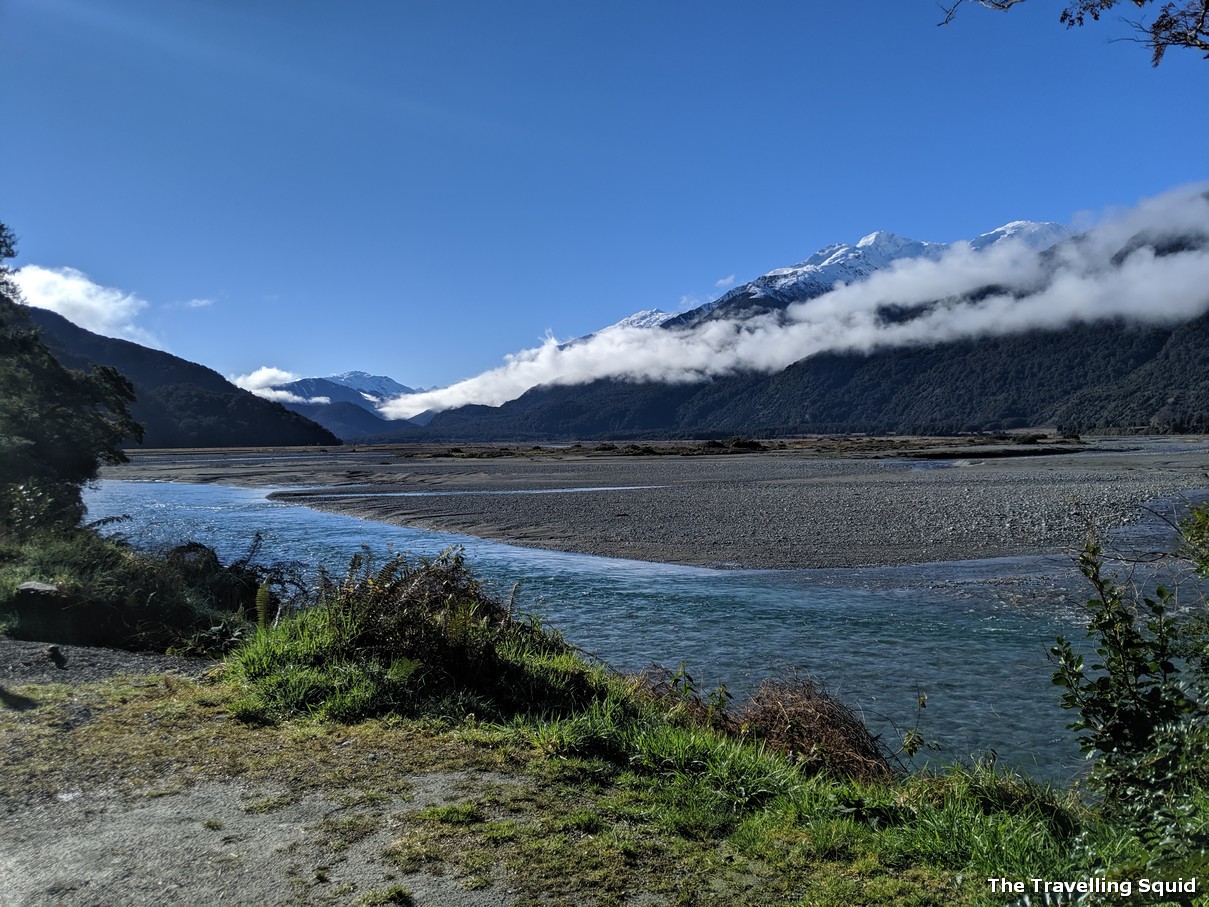
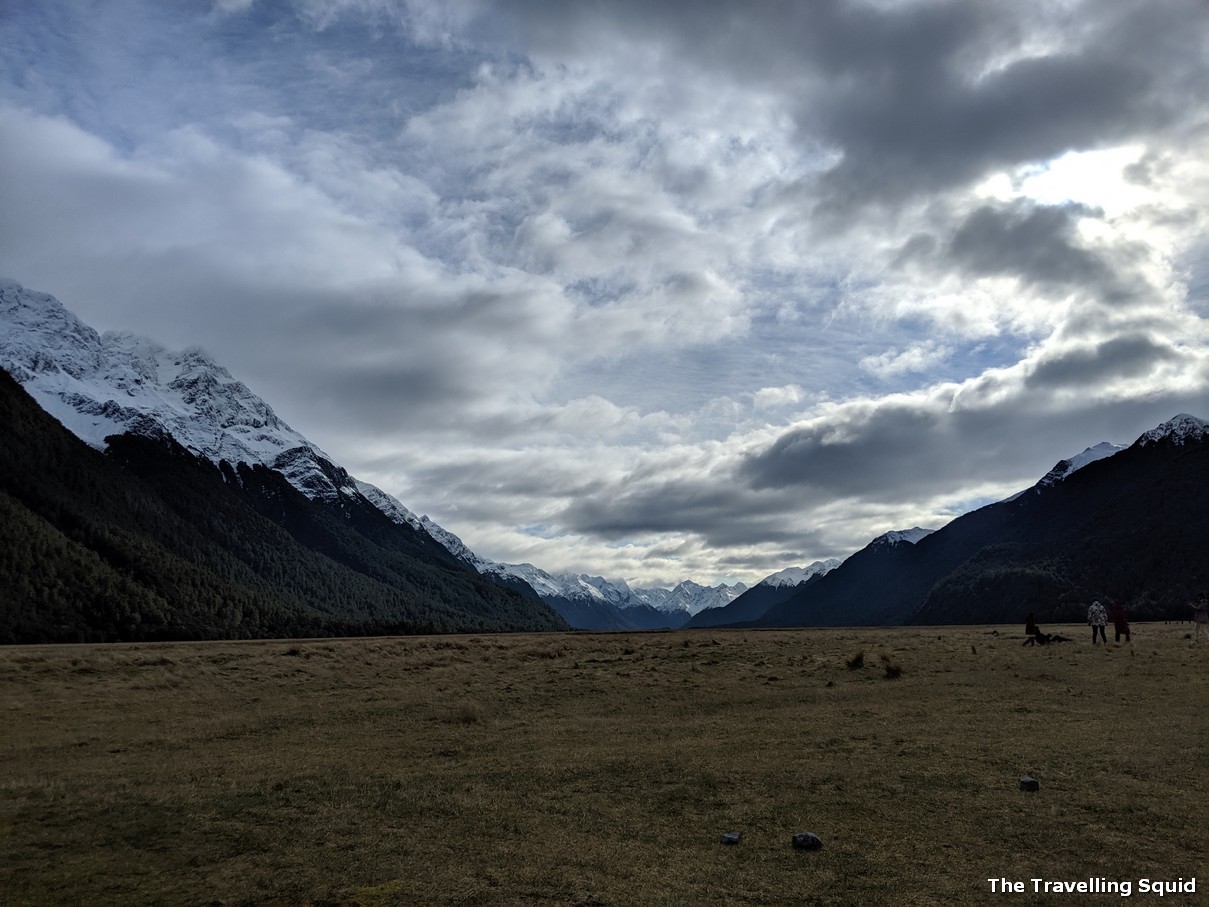
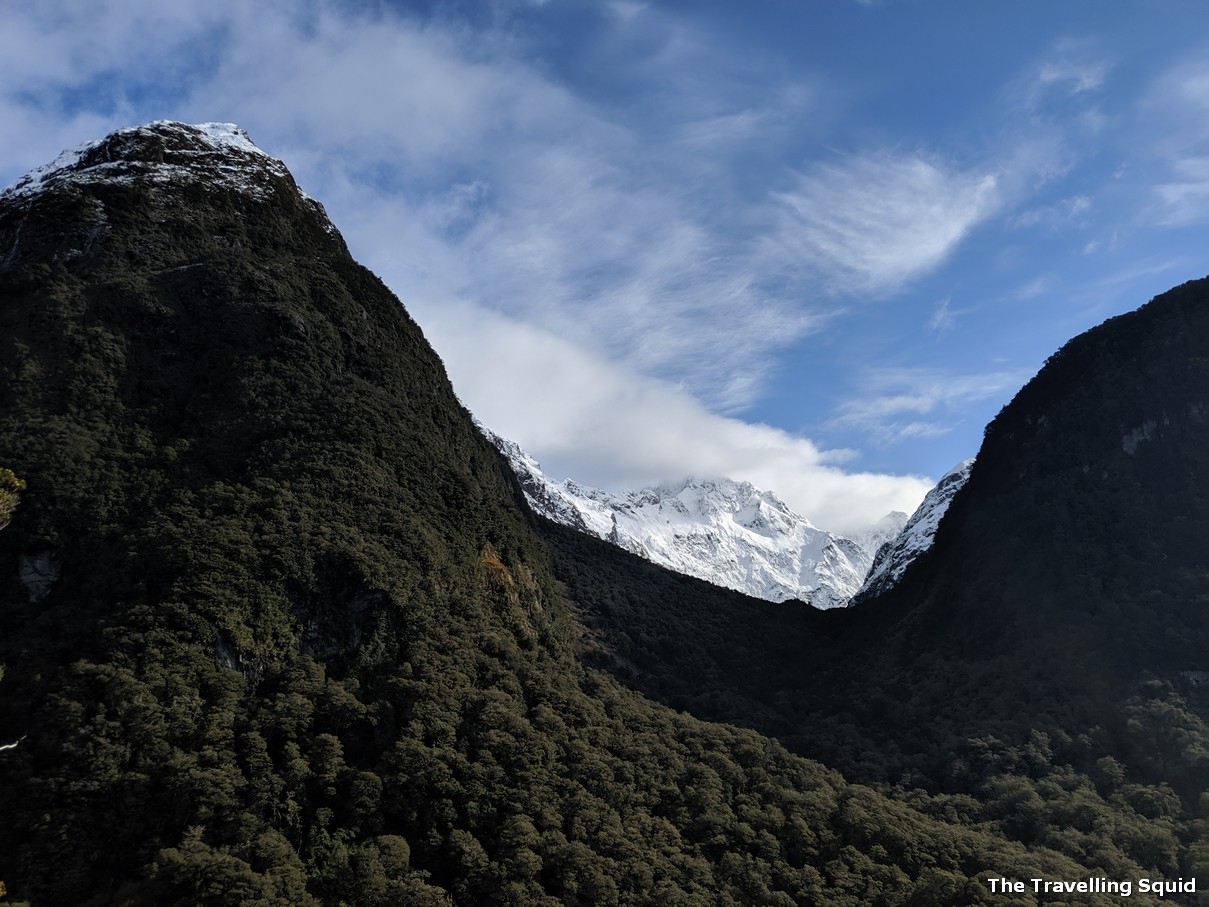
1. The Eglinton Valley
Along the way to Milford Sound from Te Anau, we passed by Eglinton Valley, one of the viewpoints along the drive to Milford Sound
Our drive to Milford Sound continued the next morning and we passed by Eglinton Valley, one of the scenic viewpoints marked out in a tourist map. There were clear brown road signs indicating the direction too. According to the official site of Milford Sound, the valley was carved out by glaciers thousands of years ago. Today, the surrounding mountains are covered in native beech trees while the valley floor is covered in golden tussock grass. The grand backdrop of the mountains behind attracted plenty of Instagrammers, despite the fact that it was drizzling.
A field to remember. Could be better, only that it was drizzling.
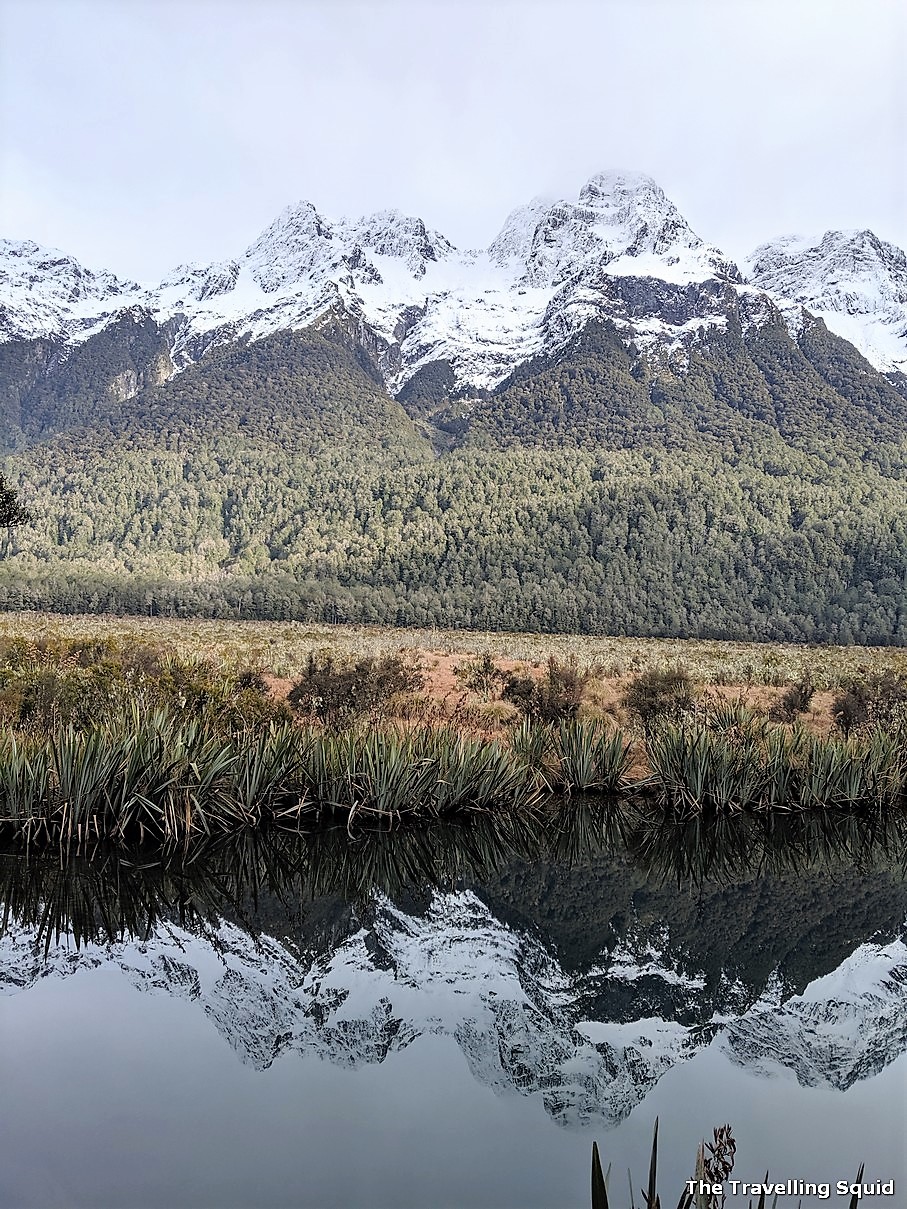
2. Mirror Lake
The sky cleared up while we were on the way to the Mirror Lake. (To be it honest, it was nothing much, just a rather still lake). That said, the still lake made for taking good photos of the snow-capped mountains and their reflection. There were plenty of tourists so we quickly did a stop and carried on, so as to get ahead of the tour buses. Overtaking was tough on a single lane road.
The Mirror Lake, along the way to Milford Sound.
There was another recommended stopover point Knobs Flat, but I don’t recall the scenery being exceptional, except that it had a clean washroom – which made for a worthwhile stop.
3. Pop’s View Lookout
The view from Pop’s Lookout, near Milford Sound. One of the viewpoints along the drive to Milford Sound.
The last stop we made before heading to Milford Sound was Pop’s View Lookout, name after Robert Alister, probably one of the area’s residents who died in an avalanche. The view here is gorgeous. To the left, you can see Mount Cristina at 2602m, while on the right you can see the little Mount Lyttle. It’s a breath-taking view of what New Zealand has to offer.
A snow-capped mountain from afar. That’s probably Mount Cristina on the left and Mount Lyttle on the right.
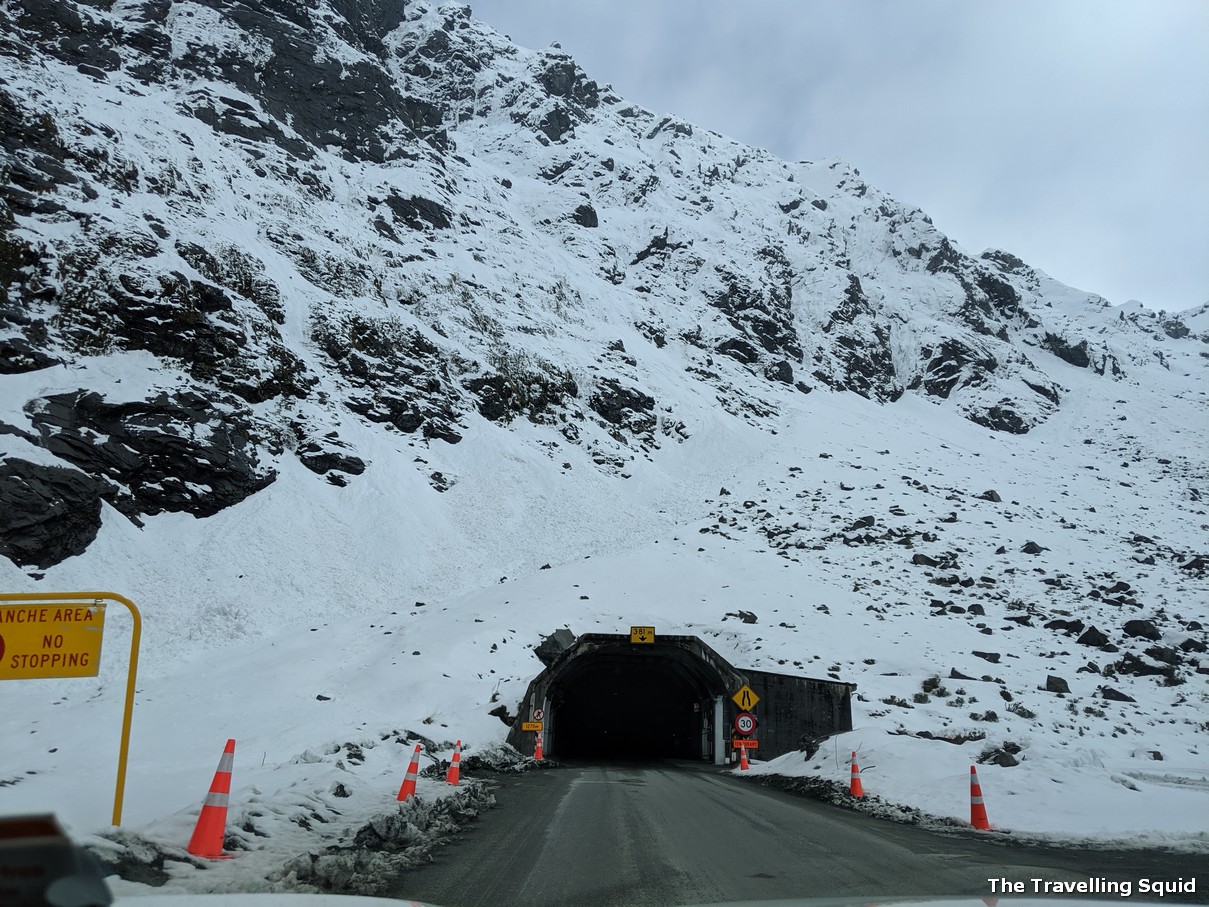
Homer Tunnel
Homer Tunnel, Milford Sound
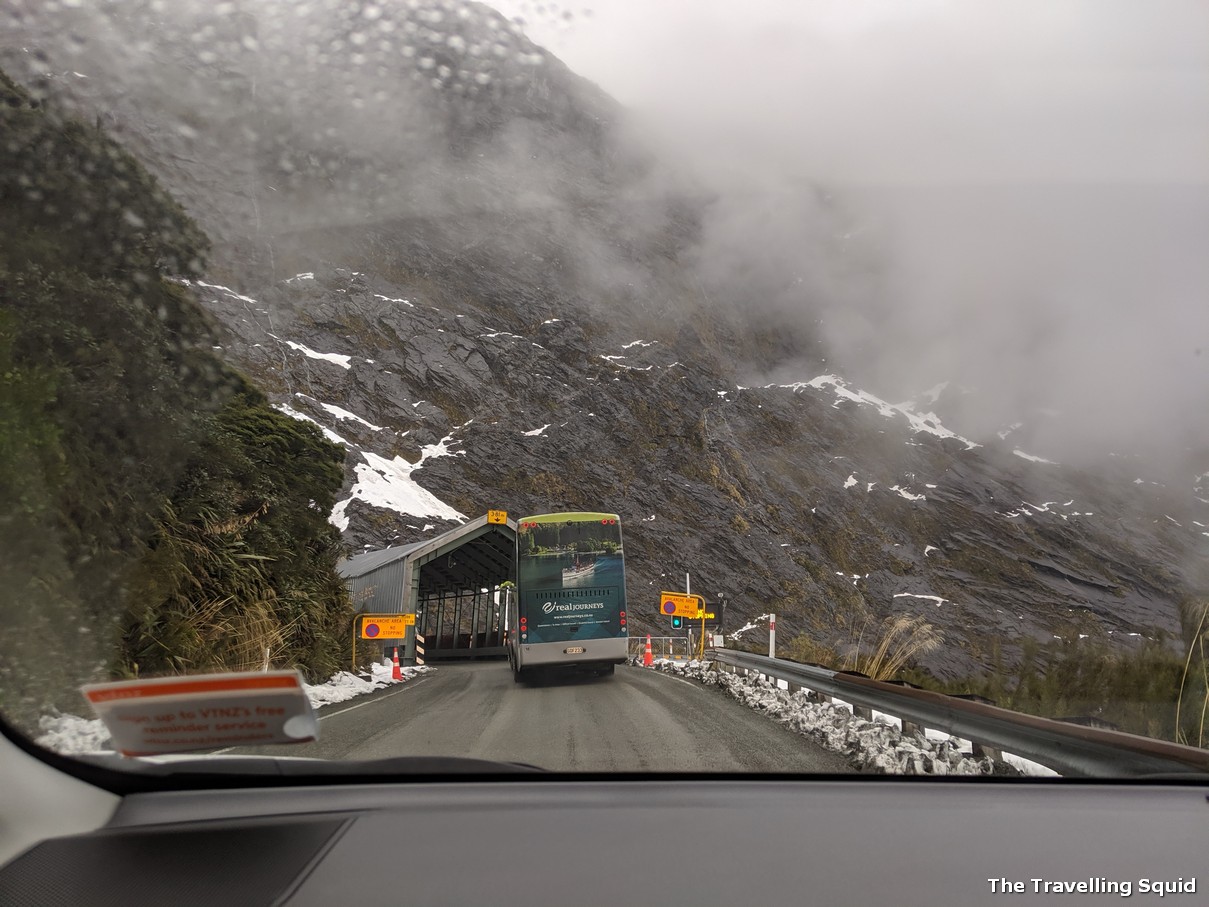
I wouldn’t consider the tunnel a viewpoint as you have to pass through it during your drive to Milford Sound. Homer Tunnel is significant as it is the longest gravel-surfaced tunnel in the world (and makes for a pretty tricky drive). The tunnel is supposed to be large enough to accommodate two lanes but I think only one lane was open during our trip there. We had to wait at the traffic light before being given the go-ahead to enter. Do drive carefully as the road was quite wet and narrow. The tour buses entering the tunnel moved super quickly for their size – it was quite a feat.
Tour bus entering Homer Tunnel near Milford Sound, going at quite a tremendous speed for its size.
The Travelling Squid’s Take
In general, our drive from Te Anau to Milford Sound was quite pleasant. There were a number of tour buses in front of us and we at times struggled to overtake, as the journey was along a one-lane road. You can definitely get there in two hours, – that’s what we did despite making quick stops at these scenic viewpoints along the drive to Milford Sound. Do give them a shot – you will not regret it.
New Zealand’s South Island is home to a few well-known wineries, especially in the regions of Marlborough and in Central Otago. Our road trip started when we flew in to the South Island from Rotorua in the North, to Blenheim, drove to the vineyards in Marlborough, then to Fox Glacier and Franz Josef Glacier, and then checked into to two more vineyards in Central Otago. It was a relaxing and rewarding drive. Here are four wineries to visit in New Zealand South Island.
When is a good time to visit?
The first half of the year is a good time to do so as the harvesting of wine grapes happens during February to April. In cooler places like Central Otago in New Zealand which is further South, the harvesting tends to happen later in June. If you’re keen to experience the harvesting process, those months are a great time to visit. That said, most wineries are open the whole year round and visiting during the winter months is when the wineries are the least crowded, and you get a chance to speak to the vineyard staff to learn more about the winery their production process.
Four wineries to visit in New Zealand South Island
Marlborough
1. Cloudy Bay
The vines were pruned real properly.
Cloudy Bay is known for its Sauvignon Blanc and Pinot Noir. At the winery in Marlborough, we had the chance to try other wines which were more complex. These include the red Te Wahi and a sparkling wine wine which was refreshing and easy to drink. Both made for great gifts. We visited Cloudy Bay during winter and there was hardly anyone around. It could be the reason why the staff was very generous during the wine tasting. That said, it would have been great to see the vines in action during summer.
Hans Herzog is very different from Cloudy Bay, though both are located in Marlborough. Unlike Cloudy Bay which does commercial production across multiple vineyards, Hans Herzog is a family-owned winery specialising in a variety of grape varietals, all grown onsite at its vineyard in Marlborough. Do make an appointment a couple of days in advance, especially if you’re looking to have a meal at the winery. A must-visit especially if you’re looking to try out organic wine.
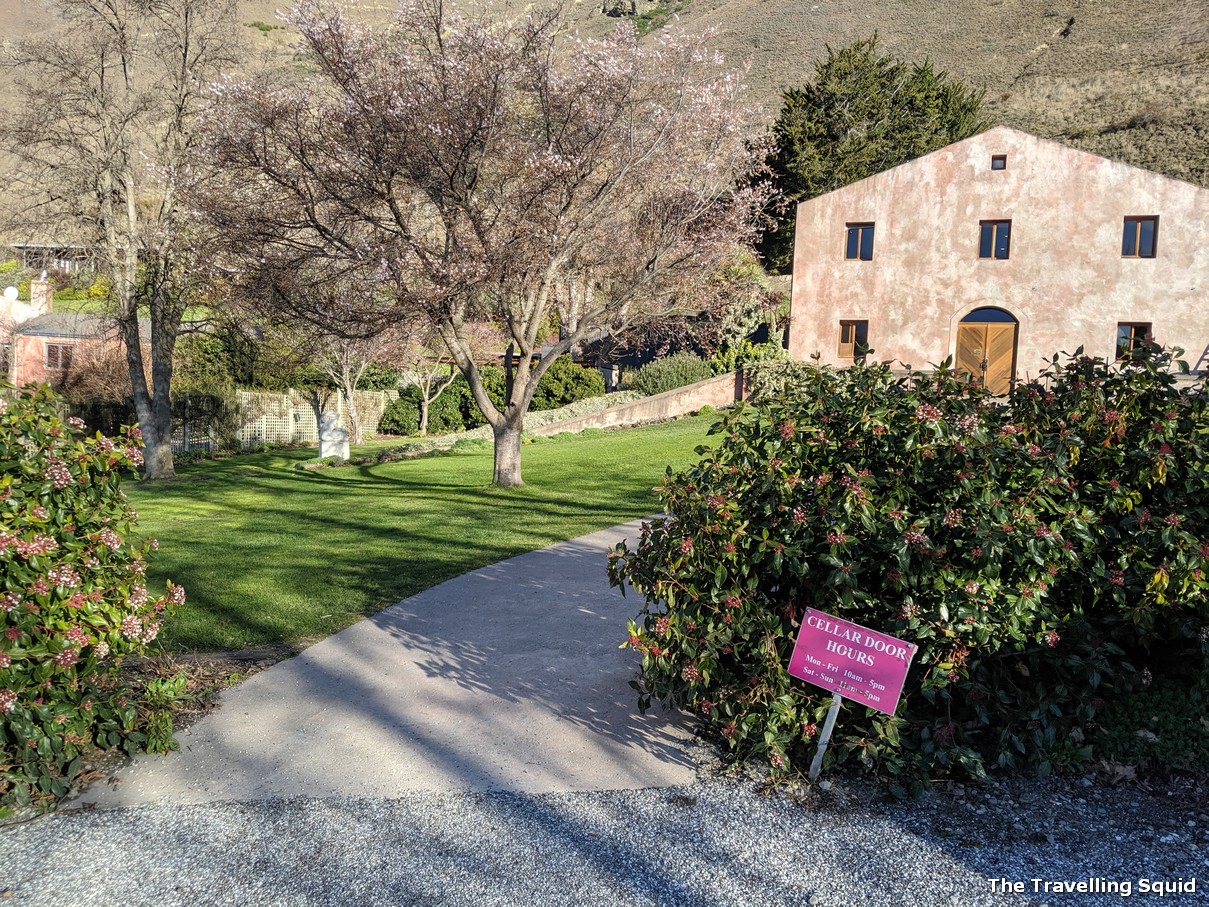
The cellar door of Felton Road in Bannockburn, in winter.
Felton Road is a must-visit in my view, because the wines are done well and are priced very reasonably. If you’re thinking of doing a wine tour and tasting, you should definitely call early to make an appointment, as they limit the number of people to 8 each sitting. While we visited during winter, the tour was almost full and we were the last ones in. I found the tour extremely helpful in understanding the wine production process.
Chard Farm is a short half an hour car ride from Queenstown, and a 35 minute car-ride away from Felton Road. It has a wide selection of affordable wines, though I must say in terms of elegance, it falls behind the first three wineries. It was however extremely popular with groups – big or small. The tasting portions are generous too. It’s an easy-drinking wine to have with a snack, or simply to have while watching Netflix. Chard Farm also provide shipping worldwide, a good option if you’re planning to serve wine at an event for many people.
Chard Farm’s estate
The Travelling Squid’s Take
Hope you found this post on the wineries to visit in New Zealand South Island useful. If you’re new to wine, New Zealand wineries are a great place to start as their wines typically have a light body, are fruit forward and refreshing.
If you have other recommendations on wineries to visit in New Zealand, do drop a comment in the box below!
If it’s your first time traveling overseas, you may be worried that you’ll forget something crucial. Of course, there are specific documents you will need and different types of accommodation to consider, and you won’t have access to the same provisions when you’re abroad, which could cause an array of problems. To avoid potential setbacks, TravelHealthConnect.com can help you learn about medicines and supplies you should take for healthier travel. Here are five tips to keep you out of a bind while you’re traveling internationally.
1. Apply for a Passport Early
International flights require you have a passport before you even board a plane, let alone book the flight. In some countries, hotels may request a scan of your passport or may hold it as collateral to ensure you pay for your room. To avoid the timeline pressure of boarding a flight, make sure you apply for a passport well in advance. Once you receive it, make paper and digital copies to give to a responsible contact at home in case you lose it while overseas.
2. Check if You Need a Visa
A visa is an additional document you may need to obtain from the country you’re visiting and which specifies the duration of time you plan to stay or work inside the country. Although you can often get a travel visa after arriving at some countries in Europe, Asia or Latin America, you should always try to secure one beforehand. It’s no fun to show up to a flight on time with all your other provisions accounted for, only to be denied entry.
3. Have a Way to Access Money Overseas
These days, you don’t need to carry cash or traveler’s checks to make purchases in other countries. Thanks to internet access, travelers can manage and access their money no matter where they are in the world. Before you leave on your vacation, let your bank know you’ll be traveling internationally and ask them about ways to avoid foreign transaction fees at ATMs. Ideally, you should always carry at least $100 in cash, as well as a travel credit card and your debit card. Keep a card locked up in a hotel room in case you lose your wallet.
4. Get an International Phone Plan
Your mobile data plan likely doesn’t offer service in other countries, and you may end up with roaming fees if you try to use your smartphone. Thankfully, some carriers provide eSIM data plans, which can receive a signal in almost any area of the world, even in spots where signal quality would typically be poor. In many newer phones with dual-SIM technology, you can use your main data line and your eSIM travel plan at the same time. Ask your mobile provider about eSIM data plans and how you can get service in the country you’re visiting.
5. Bring Clothing Appropriate for Any Climate
Many destinations have temperatures that fluctuate dramatically throughout the day or they have a colder climate (Ireland or Scotland.) Tourists who aren’t prepared with clothing for all weather conditions won’t be able to take part in activities outside, at least not comfortably. Columbia offers excellent deals on parkas, which will keep you warm in any environment and save you money before you travel.
Enjoy Your First International Trip by Preparing Beforehand
Do you have everything you need to experience a successful and enjoyable overseas trip? You can feel prepared for your vacation with any of these travel tips, but don’t forget to keep yourself comfortable. Choose apparel for your trip that doesn’t hold you back from any travel experience. Equally important is making sure you’re equipped with comfortable shoes and adequate shoe inserts so you can make the most of your experience.
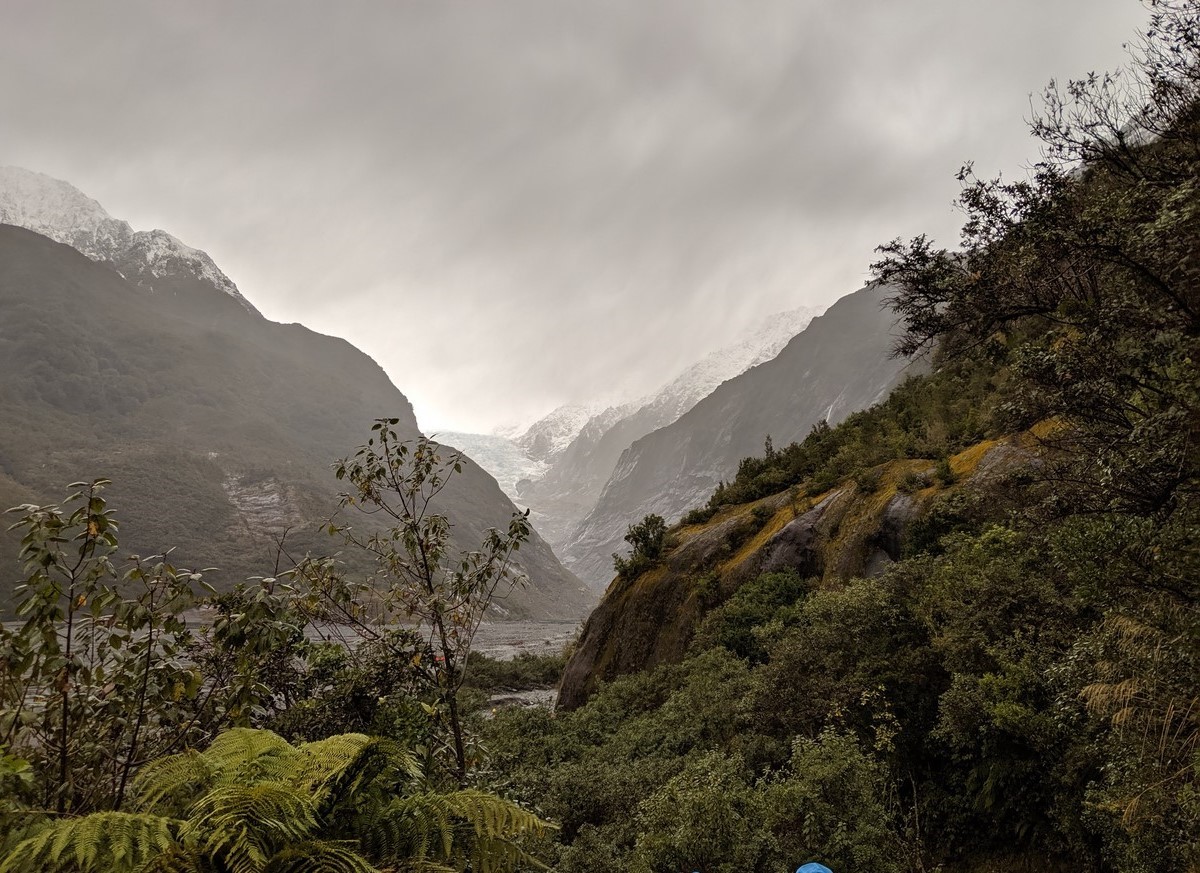
Can the hike to Franz Josef Glacier be done on your own?
If you’re planning to hike to Franz Josef Glacier in New Zealand’s South Island, I think it’s perfectly doable if the weather is fine. That said, if you’re planning to do a hike during a downpour as you’re only at Franz Josef for a day, it’s much better to go on a walking tour. Can the hike to Franz Josef Glacier be done on your own? I would say it’s possible, but you get to learn more about the glaciers, plants and sights around if you were to go on a tour.
Getting there
After visiting the vineyards in Marlborough, we drove into a little small town where which was a base to visit Franz Josef Glacier. It was raining that morning and we hoped that the rain would stop, just in time for our hike which was scheduled later that afternoon. We had booked a Glacier Valley Walk tour with Franz Josef Glacier Guides. It cost us NZD82+ for one adult. At about 2pm, it was pouring but we were told that the tour was still on. I was slightly reluctant as I was wearing a down jacket and did not want it to get wet. We were then told that gear would be provided.
Gear for the walk
We later found out that all gear for the walk was provided, including a waterproof jacket, pants, socks and shoes. The gear was in a very good condition – there was surprising no musty smell despite the fact that most of the shared gear would have gotten wet at some point due to the rainy conditions.
Beware of inclement weather
We visited Franz Josef Glacier in Aug 2019, and were told by our guide that in Mar 2019, the Waiho River overflowed and the bridge linking the park had washed away. According to the NZ Transport Agency, there was massive rainfall and the currents affected the rock which held the bridge in place. The bridge has since been repaired. With this news in mind, it is not advisable to go on a hike on your own in the event of inclement weather.
Start off point
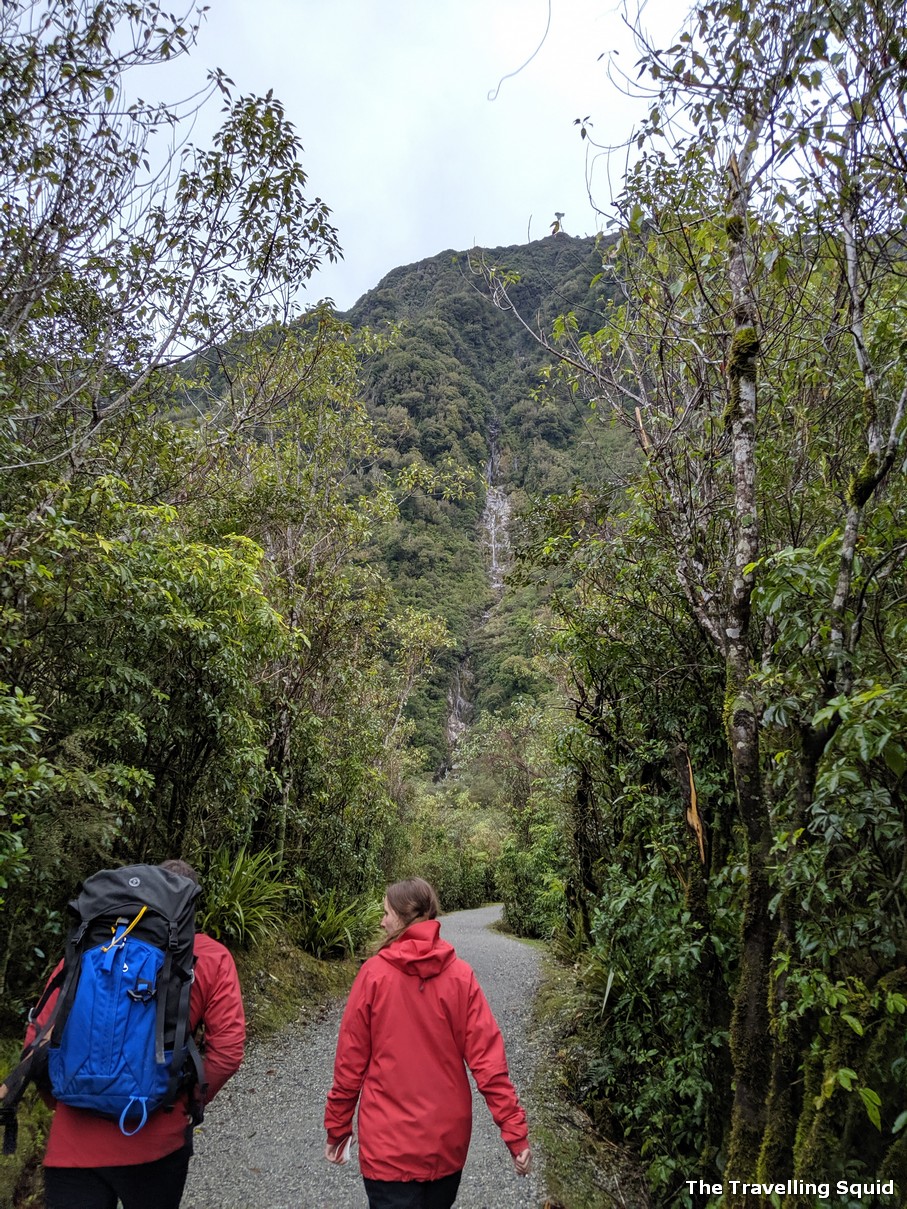
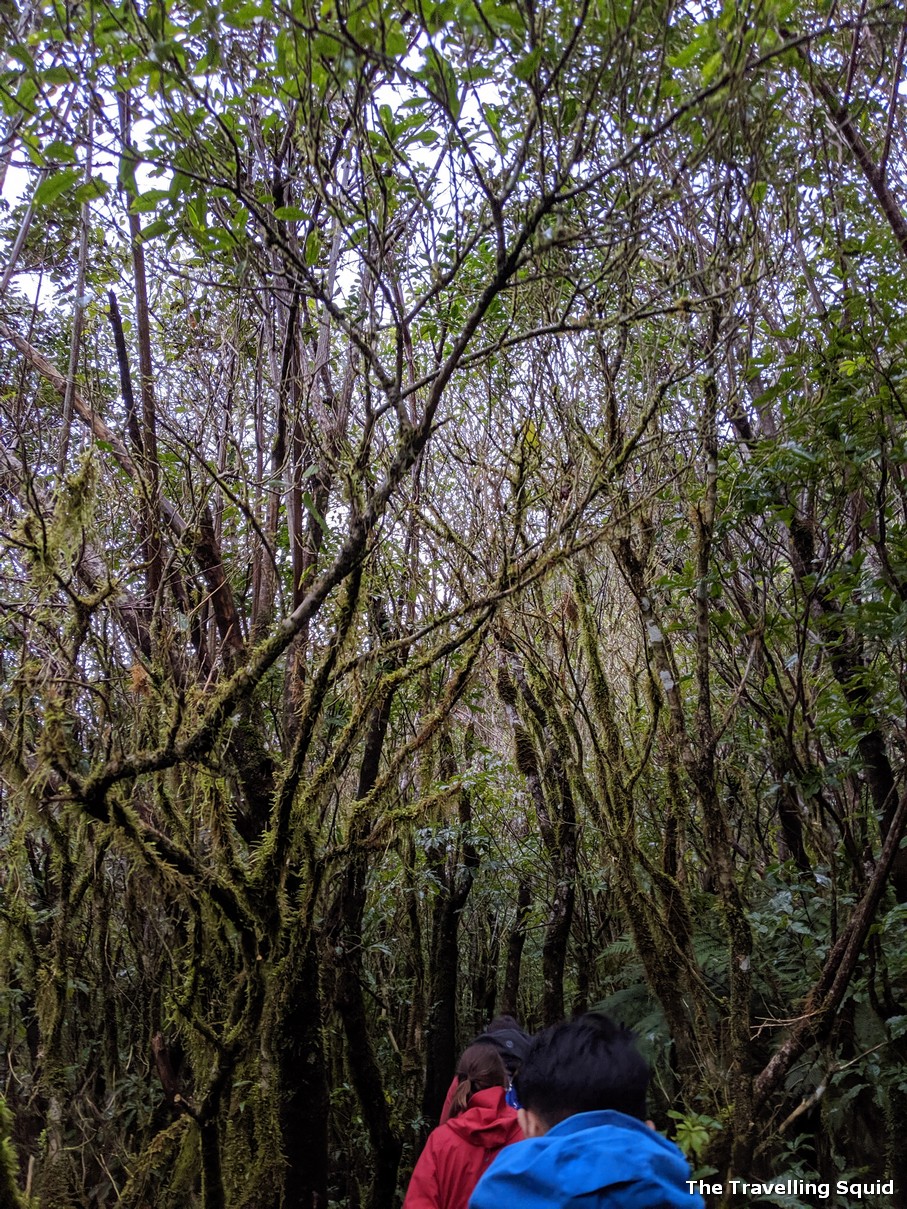
The van took us from the Franz Josef Glacier’s office to the carpark of the Franz Josef Glacier walk start point. At the start, we came across plenty of interesting trees. Our guide would pause to talk about them for a short while before moving on.
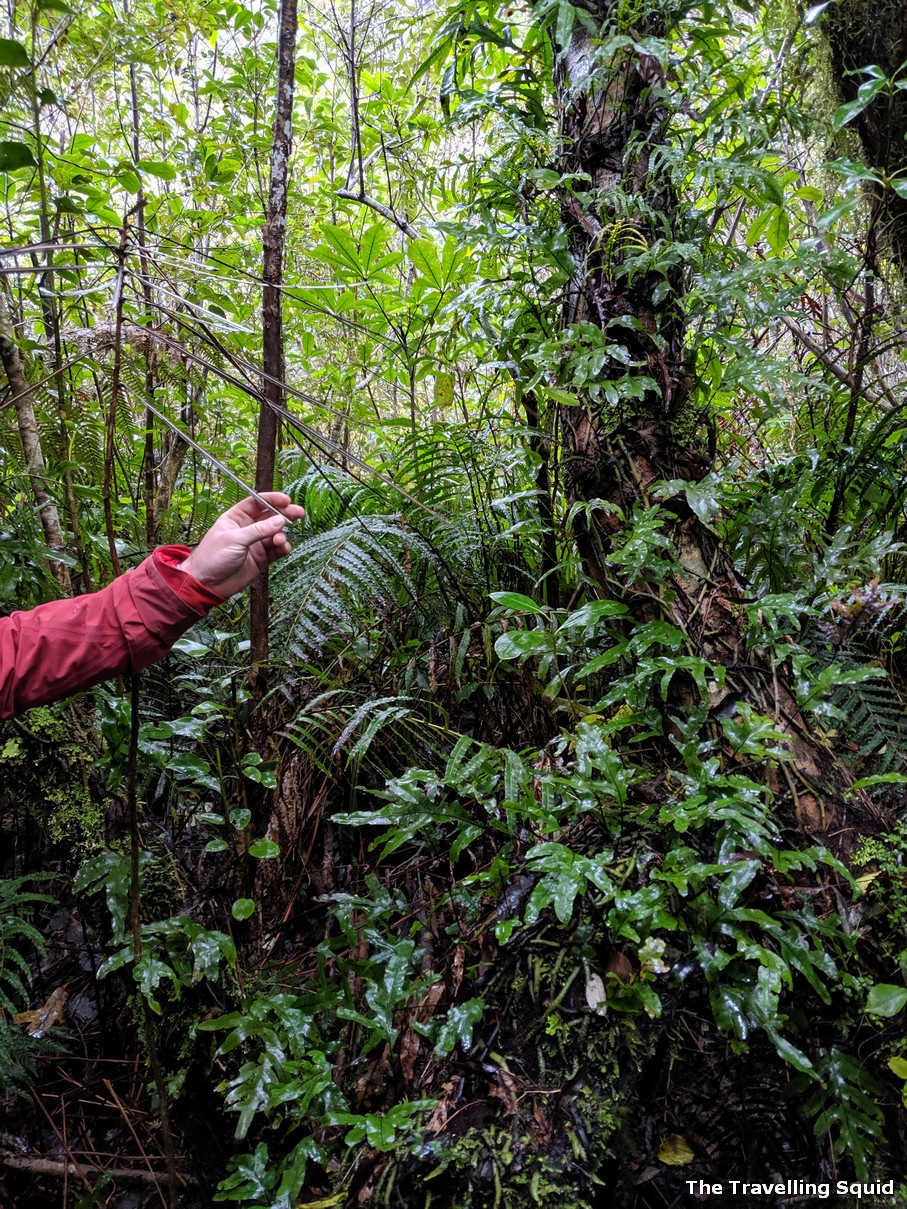
The start of the hike. The terrain is easy for an average person.Passing by some interesting looking plants along the way.Some ferns we spotted along the way.
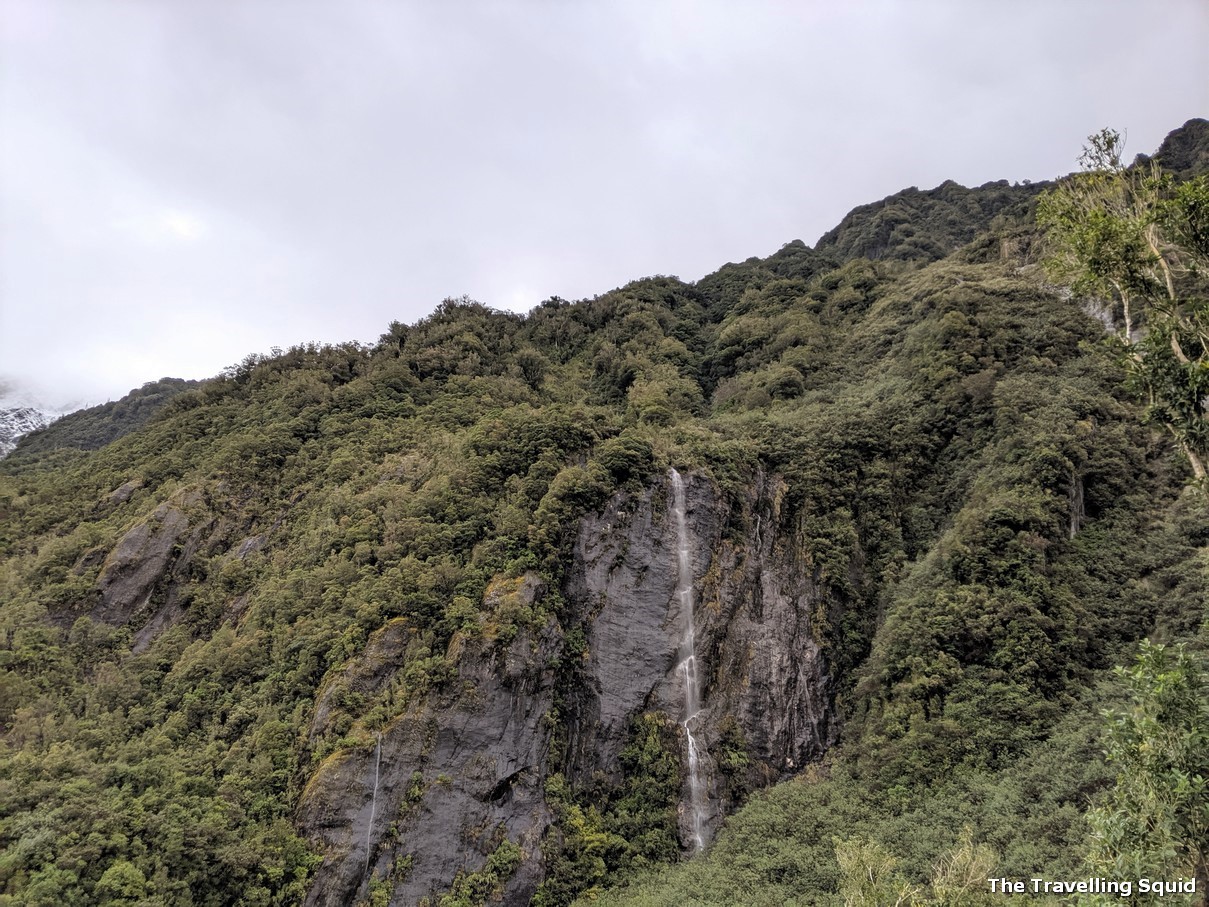
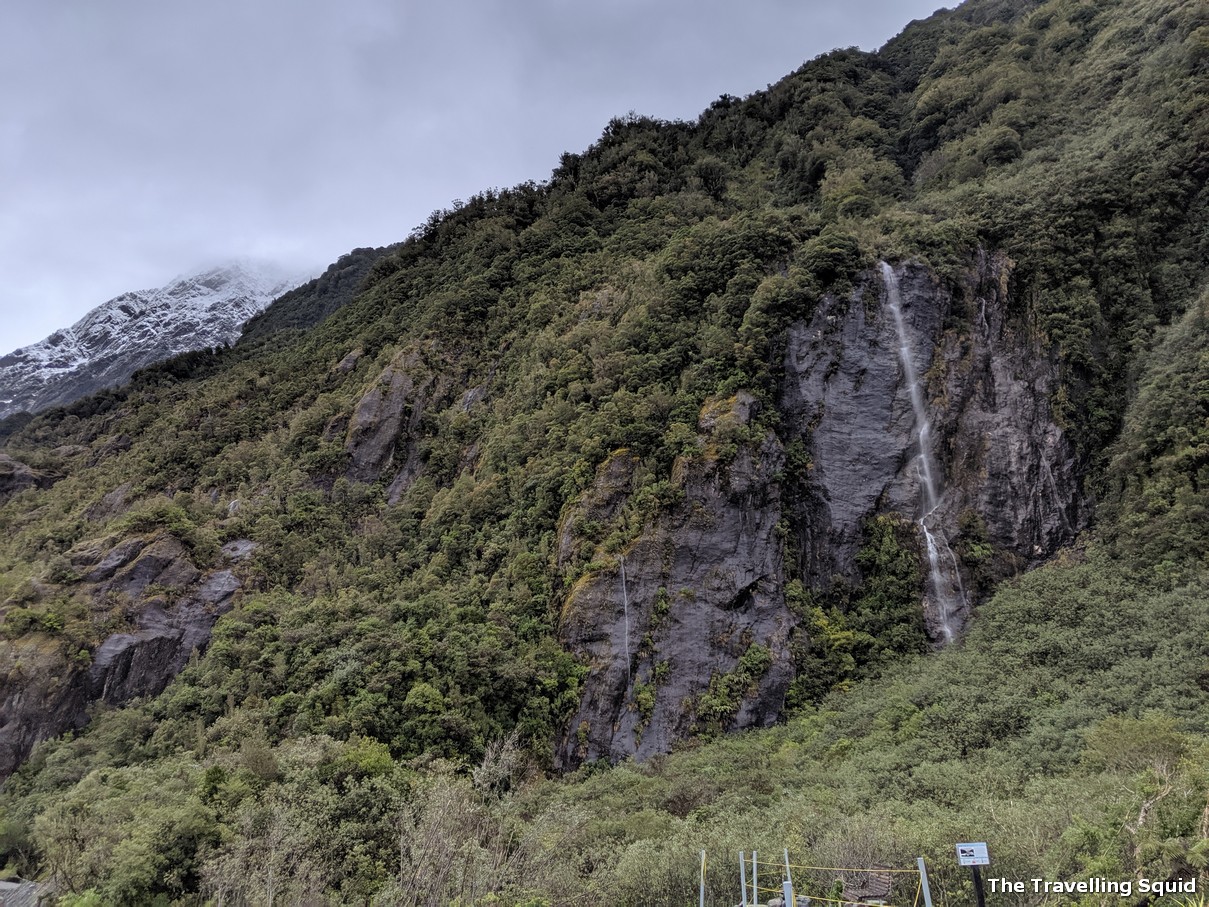
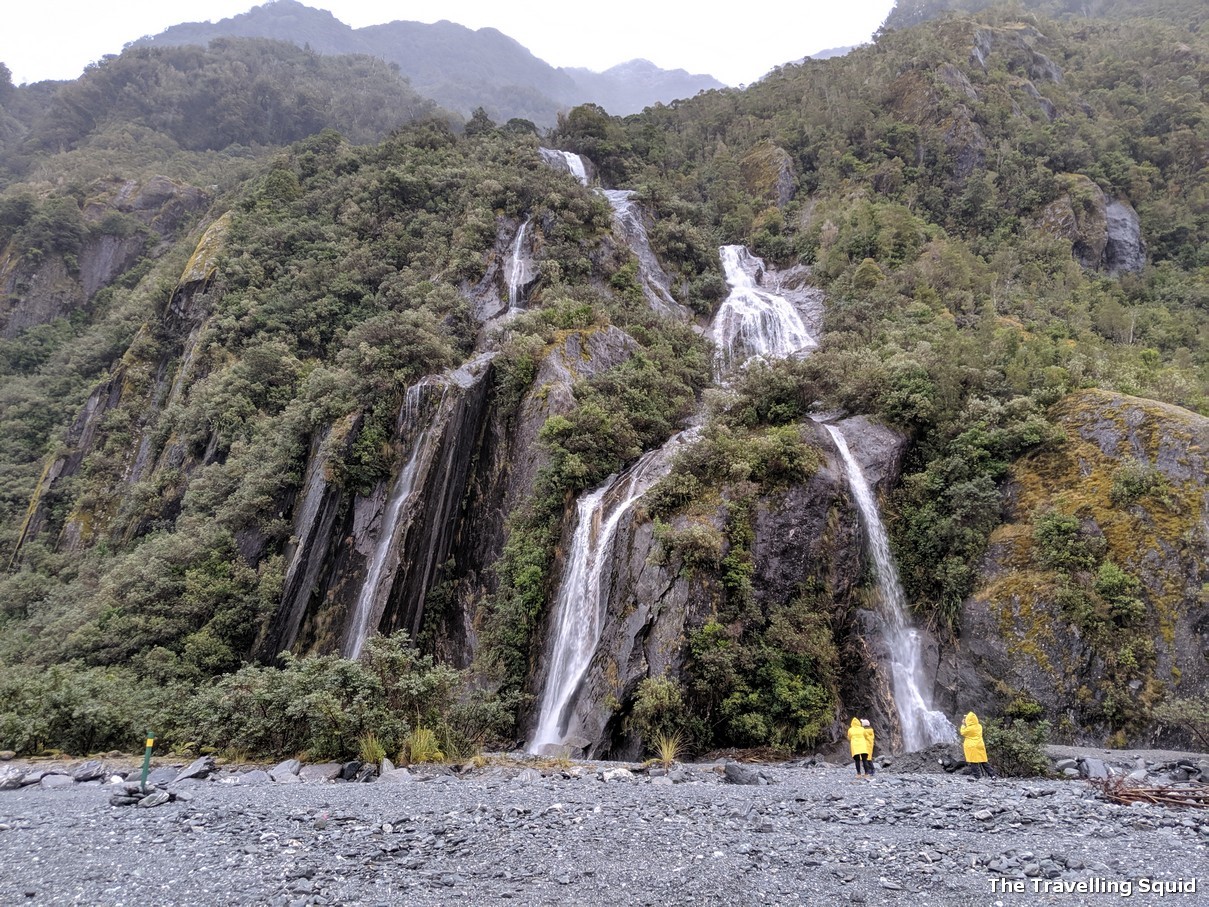
Our guide shared that the crevices you see in the rock are caused by movement in the Earth’s plates. This caused the indentations in the rock, and subsequently a mini-waterfall as snow from the mountains melt.
Shifts in the earth plates lead to the formation of these crevices, which end up being min-waterfalls.We came across plenty of these crevices during the hike.
Why are glaciers blue? This was a popular question and our guide said it was due to snow falling on the glacier. When it gets compressed, it becomes part of the glacier and air bubbles are squeezed out of the ice. The ice crystals enlarge and the ice appears blue as it absorbs other colours more easily than blue.
He told us that he had been to the Tasman Glacier, New Zealand’s longest glacier and taken a piece of glacier ice back. The ice made great drinks and it retained its solid form for about 4 days before melting.
It is common for glaciers to grow and retreat but unfortunately due to climate change and global warming, glaciers all over the word, including the Franz Josef Glacier and Fox Glacier which we visited next had entered a very rapid pace of retreat. According to Wikipedia, Franz Josef Glacier should have retreated by 5km and lose 38% of its mass by 2100.
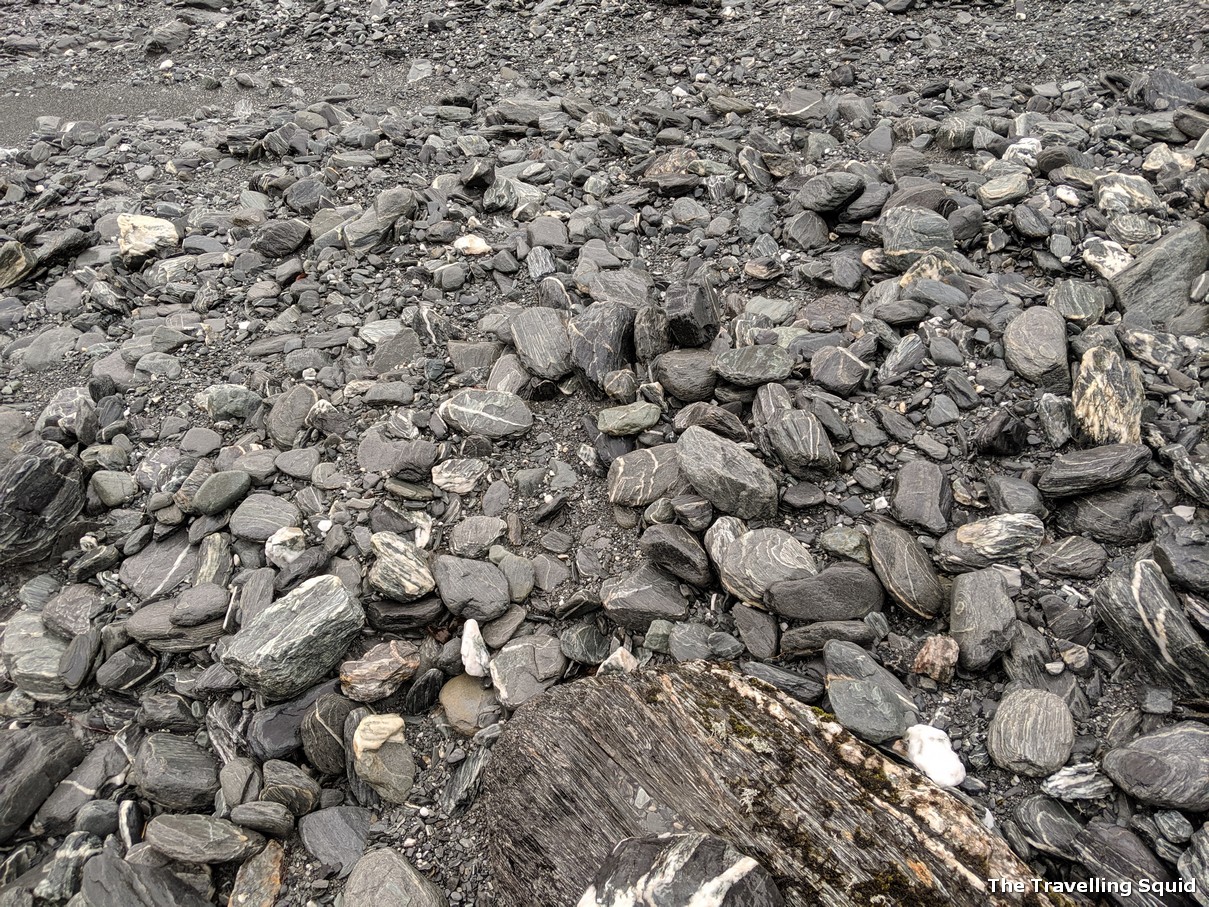
Can the hike to Franz Josef Glacier be done on your own?Stones on the river bed. This used to be where the glacier would lie, but it has since retreated.An interesting waterfall. Flowing into what used to be part of the glacier and river.Walking along the riverbed.At the last viewpoint of Franz Josef Glacier, we had warm cocoa, a nice touch given the drizzle before us.One last crevice to share.The colour of the moss here suggest that this was were the glacier was before, before retreating.The scenery was nice – it would have been better if not for the rain.The view of the glacier. It would have been better without the rain.Looking back from where we came from.
The Travelling Squid’s Take
The Glacier Valley Walk by Franz Josef Guides was informative and gave us the confidence to do our own walk to Fox Glacier the next day. If it’s your first time attempting such walks, I think it would be useful to go with a guide. But once you get a hang of it and understand the terrain you’re dealing with, you’re set. Just remember to take extra precaution during inclement weather.
Our guide was also super helpful with sharing recommendations on the good eats in Queenstown, as we were heading there next. It was nice to hear a local’s perspective about working in New Zealand too – the cost of living in Queenstown is apparently super high. Last but not least, if you’re keen to do this trek, you can make a reservation online at the Franz Josef Glacier Guides website.